This project leverages Node.js for its backend, utilizing its non-blocking, event-driven architecture to ensure our AI Voice Note application is fast and scalable. We’re integrating GridDB for data storage, chosen for its high performance and scalability when dealing with large sets of structured data, making it ideal for handling the complex and voluminous data generated by voice notes. OpenAI’s Speech to text APIs are at the core of our application, enabling advanced natural language processing capabilities that allow for transcription, analysis, and categorization of voice notes. By combining these technologies, we aim to create a robust, efficient tool that simplifies note-taking, turning spoken language into organized, easily retrievable information.
Source Code
Here is the source code if you want to follow along:
$ git clone https://github.com/griddbnet/Blogs.git --branch ai-voice
How it Works?
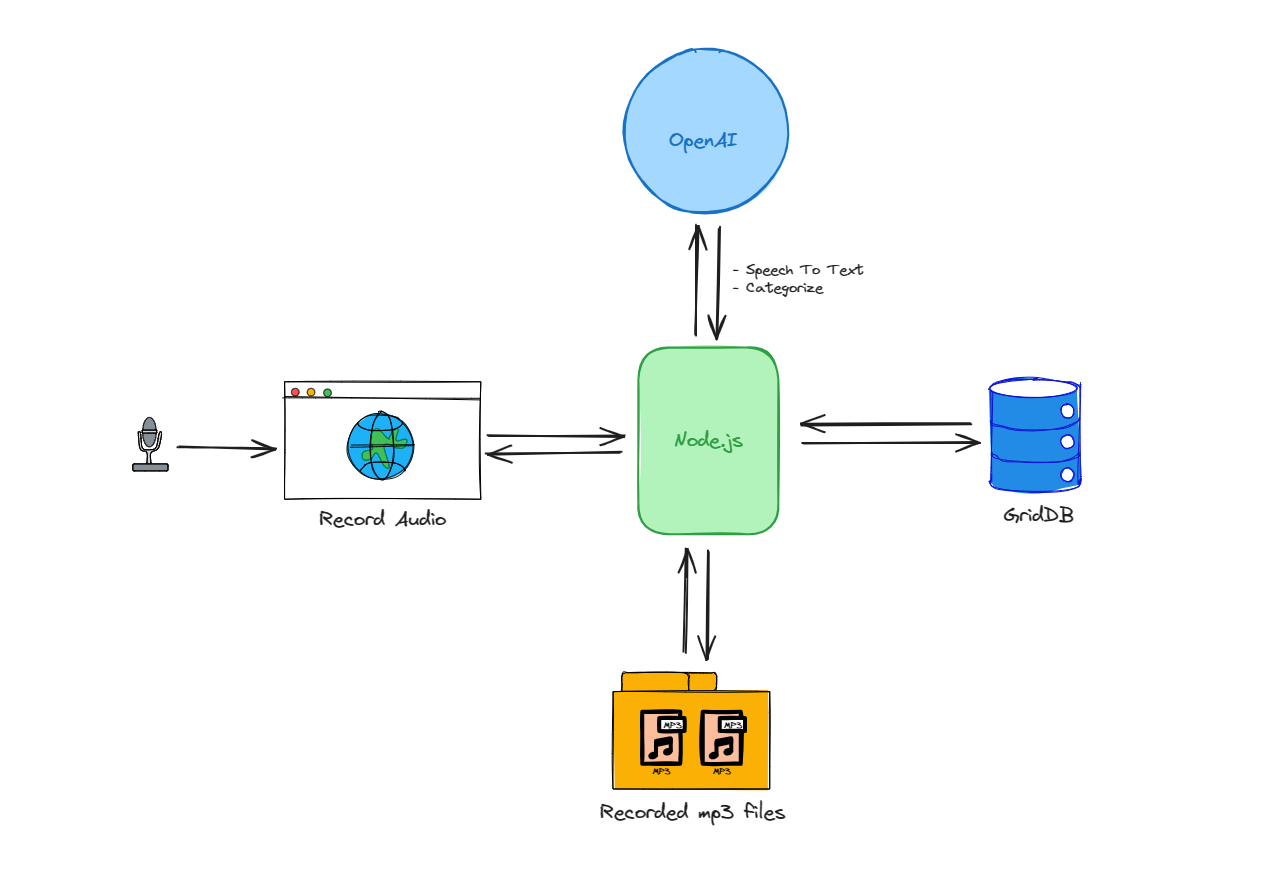
The architecture of the AI Voice Note application can be simplified into a few steps:
-
Users record audio through a web interface, which then sends the audio data to a Node.js server.
-
Node.js processes this data and saves the recordings as MP3 files in persistent storage.
-
Simultaneously, Node.js interacts with OpenAI’s API to transcribe the audio to text and categorize the content.
-
The transcribed and categorized data is then stored in GridDB, a scalable NoSQL database.
The process flow is a bidirectional interaction between Node.js and both the database and the AI service, this makes Node.js act as the central hub for data management and processing within the application.
Setup & Installation
Clone the project code from this GitHub repository
git clone git@github.com:junwatu/ai-voice-note.gitChange directory to app directory:
cd ai-voice-note
cd app
Install dependencies using the npm command:
npm installCreate a .env file or copy from .env.example and set these environment variable keys:
| Environment Variable Key | Description | Value |
|---|---|---|
OPENAI_API_KEY |
Key for authenticating API requests to OpenAI. | (Your actual OpenAI API key) |
VITE_API_URL |
The base URL of the Vite application’s backend API. | http://localhost:3000 |
Feel free to change the default VITE_API_URL. However, if you change it, you should build the client application with this command:
npm run buildThen to run the project, you should use this command:
npm run startBy default the port running on 3000. It’s recommended to use the Google Chrome browser to open the AI Voice Note app:
http://localhost:3000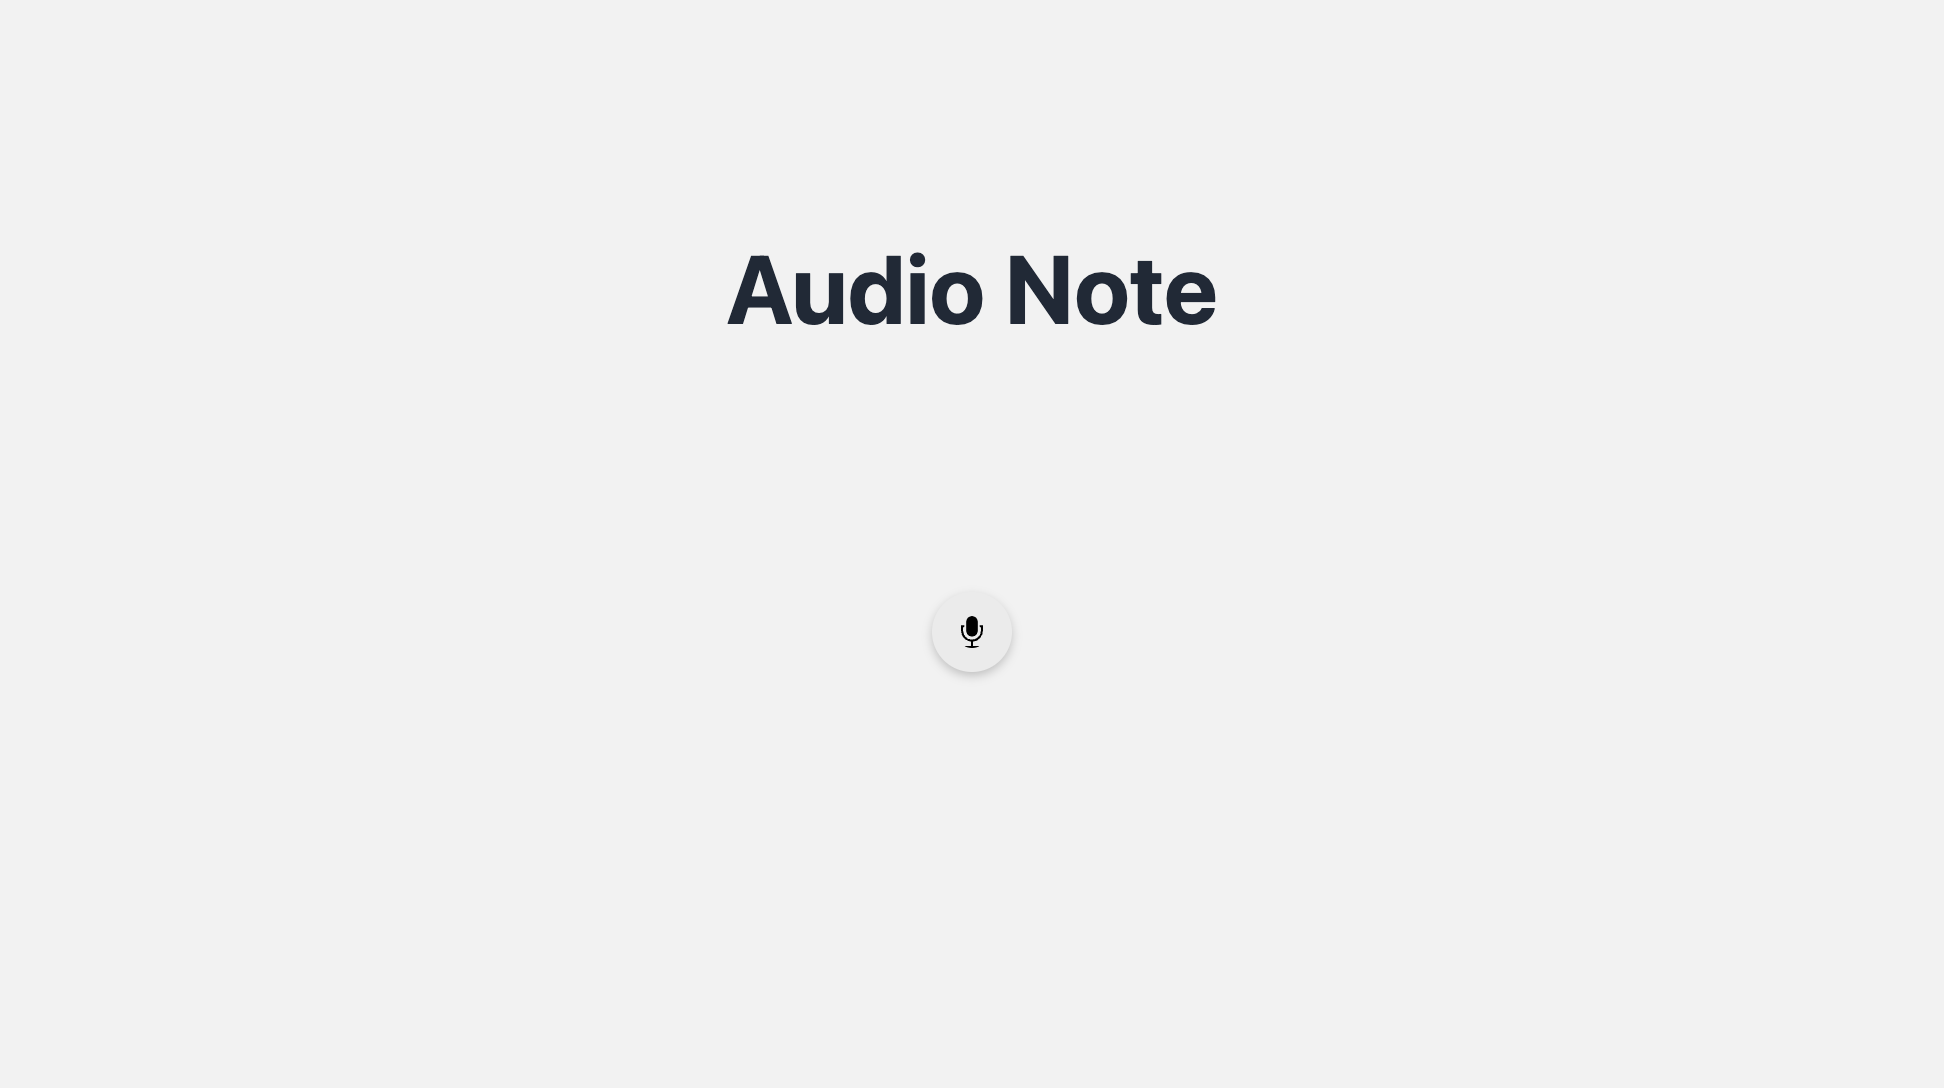
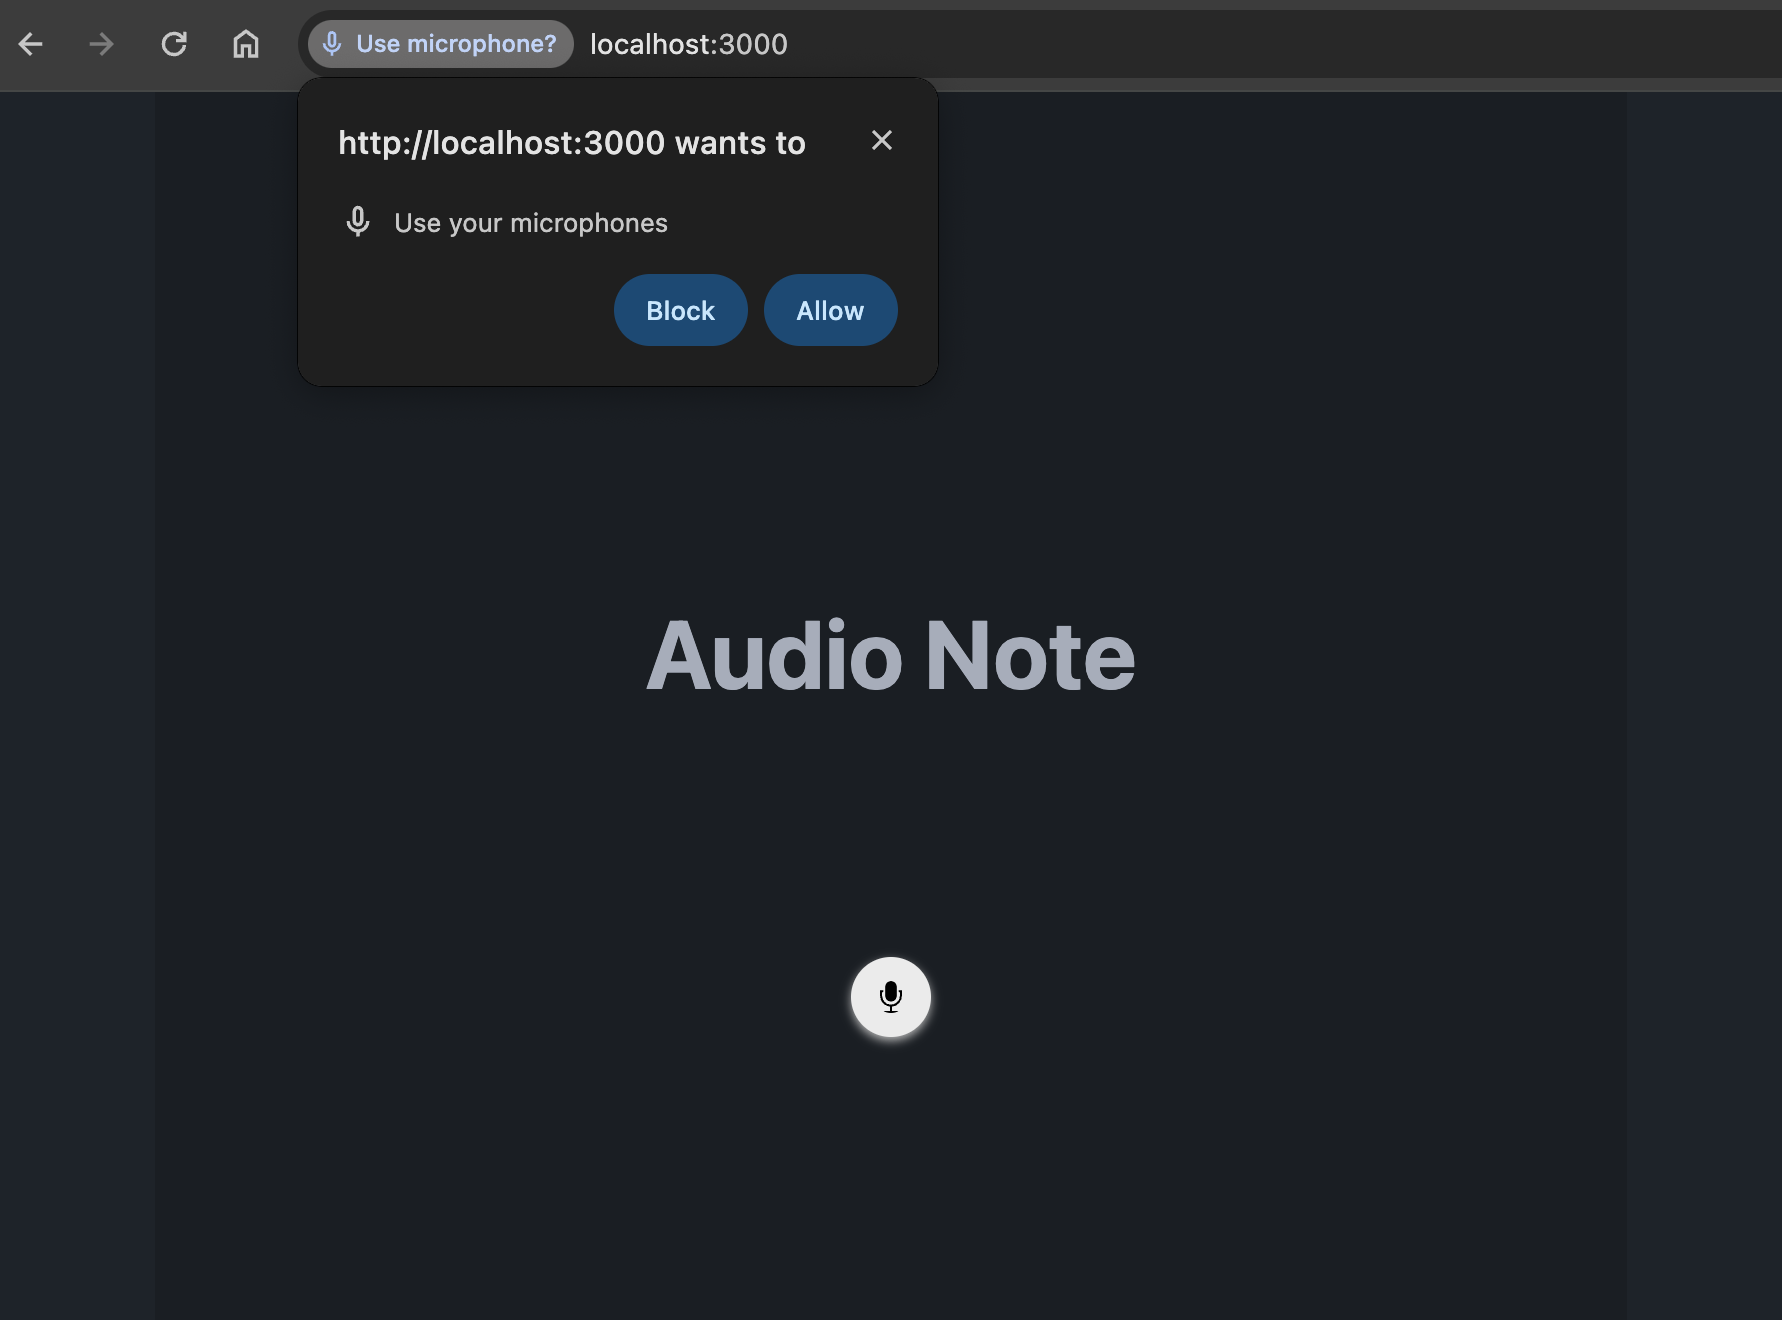
This web application needs microphone access permission. To record audio from the default microphone, you should allow it.
Audio Recording
The React Audio Recorder is an audio recording helper for React. It offers a component and a hook to aid in audio recording, which can be done on the client side via Web APIs such as Media Recorder.
import { AudioRecorder, useAudioRecorder } from 'react-audio-voice-recorder';

export default function Home() {

 const apiUrl = import.meta.env.VITE_API_URL;

 const recorderControls = useAudioRecorder({
  noiseSuppression: true,
  echoCancellation: true,
 },
  (err) => console.table(err) // onNotAllowedOrFound
 );
 const addAudioElement = (blob) => {
  const url = URL.createObjectURL(blob);
  const audio = document.createElement('audio');
  audio.src = url;
  audio.controls = true;
  document.body.appendChild(audio);

  const formData = new FormData();
  formData.append("file", blob, "audio.webm");

  fetch(`${apiUrl}/upload`, {
   method: 'POST',
   body: formData,
  })
   .then(response => response.json())
   .then(data => {
    console.log('Success:', data);
   })
   .catch((error) => {
    console.error('Error:', error);
   });
 };

 return (
  <div className="hero min-h-screen bg-base-200">
   <div className="hero-content text-center">
    <div className="max-w-md">
     <h1 className="text-5xl font-bold">Audio Note</h1>
     <div className='flex justify-center items-center w-full my-32'>
      <AudioRecorder
       onRecordingComplete={(blob) => addAudioElement(blob)}
       recorderControls={recorderControls}
       showVisualizer={true}
      />
     </div>
    </div>
   </div>
  </div>
 );
}
The <AudioRecorder> is an out-of-the-box component that takes the onRecordingComplete() method as a prop and calls it when you save the recording. This React component will record audio using Web APIs. On recording complete, the audio blob will be processed and then uploaded to Node.js /upload server endpoint.

Create Node.js Server
Node.js server will save the recordings as .webm files in persistent storage and then will send the audio file to OpenAI for speech-to-text recognition.
The Node.js server sets up an Express server route that handles POST requests at the /upload endpoint. It uses multer middleware to process a single file upload from the request.
app.post('/upload', upload.single('file'), async (req, res) => {
 if (req.file) {
  const filePath = join(__dirname, 'uploads', req.file.filename);

  try {
   const transcription = await openai.audio.transcriptions.create
   ({
    file: fs.createReadStream(filePath),
    model: "whisper-1",
   });

   console.log(transcription.text);

   // eslint-disable-next-line no-unused-vars
   const speechData = {
    filename: filePath,
    text: transcription.text,
    category: "voice note"
   }

   // Process data to GridDB database
   // Save the transcription data to GridDB
   const saveStatus = await saveData(speechData);

   res.json({
    message: 'Successfully uploaded file and saved data',
    transcription: transcription.text,
    saveStatus: saveStatus
   });
  } catch (error) {
   console.error('Error during transcription:', error);
   res.status(500).json({ message: 'Error during transcription', error: error.message });
  }
 } else {
  res.status(400).json({ message: 'No file uploaded' });
 }
});
When a recorded audio file is uploaded, generally these will happen:
- The server generates a path for the file based on the current directory and an
uploadssubdirectory. - It attempts to transcribe the audio file to text using OpenAI’s audio transcription API, using the
whisper-1model. - If successful, it logs the transcription to the console and creates an object with the file path, transcribed text, and a hard-coded category of voice note.
- This data then needs to be saved to a GridDB database.
- The server then sends a JSON response back to the client, indicating success and including the transcription text.
- If an error occurs during transcription, it logs the error and sends back a 500 status with an error message.
- If no audio file is uploaded, it responds with a
400status, indicating a bad request.
Routes
The server.js file provides routes to save and get the audio data. Below is a summarized table of the routes defined in the Node.js server, including their methods, paths, and descriptions:
| Method | Path | Description |
|---|---|---|
| POST | /upload |
Uploads a file, transcribes it and optionally saves the data. |
| POST | /save-data |
Saves provided data (filename, text, category) to the database. |
| GET | /data/:id |
Retrieves data for a specific ID from the database. |
| GET | /all-data |
Retrieves all data entries from the database. |
| GET | /info |
Provides information about the GridDB containers. |
These endpoints collectively enable the functionality for uploading and managing audio transcriptions within a Node.js application using Express, multer for file handling, and GridDB for data storage.
Speech to Text Using OpenAI
OpenAI has capabilities to turn audio into text or speech to text feature. The Audio API provides two speech-to-text endpoints, transcriptions and translations, based on the state-of-the-art open-source large-v2 Whisper model. They can be used to:
- Transcribe audio into whatever language the audio is in.
- Translate and transcribe the audio into English.
File uploads are currently limited to 25 MB and the following input file types are supported: mp3, mp4, mpeg, mpga, m4a, wav, and webm.
In this project, we will use the transcription feature and limit file type to webm. The code to transcribe an audio file:
const transcription = await openai.audio.transcriptions.create({
    file: fs.createReadStream(filePath),
    model: "whisper-1",
});
The transcriptions API takes as input the audio file from the storage and will respond to the transcription of the audio. By default, the response type will be JSON with the raw text included.
Save Data to GridDB
GridDB is an open-source time series database optimized for IoT and Big Data. However, it can also be used for general web applications. To save the transcribed data from OpenAI, we will use GridDB as the database. In the Node.js server, these data will be saved in the database:
const speechData = {
    filename: filePath,
    text: transcription.text,
    category: "voice note"
}

const saveStatus = await saveData(speechData);
Three fields will be saved to the database. One important note is this project will not save the audio file in the database but it will save the audio file reference (file path).
| Key | Description | Example Value |
|---|---|---|
filename |
The path where the uploaded audio file is stored. | /path/to/uploads/audio-12345.webm |
text |
The transcribed text obtained from the audio file. | “Transcribed speech from the audio.” |
category |
A label or category assigned to the audio note. | “voice note” |
The saveData() method will save the audio data into the GridDB database. In the griddbservice.js file you can find the saveData() code:
export async function saveData({ filename, text, category }) {
 const id = generateRandomID();
 const sfilename = String(filename);
 const speechText = String(text);
 const scategory = String(category);

 const packetInfo = [parseInt(id), sfilename, speechText, scategory];
 const saveStatus = await GridDB.insert(packetInfo, collectionDb);
 return saveStatus;
}
The initContainer() function will initialize the GridDB container with the audio or speech data. You can see this function in the libs/griddb.cjs file.
function initContainer() {
 const conInfo = new griddb.ContainerInfo({
  name: containerName,
  columnInfoList: [
   ['id', griddb.Type.INTEGER],
   ['filename', griddb.Type.STRING],
   ['speechText', griddb.Type.STRING],
   ['category', griddb.Type.STRING]
  ],
  type: griddb.ContainerType.COLLECTION,
  rowKey: true,
 });

 return conInfo;
}
Further Enhancements
This project is currently a prototype and has several opportunities for enhancement to improve functionality and user experience. Here are potential enhancements you can consider:
-
Device Selection Capability:
- Multiple Device Support: Implement a feature that allows users to select from available microphones and input devices. This will enable users to choose their preferred audio source, especially useful in environments with multiple audio input options.
-
Audio Environment Optimization:
- Noise Suppression: Integrate advanced noise suppression algorithms that can dynamically reduce or eliminate background noise during recording. This enhancement will significantly improve audio clarity and quality, especially in non-ideal, noisy environments.
-
User Interface Improvements:
- Device Selection UI: Develop a user-friendly interface that lists all available microphones and lets the user select their preferred input device easily. This interface can include device specifications, current status, and a test feature to check audio quality.
- Visual Feedback for Sound Level: Add visual feedback mechanisms such as a sound level meter or a waveform view to help users understand the audio input levels in real-time. This feature will aid users in adjusting their mic placement or settings before starting the recording.
These enhancements aim to make the web application more robust, versatile, and user-friendly, catering to a wider range of recording situations and user preferences. Integrating these features would significantly increase the utility and appeal of the application.
If you have any questions about the blog, please create a Stack Overflow post here https://stackoverflow.com/questions/ask?tags=griddb .
Make sure that you use the “griddb” tag so our engineers can quickly reply to your questions.