This article will serve as a continuation of our previous blog featuring the new GridDB Cloud service; you can read about the basics of the Cloud service in our first blog: An Introduction to GridDB Cloud. With the introduction out of the way, we will focus on new features brought upon us by version 1.2 of the Cloud service.
With the release of the new version of GridDB, there is now an available GridDB Web API baked right into the GridDB Cloud; you can learn the basics of using the WebAPI here. The main benefits of the Web API are that you can use HTTP Requests to create containers and to push data directly into your database. This opens up using other services like Telegraf to record metrics and other data into your GridDB database.
In this article, we will showcase some simple Web API commands using curl. And then we will show you how to install and use Telegraf with your Cloud service.
GridDB Web API With Cloud
Using Web API is very straightforward. When you sign up for your GridDB Cloud Service, you are given your unique URL to the dashboard itself, and then another URL to the specific Web API Endpoint which you will use as your base to build your HTTP Requests.
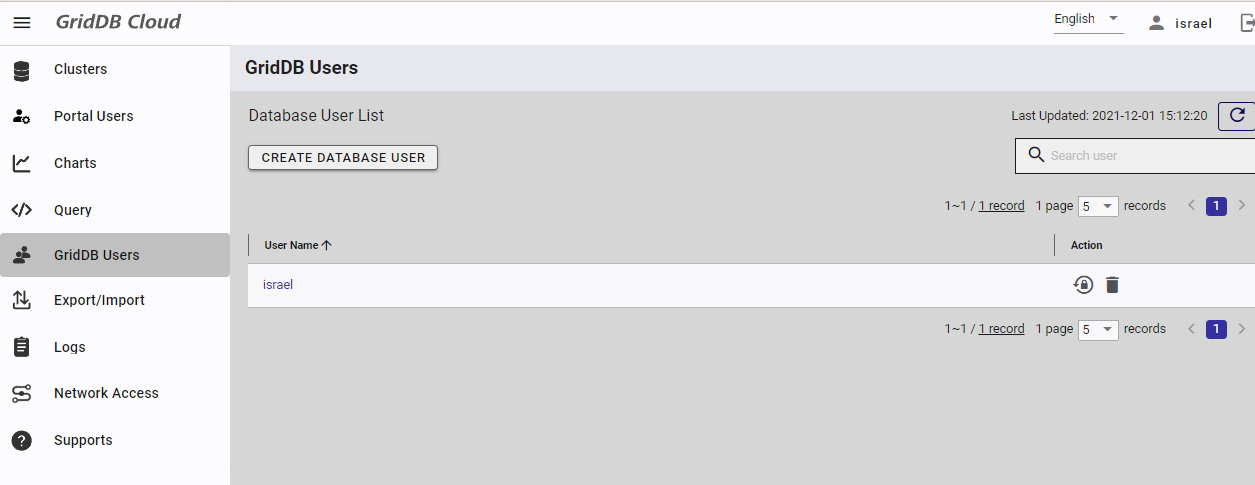
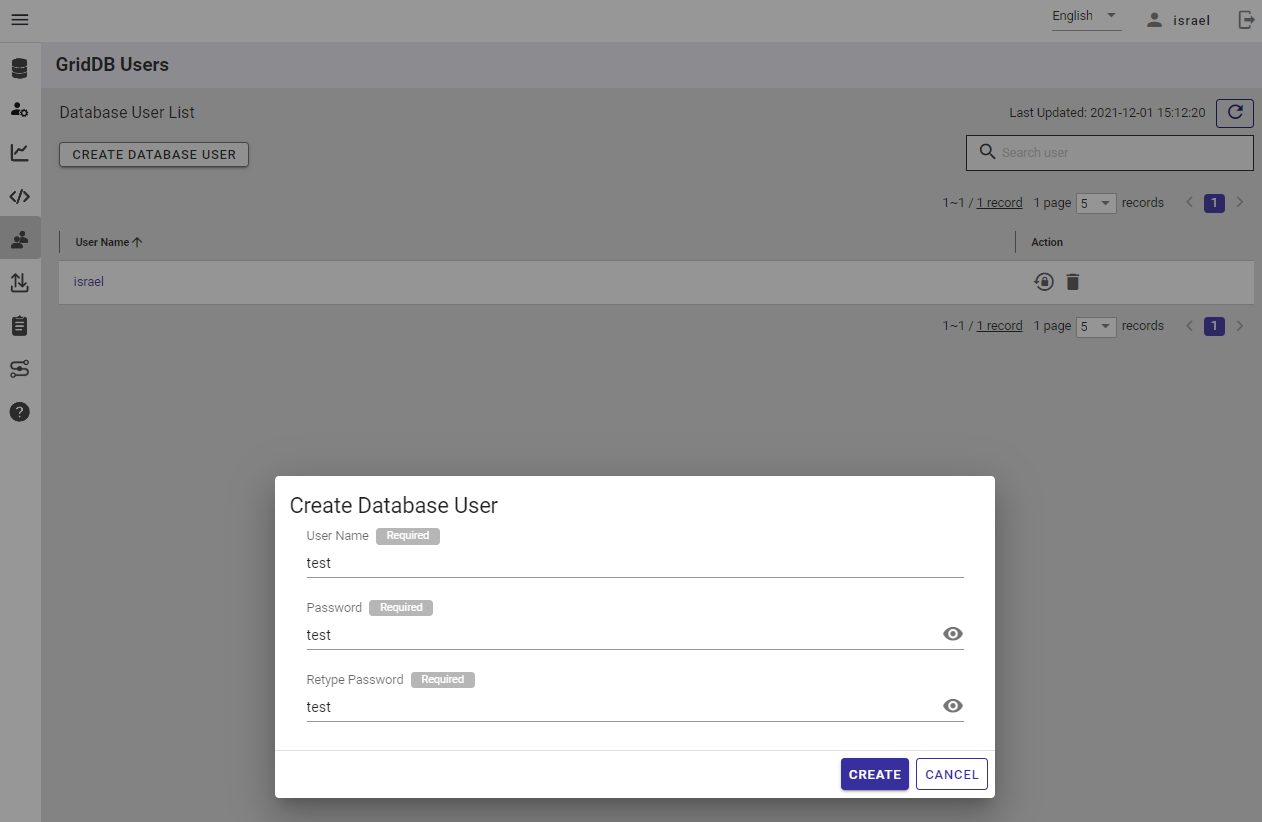
Creating GridDB User
To start, first create a new GridDB User. This user and password will be used when making your HTTP Web API Requests. For this example, we will use User: test & Password: test.
Creating A Container
And now let’s create our first Request. To start, let’s create a container called point01.
The Request will need to set the content type to application/json; charset=UTF-8 and have a Basic Authorization header with your username and password encoded to base64. This is what a Request using curl would look like, for example:
curl --location --request POST 'https://cloud1.griddb.com/trial002/griddb/v2/gs_clustertrial002/dbs/public/containers'
--header 'Authorization: Basic dGVzdDp0ZXN0Cg=='
--header 'Content-Type: application/json; charset=UTF-8'
--data '{
    "container_name": "point01",
    "container_type": "TIME_SERIES",
    "rowkey": true,
    "columns": [
        {
            "name": "timestamp",
            "type": "TIMESTAMP"
        },
        {
            "name": "active",
            "type": "BOOL"
        },
        {
            "name": "voltage",
            "type": "DOUBLE"
        }
    ]
}'
So, first we use your given GridDB Cloud Web API URL as our endpoint. We build out the Endpoint using this “formula”:
As for the Authorization line, we simply encode our username and password into base64 as a single entity like so: test:test.
The data column is simply a json of the schema of the container we would like to create. In this case, we are creating a TIME_SERIES container called point01 with 3 columns. Once sent, you should received back a HTTP Response Code of 201 (Created).
Registering a Row
To register a row, we again use a simple formula to build out our endpoint: PUT, not POST):
curl --location --request PUT 'https://cloud1.griddb.com/trial002/griddb/v2/gs_clustertrial002/dbs/public/containers/point03/rows' --header 'Authorization: Basic dGVzdDp0ZXN0Cg==' --header 'Content-Type: application/json;charset=UTF-8' -d '[["2021-06-28T10:30:00.000Z", false, "100"]]''This will add some generic values to your GridDB Cloud point03 container.
Obtaining A Row
To Obtain a row, we use the same Endpoint as registering a row, except instead of a PUT, we use POST. We will also send with our Request a different body.
And to change things up, if you are not comfortable with using curl (or a command line), you can also simply use the VS Code REST Client extension. Here’s what a Request looks like using VS Code to obtain a row of data:
POST https://cloud1.griddb.com/trial002/griddb/v2/gs_clustertrial002/dbs/public/containers/point03/rows HTTP/1.1
Host: cloud1.griddb.com
Authorization: Basic dGVzdDp0ZXN0Cg==
Content-Type: application/json
Content-Length: 93

{
  "limit"  : 100,
  "condition" : "timestamp >= TIMESTAMP('2021-06-28T04:30:00.000Z')"
}
And of course, if you would like an even easier method for making HTTP Requests, you can also use Postman
Those are the basics of using the Web API with GridDB Cloud. Next, let’s try using InfluxDB and Telegraf
Telegraf
Telegraf is an “open source server agent to help you collect metrics from your stacks, sensors and systems”. To put simply, we will be using the newly released GridDB Output plugin for Telegraf, in conjunction with the GridDB Web API, to send data to our GridDB Cloud using HTTP.
First, let’s install all of the necessary requirements.
Installation
The requirements for this are:
- CentOS 7 or higher
- Go version 1.15.13 or higher
- The GridDB Telegraf output plugin
Go
To install Go, you can download directly from their website. Installation instructions can be found here. Once installed, you can run $ go version to make sure.
Telegraf & The GridDB Output Plugin
First, download the source code for the GridDB output plugin for Telegraf from the GridDB Cloud dashboard supports section.
Next, you can install Telegraf itself using the go get command.
$ go get -d "github.com/influxdata/telegraf"
NOTE: If you are having issues here, make sure you working inside your Go home directory. Also make sure that the GO111MODULE environment setting is set to on.
$ export GO111MODULE=on
Once you download it, everything should be placed in your go home directory (~/go/src/github.com/influxdata/telegraf)
Now we will copy over the plugins from the source code downloaded into the influxdata directory. Direct yourself over to the downloaded directory and into the telegraf directory. Then:
$ cp -R ./plugins ./griddb.conf ~/go/src/github.com/influxdata/telegraf
Next will be adding the GridDB plugin into the file itself. So find the all.go file in the following directory: ~/go/src/github.com/influxdata/telegraf/plugins/outputs/all/ and add this line to the import section:
_ "github.com/influxdata/telegraf/plugins/outputs/griddb"
And now telegraf is ready to be built and run. So head back to the root of your telegraf directory
$ cd ~/go/src/github.com/influxdata/telegraf
And then make
$ make telegraf
If everything goes well, there should be a runnable executable file called telegraf inside the directory.
Usage
First, let’s get our griddb.conf file up to snuff. A copy of this file should already be in your telegraf root directory if you have been following along. Now let’s make some of the changes to get our instance of Telegraf to output to our GridDB Cloud.
Before we begin, it may be useful to have a basic understanding of how Telegraf itself works. Telegraf will take an input and send all data to the output. So for our example here, the input will be our influxdb server which is scraping the system for metrics, and the output will be our GridDB Cloud Instance.
Inputs
There are many different types of inputs which are available, though following along with this blog will give you a working system. If you would like to expand beyond this simple example, you can always read more about the inputs here.
For this particular example, we will keep it simple and use the cpu input plugin, which will simply gather info about the host machine’s CPU and send it out to GridDB. The config will look like this:
#[[inputs.cpu]]
  ## Whether to report per-cpu stats or not
  percpu = true
  ## Whether to report total system cpu stats or not
  totalcpu = true
  ## If true, collect raw CPU time metrics
  collect_cpu_time = false
  ## If true, compute and report the sum of all non-idle CPU states
#  report_active = false
    ## The column to extract the name of the metric from
    # csv_measurement_column = "name"

    ## The column to extract time information for the metric
    ## `csv_timestamp_format` must be specified if this is used
    # csv_timestamp_column = "time"
And for fun, you can include an activemq input which will use the GridDB JMS service and serve up those topics:
[[inputs.activemq]]
  ## ActiveMQ WebConsole URL
  url = "http://127.0.0.1:8161"

  ## Required ActiveMQ Endpoint
  ##   deprecated in 1.11; use the url option
  # server = "192.168.50.10"
  # port = 8161

  ## Credentials for basic HTTP authentication
   username = "admin"
   password = "admin"

  ## Required ActiveMQ webadmin root path
  webadmin = "admin"

  ## Maximum time to receive response.
  # response_timeout = "5s"

  ## Optional TLS Config
  # tls_ca = "/etc/telegraf/ca.pem"
  # tls_cert = "/etc/telegraf/cert.pem"
  # tls_key = "/etc/telegraf/key.pem"
  ## Use TLS but skip chain & host verification
  # insecure_skip_verify = false
Outputs
The output section is a bit simpler as for this blog, we only have one destination: the GridDB Cloud. Though as a small note, if you end up needing to debug, a helpful tip is to set the debug flag to true and to set up a second output:
[[outputs.file]]
  files = [ "stdout" ]
  flush_interval = "1s"
  flush_jitter = "1s"
  metric_batch_size = 10
The main output, though, will be to the GridDB Cloud. The default griddb.conf file should already have the skeleton of this laid out for you, and most of it is very straightforward. Here’s what it should look like once filled out with your information:
[[outputs.griddb]]
    ## The GridDB WebAPI URL.
    ## # (Required)
    api_url = "{your GridDB Web API URL}"

    ## The database name.
    ## # (Optional) Default: public
    database = "public"

    ## The cluster name.
    ## # (Required)
    cluster_name = "{clusterName}"

    ## GridDB administrator username.
    ## # (Required)
    username = "test"

    ## GridDB administrator password.
    ## # (Required)
    password = "test"

    ## Delete existing container if exist.
    ## # (Optional) ; Default: append
    ## # Accepted Value: replace, append
    ##     - replace: Override the existing container.
    ##     - append:  Append new rows into existing container.
    update_mode = "replace"

    ## The list of container that will be transfer to GridDB
    ## # Example: ["cpu", "ram", "product"]
    ## # Empty list [] means ALL containers
    ## # (Optional) ; Default: []
    containers = []

    ## Name the timestamp column. If timestampColumn is empty, it wont add timestamp column to the first column of the container
    ## # (Optional)
    timestamp_column = "timestamp"
One last change I would recommend making over the default file is the interval value in the agent section
[agent]
    ## Data collection interval for all inputs
    ## Because of migrating from InfluxDB to GridDB, the interval will be set to a enough large number
    ## After all data was migrated, we can terminal the telegraf process
    interval = "10s"
The reason for this is that it seems as though Telegraf will fail to send any data until the interval time frame runs through once first, instead of it sending data and then waiting for the interval to run through.
Running
Finally we can run everything at once.
So in one terminal make sure influxdb is still running and then open up a second terminal and run telegraf:
$ ./telegraf --config griddb.conf
If all goes well, you should see data being sent over to your GridDB Cloud and your Telegraf console should be outputting some data
2021-12-04T00:12:30Z I! [outputs.griddb] Transaction succeed: 1 containers was updated. 0 containers was error
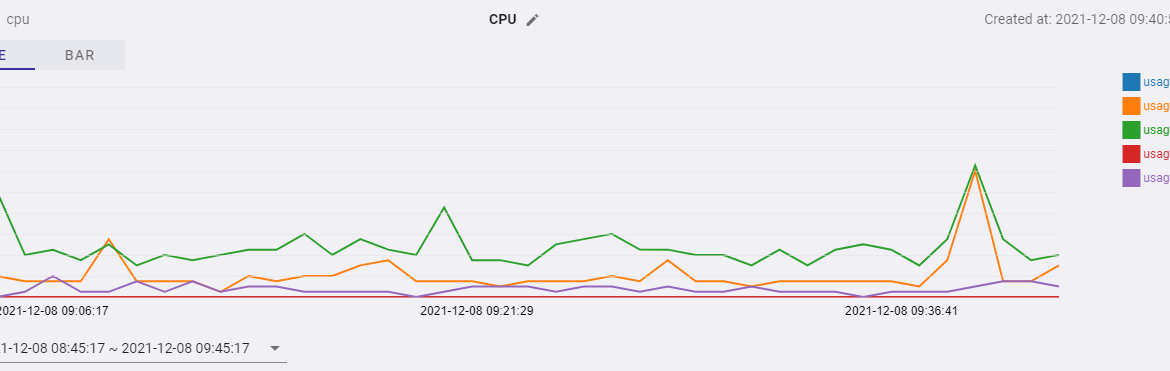
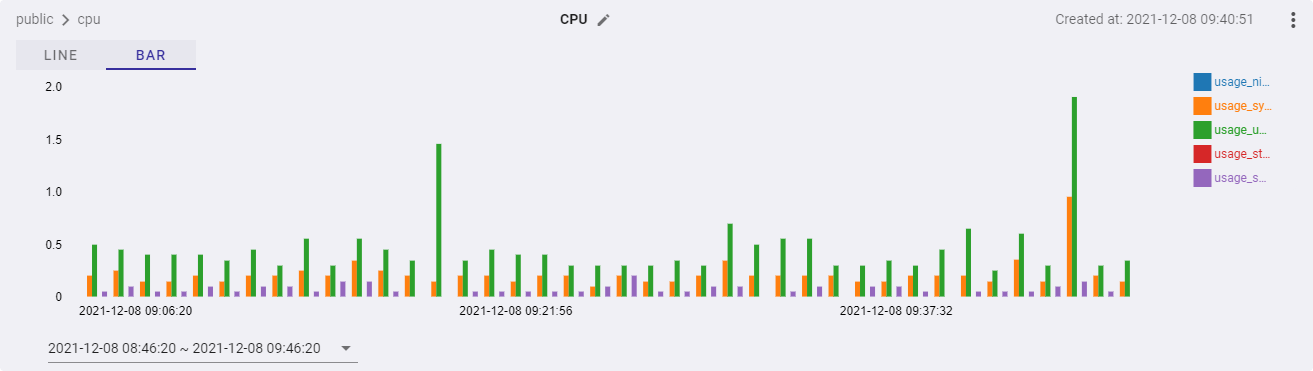
In the image below, I was charting the CPU data being sent over from the host machine. When gathering the data, I ran a simple 7z CPU benchmark to get some nice fluctuations for the image. Of course, this is a very simple example — I am interested to see what other kinds of metrics other developers will show on here!
Line Chart:
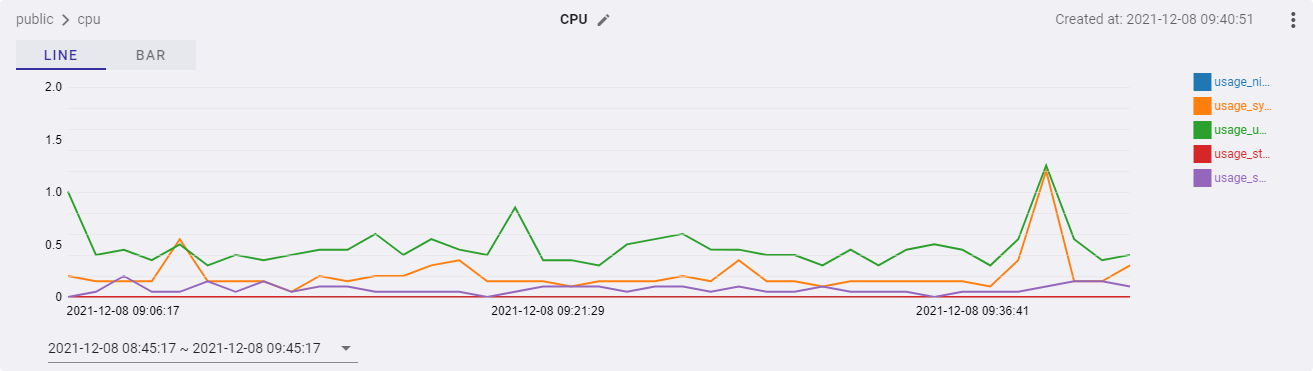
Bar Chart:
Conclusion
With the release of the Web API for the GridDB Cloud, you can now more easily use the service. You can also now use services which communicate via HTTP like Telegraf.
If you would like to sign up for a trial of the GridDB Cloud, you can do so here: https://www.global.toshiba/ww/products-solutions/ai-iot/griddb/product/griddb-cloud.html. Though please note, the website is currently only available in Japanese, so you may need to use some sort of translation software.