Introduction
Though GridDB has grown easier to manage and use over time, the development team has created an even more streamlined way of using the time series database. In this blog, we are introducing GridDB Cloud, a service that provides the database as a cloud service through a convenient online portal. This blog will serve as as a basic introduction and will showcase some basic features and instruct prospective users on how to setup and use it.
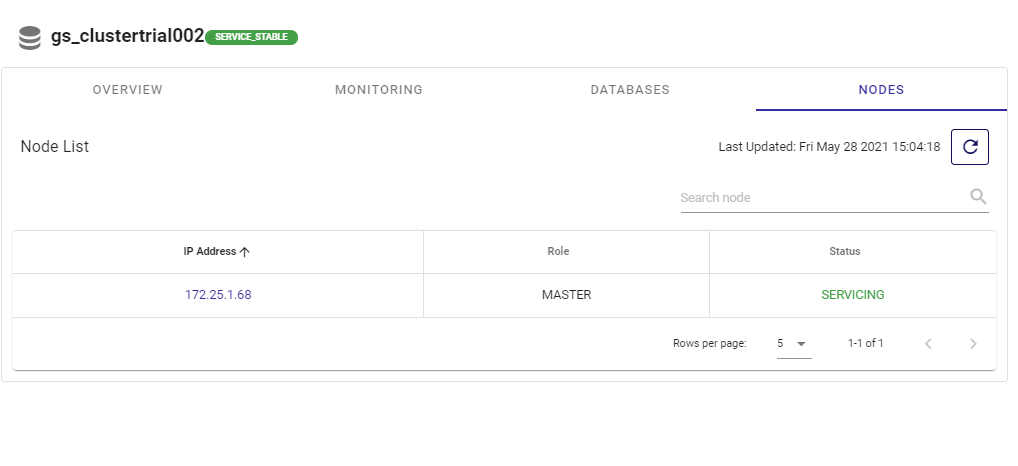
As an example, here’s the portal showing all working nodes in the cluster:
As a bonus, we will also show you how to set up Grafana in conjunction with your Cloud instance — just to show off some functionality and to show you the possibilities.
How to Use
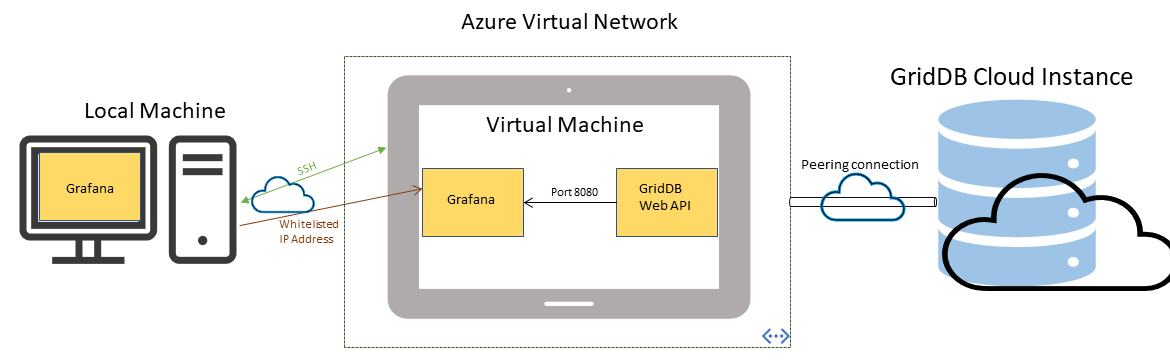
For this blog, I will be walking you through setting up a virtual private network in Microsoft’s Azure, which can then be used to connect to your cloud instance. Not only is this the most secure way to tunnel your data around, it’s also extremely easy.
Here’s how it works: you set up a virtual private network on your Azure subscription and then simply connect a virtual machine to that same network. From there, you set up a peer connection which allows remote connections to join your Azure network. Once that is set up, you can communicate from within the network to your GridDB Cloud (ie. the virtual machines within your virtual network can directly communicate with your GridDB Cloud).
Setting Up the Peer Network
To begin, please create a resource group in your Azure subscription for this project.
You will also need to make sure the Azure user you are using has an administrator role in the Azure AD Roles Directory; you can add this by following the instructions here: https://docs.microsoft.com/en-us/azure/active-directory/roles/manage-roles-portal.
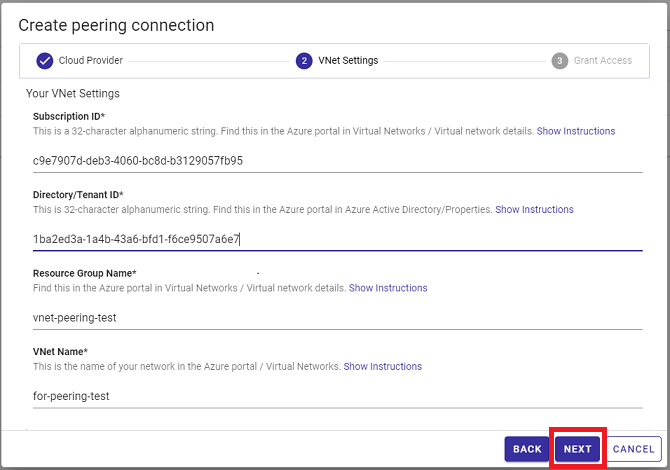
Once you’ve got that all squared away, please note down your Azure Subscription ID (found in your resource group) and your Directory/Tenant ID (found in the Azure Active Directory).

With these two crucial IDs ready, you can follow the GridDB Cloud wizard to create a peering connection with your Azure cloud provider.
Once the info is entered into the wizard, you will need to switch to a command line and use the Azure CLI (you can also use the Azure Cloud Shell if you prefer).
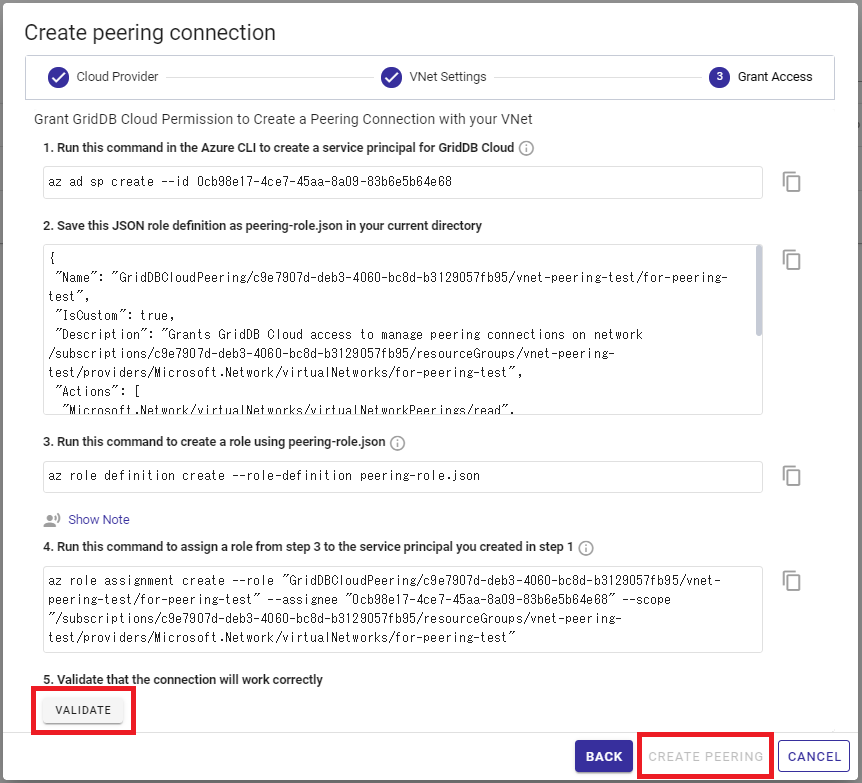
And again, if you are facing issues when following the first command
az ad sp create --id RESOURCE-ID
Please make sure your active user has the proper administrative role to continue with the steps laid out in the wizard. Once done, click validate to ensure the connection is good.
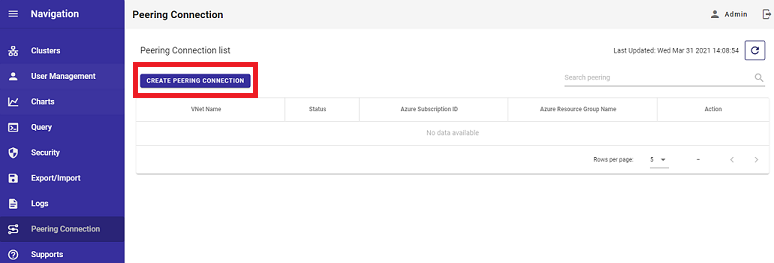
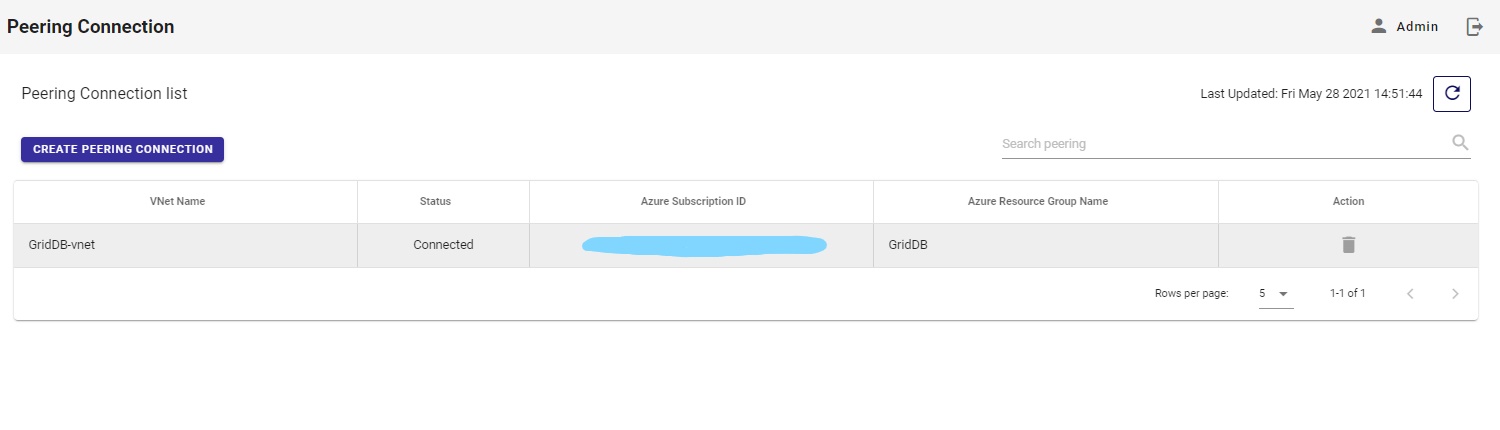
If all is good, it will show up in your peering connection page:
Creating A DB User
Before you can load data into your cloud instance, you must create a database user. To do so, click on the security tab and click Create Database User. This user (along with its credentials) will be used when communicating with the cloud instance.

Loading Data Into GridDB Cloud
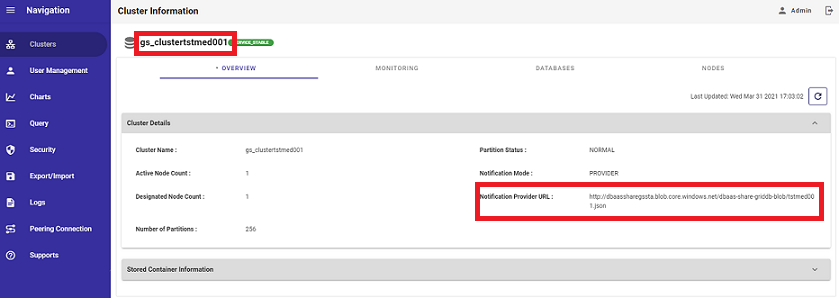
To connect to your GridDB Cloud instance, you will use the Notification Provider method as it is currently the only way to make a connection. In the Overview section of your Cloud portal, you will find your unique Notification Provider URL. So, to load data into your Cloud instance, you simply use the provider URL along with the credentials made in the previous step.
For example, if I made a user in the above step called test_user1 with a password of test_user1, this is how I would connect to my Cloud instance from my virtual machine within the same network (python script snippet):
gridstore = factory.get_store(notification_provider='http://dbaassharegssta.blob.core.windows.net/dbaas-share-griddb-blob/<cloudName>.json',
cluster_name='gs_clustertrial002',
username='test_user1',
password='test_user1')
So for a brief rundown, I SSH’d into my Azure cloud virtual machine (via my terminal), and because that VM was inside a virtual network which had a peering connection with the cloud instance, I was able to communicate directly with the cloud instance of the database. That is why I can use the python snippet above to load data directly into the cloud instance.
With that in place, you should be able to use your remote GridDB Cloud instance as if it was a local database.
Viewing Data in Online Portal
In preparation for this blog, I loaded the dataset from my previous blog into my cloud instance.
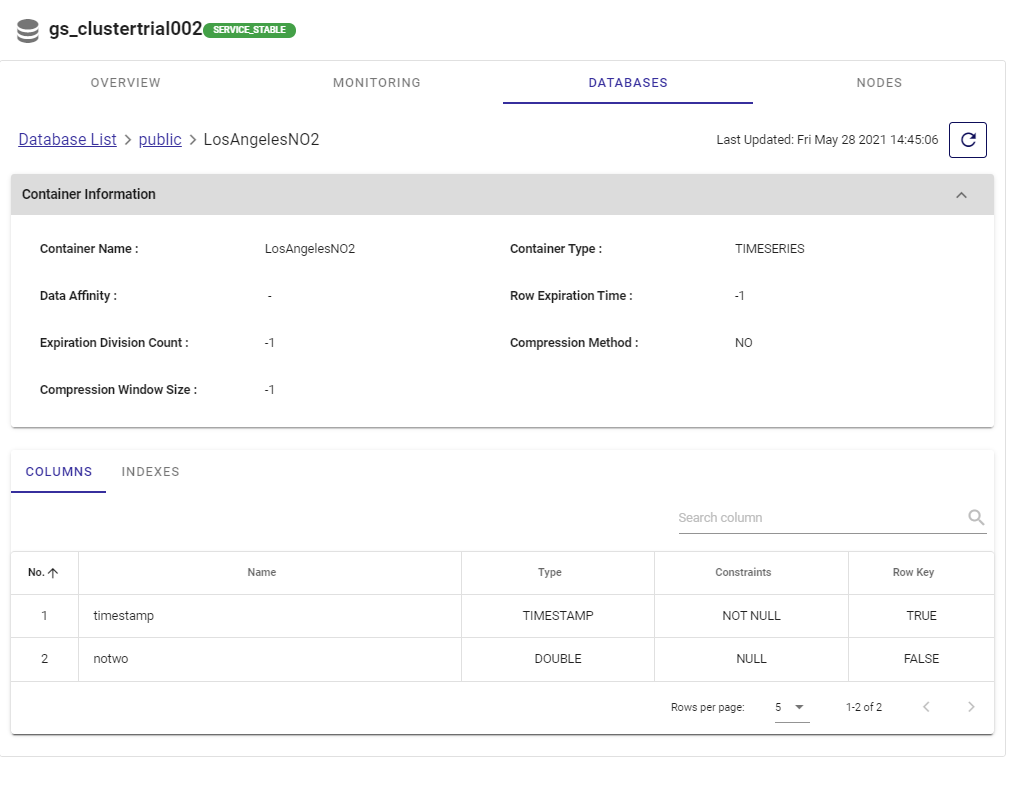
To look at the data from the portal, navigate yourself to the DATABASES header in the main page. At the bottom of this page will be a full list of your columns and even indexes.
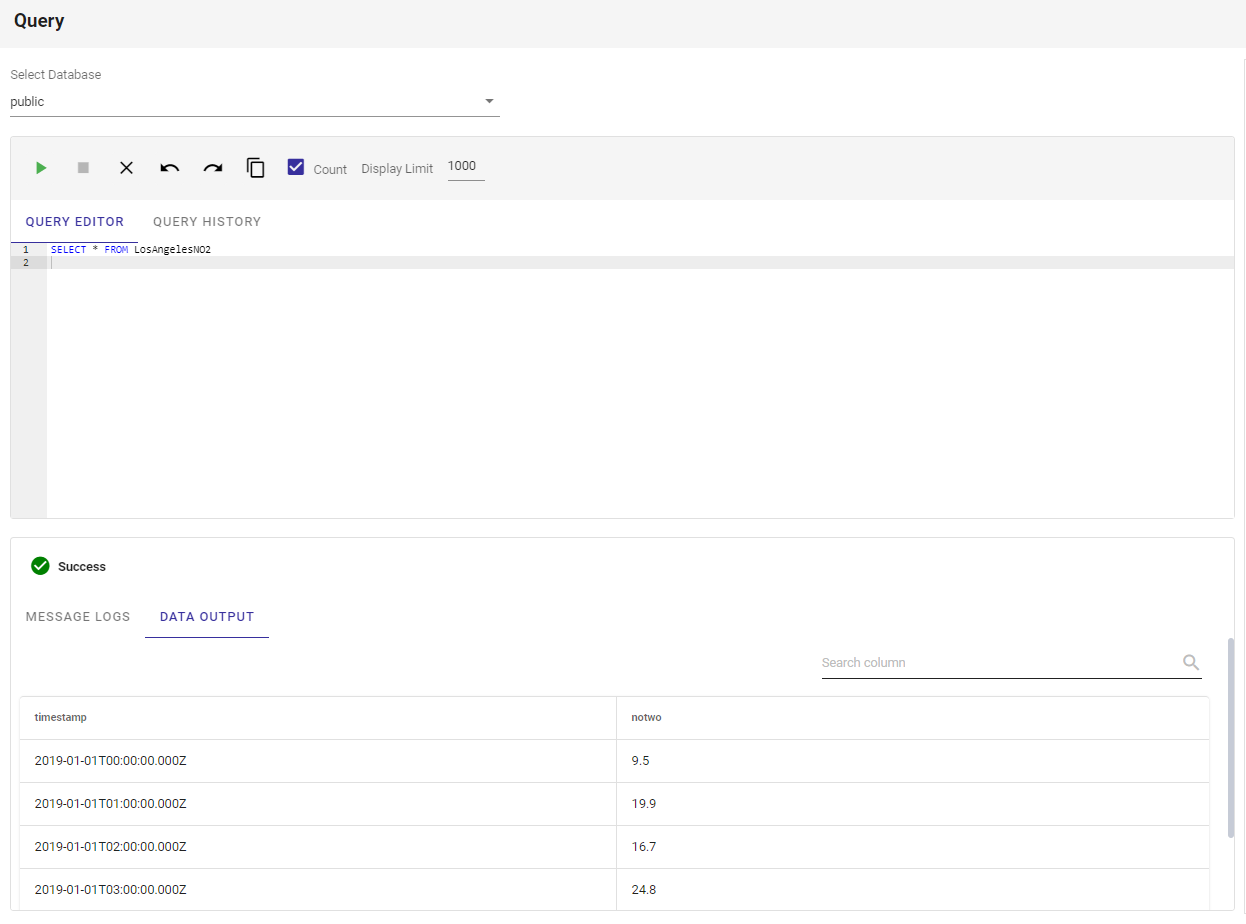
To go along with a simple view of all the data and its components, the online portal also contains an online query editor/viewer. This means you can make complex queries directly from the portal and view the output in the same page! To do this, simply click the Query navigation button in the side menu
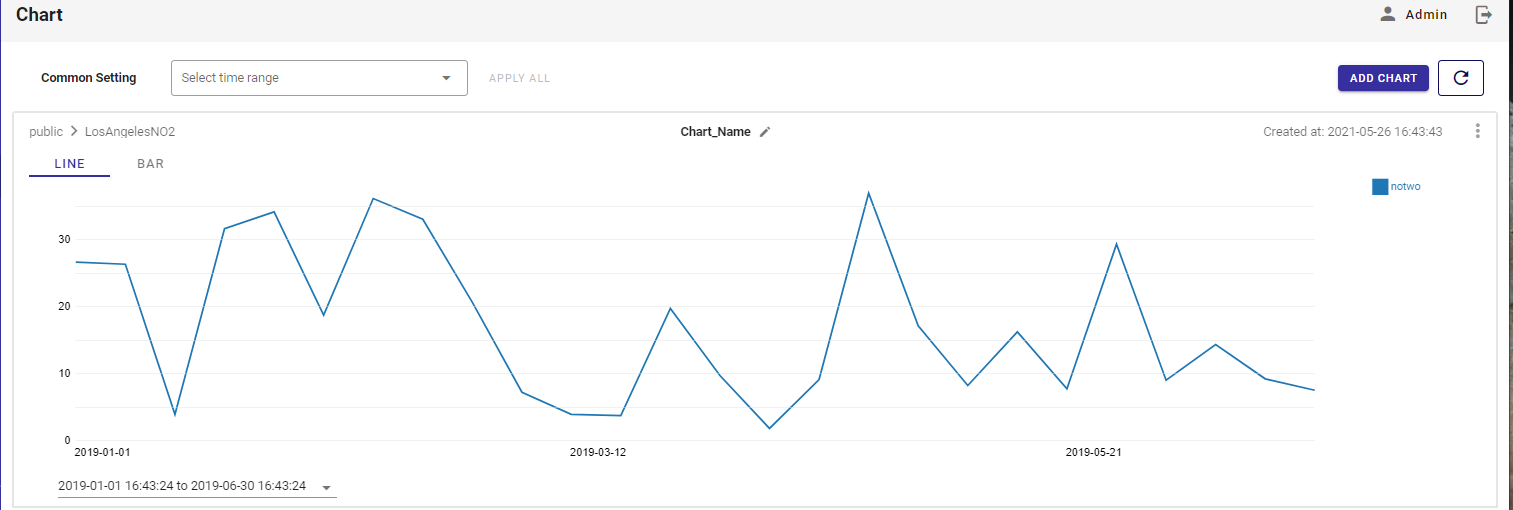
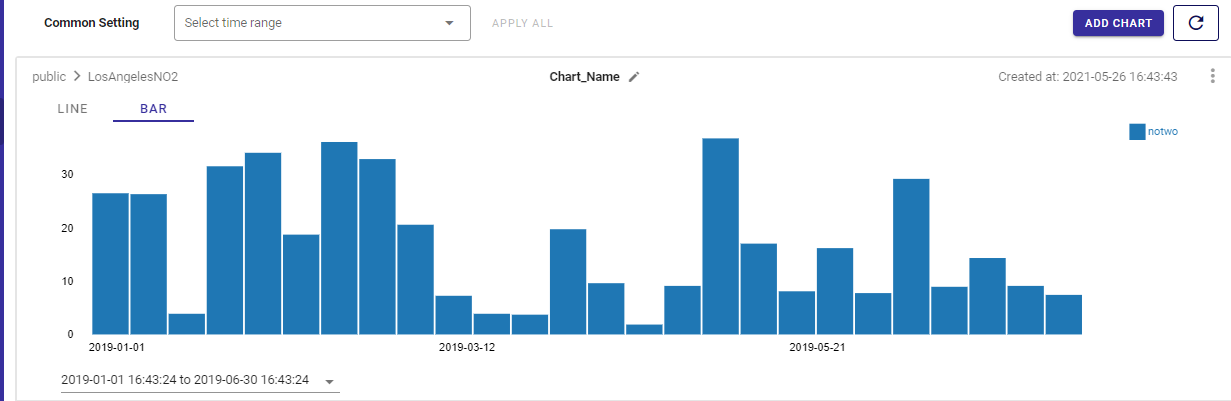
And of course, because GridDB is a time series database, the portal also has a chart viewer. If you click the Charts button from the sidebar menu, you can select a time range and view your data in either a line or bar chart. Very convenient!
Grafana
Grafana is an open source analytics and monitoring solution; we have written about it here. To use with the cloud instance, we need to download Grafana, set up the GridDB Web API, and then install the GridDB Grafana Plugin
Setting it Up
So, to be able to successfully use the GridDB Cloud instance as your backend, you run and install Grafana on your virtual machine (and make sure you open up the specific port in the Azure firewall to access the site locally). Here’s how to do it: How to open ports to a virtual machine with the Azure portal
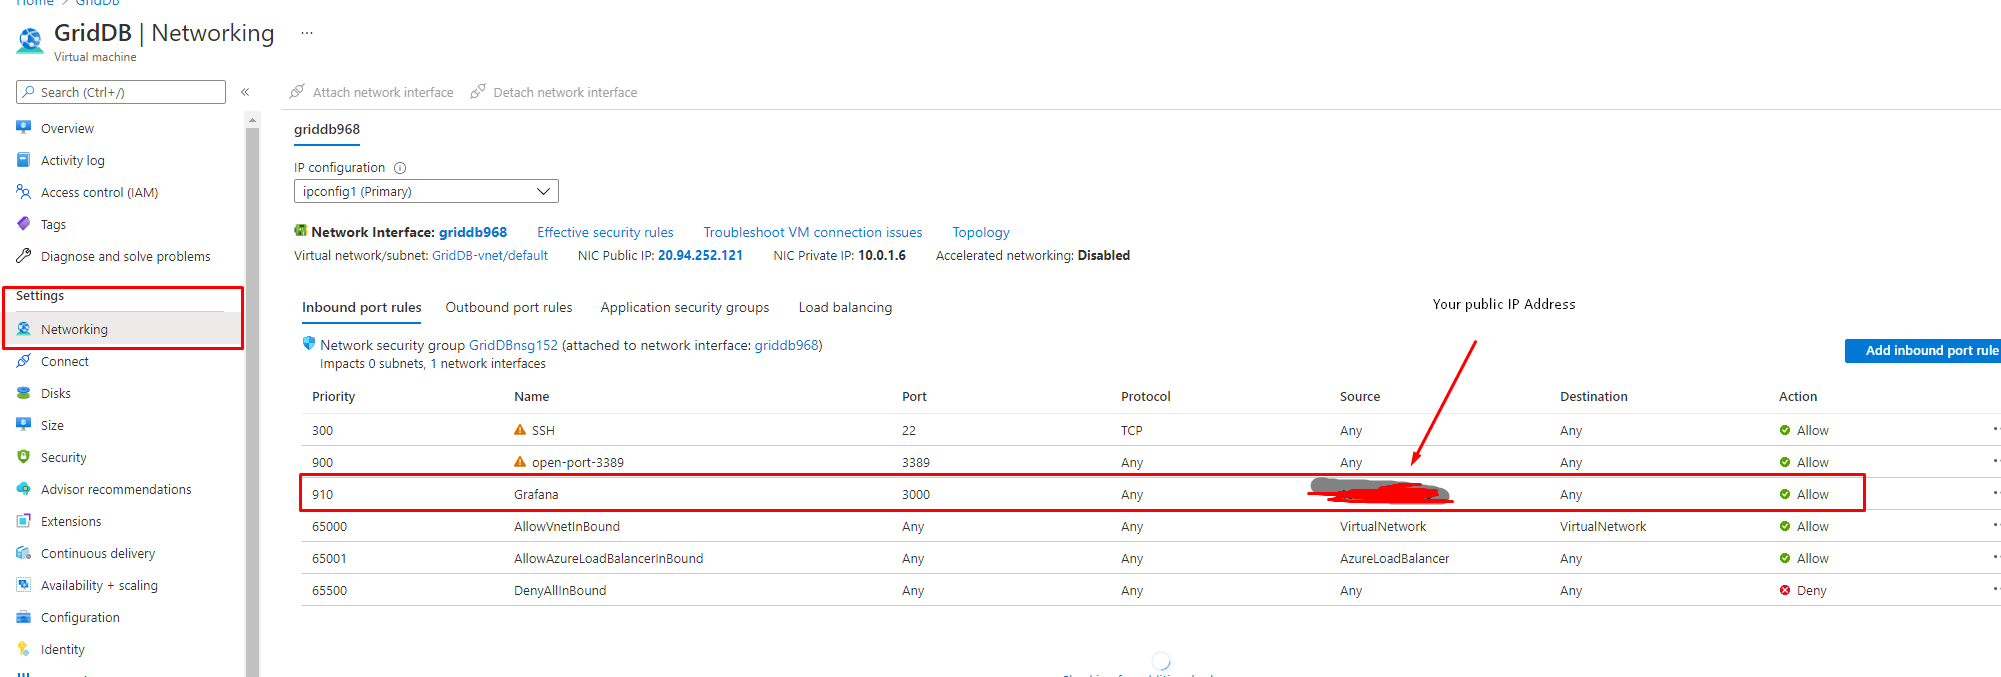
Notice I opened up port 3000, this is key. Now you can simply take your VM’s public Address and go to your browser and you will get your Grafana instance: http://<yourVMIP:3000>.
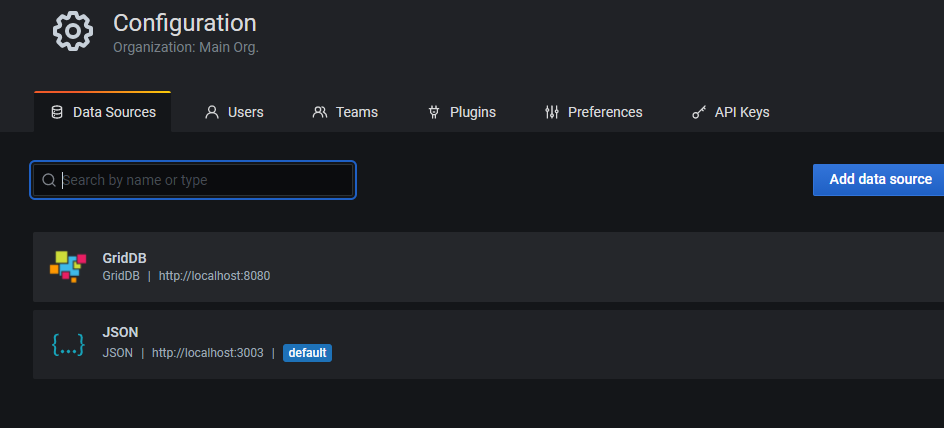
Once accessible, you can simply add the GridDB Grafana Plugin to be able to use the GridDB Web API as a data source.
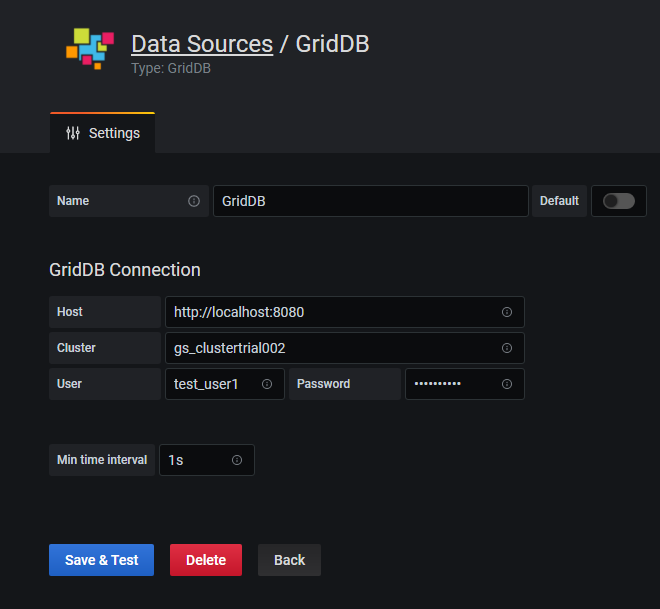
To install and use the Web API, please follow the instructions from either the GitHub page or our previous blog. You will also need to edit the webapi-2.2.0/conf/repository.json file to point to your GridDB Cloud Instance. For example:
{
  "clusters" : [
    {
      "name" : "gs_clustertrial002",
      "mode" : "PROVIDER",
      "providerUrl": "http://dbaassharegssta.blob.core.windows.net/<cloud instance name>/trial002.json"
    }
  ]
}
To keep it succinct, you run the Web API in another terminal, and then once you add the GridDB as a data source in the portal, you can set the data host as the localhost with a port of 8080.
Once you have your data source fully integrated, you can make beautiful and detailed charts like this one:

Conclusion
Using the GridDB Cloud can really help streamline things and allow you to produce a working, proof-of-concept application that much quicker. Please take a look here to get started with your own GridDB Cloud.
If you have any questions about the blog, please create a Stack Overflow post here https://stackoverflow.com/questions/ask?tags=griddb .
Make sure that you use the “griddb” tag so our engineers can quickly reply to your questions.