
Table of Contents
- Prerequisites
- How to Run
- Architecture
- Technical Implementations
- API Routes
- Saving Data to GridDB
- Read Data from GridDB
- User Interface
What This Blog is About
Using your camera to capture memorable moments or interesting objects, then transforming them into creative, stylized
video clips with AI, is an exciting way to engage users and demonstrate the power of modern technology.
In this guide, we build a developer-friendly pipeline using Next.js for the frontend, Fal.ai as a serverless inference
runtime, Kling AI for video generation, and GridDB Cloud for real-time metadata storage. We’ll walk through how to
capture frames from the webcam, send them to Kling for enhancement, log metadata (image URL, applied effects, which is
the prompt, and generated video URL) to GridDB, and render the final video.
Prerequisites
Node.js
This project is built using Next.js, which requires Node.js version 16 or higher. You can download and install Node.js
from https://nodejs.org/en.
GridDB
Sign Up for GridDB Cloud Free Plan
If you would like to sign up for a GridDB Cloud Free instance, you can do so at the following link: https://form.ict-toshiba.jp/download_form_griddb_cloud_freeplan_e.
After successfully signing up, you will receive a free instance along with the necessary details to access the GridDB
Cloud Management GUI, including the GridDB Cloud Portal URL, Contract ID,
Login, and Password.
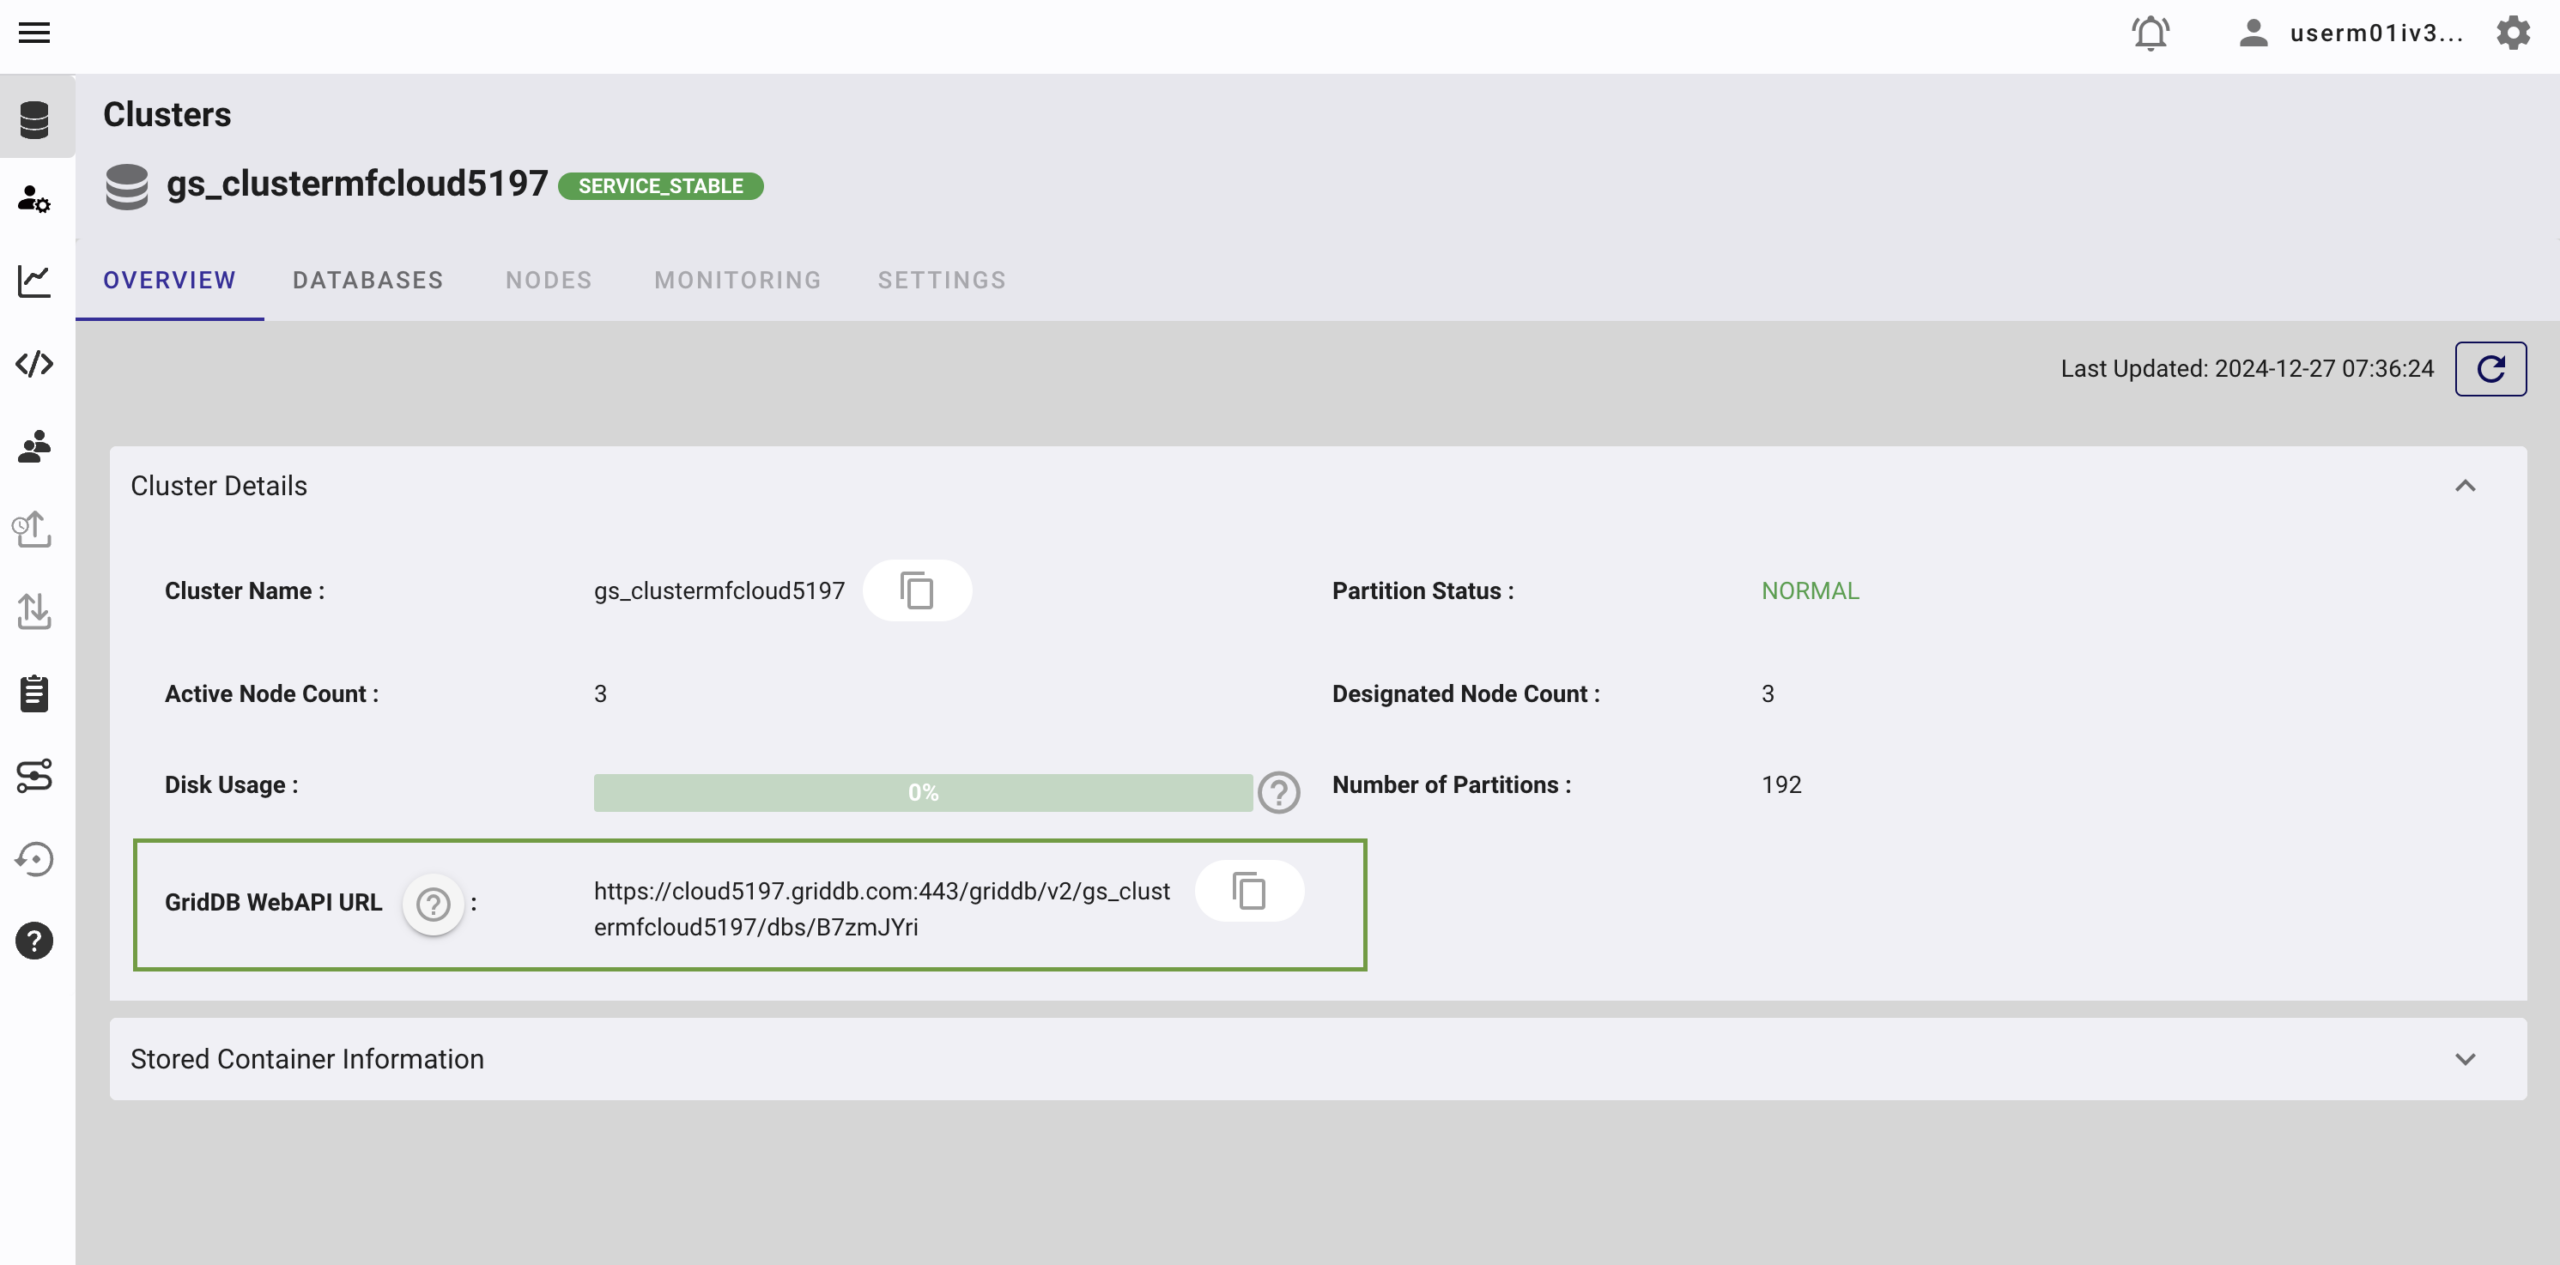
GridDB WebAPI URL
Go to the GridDB Cloud Portal and copy the WebAPI URL from the Clusters section. It should look like
this:
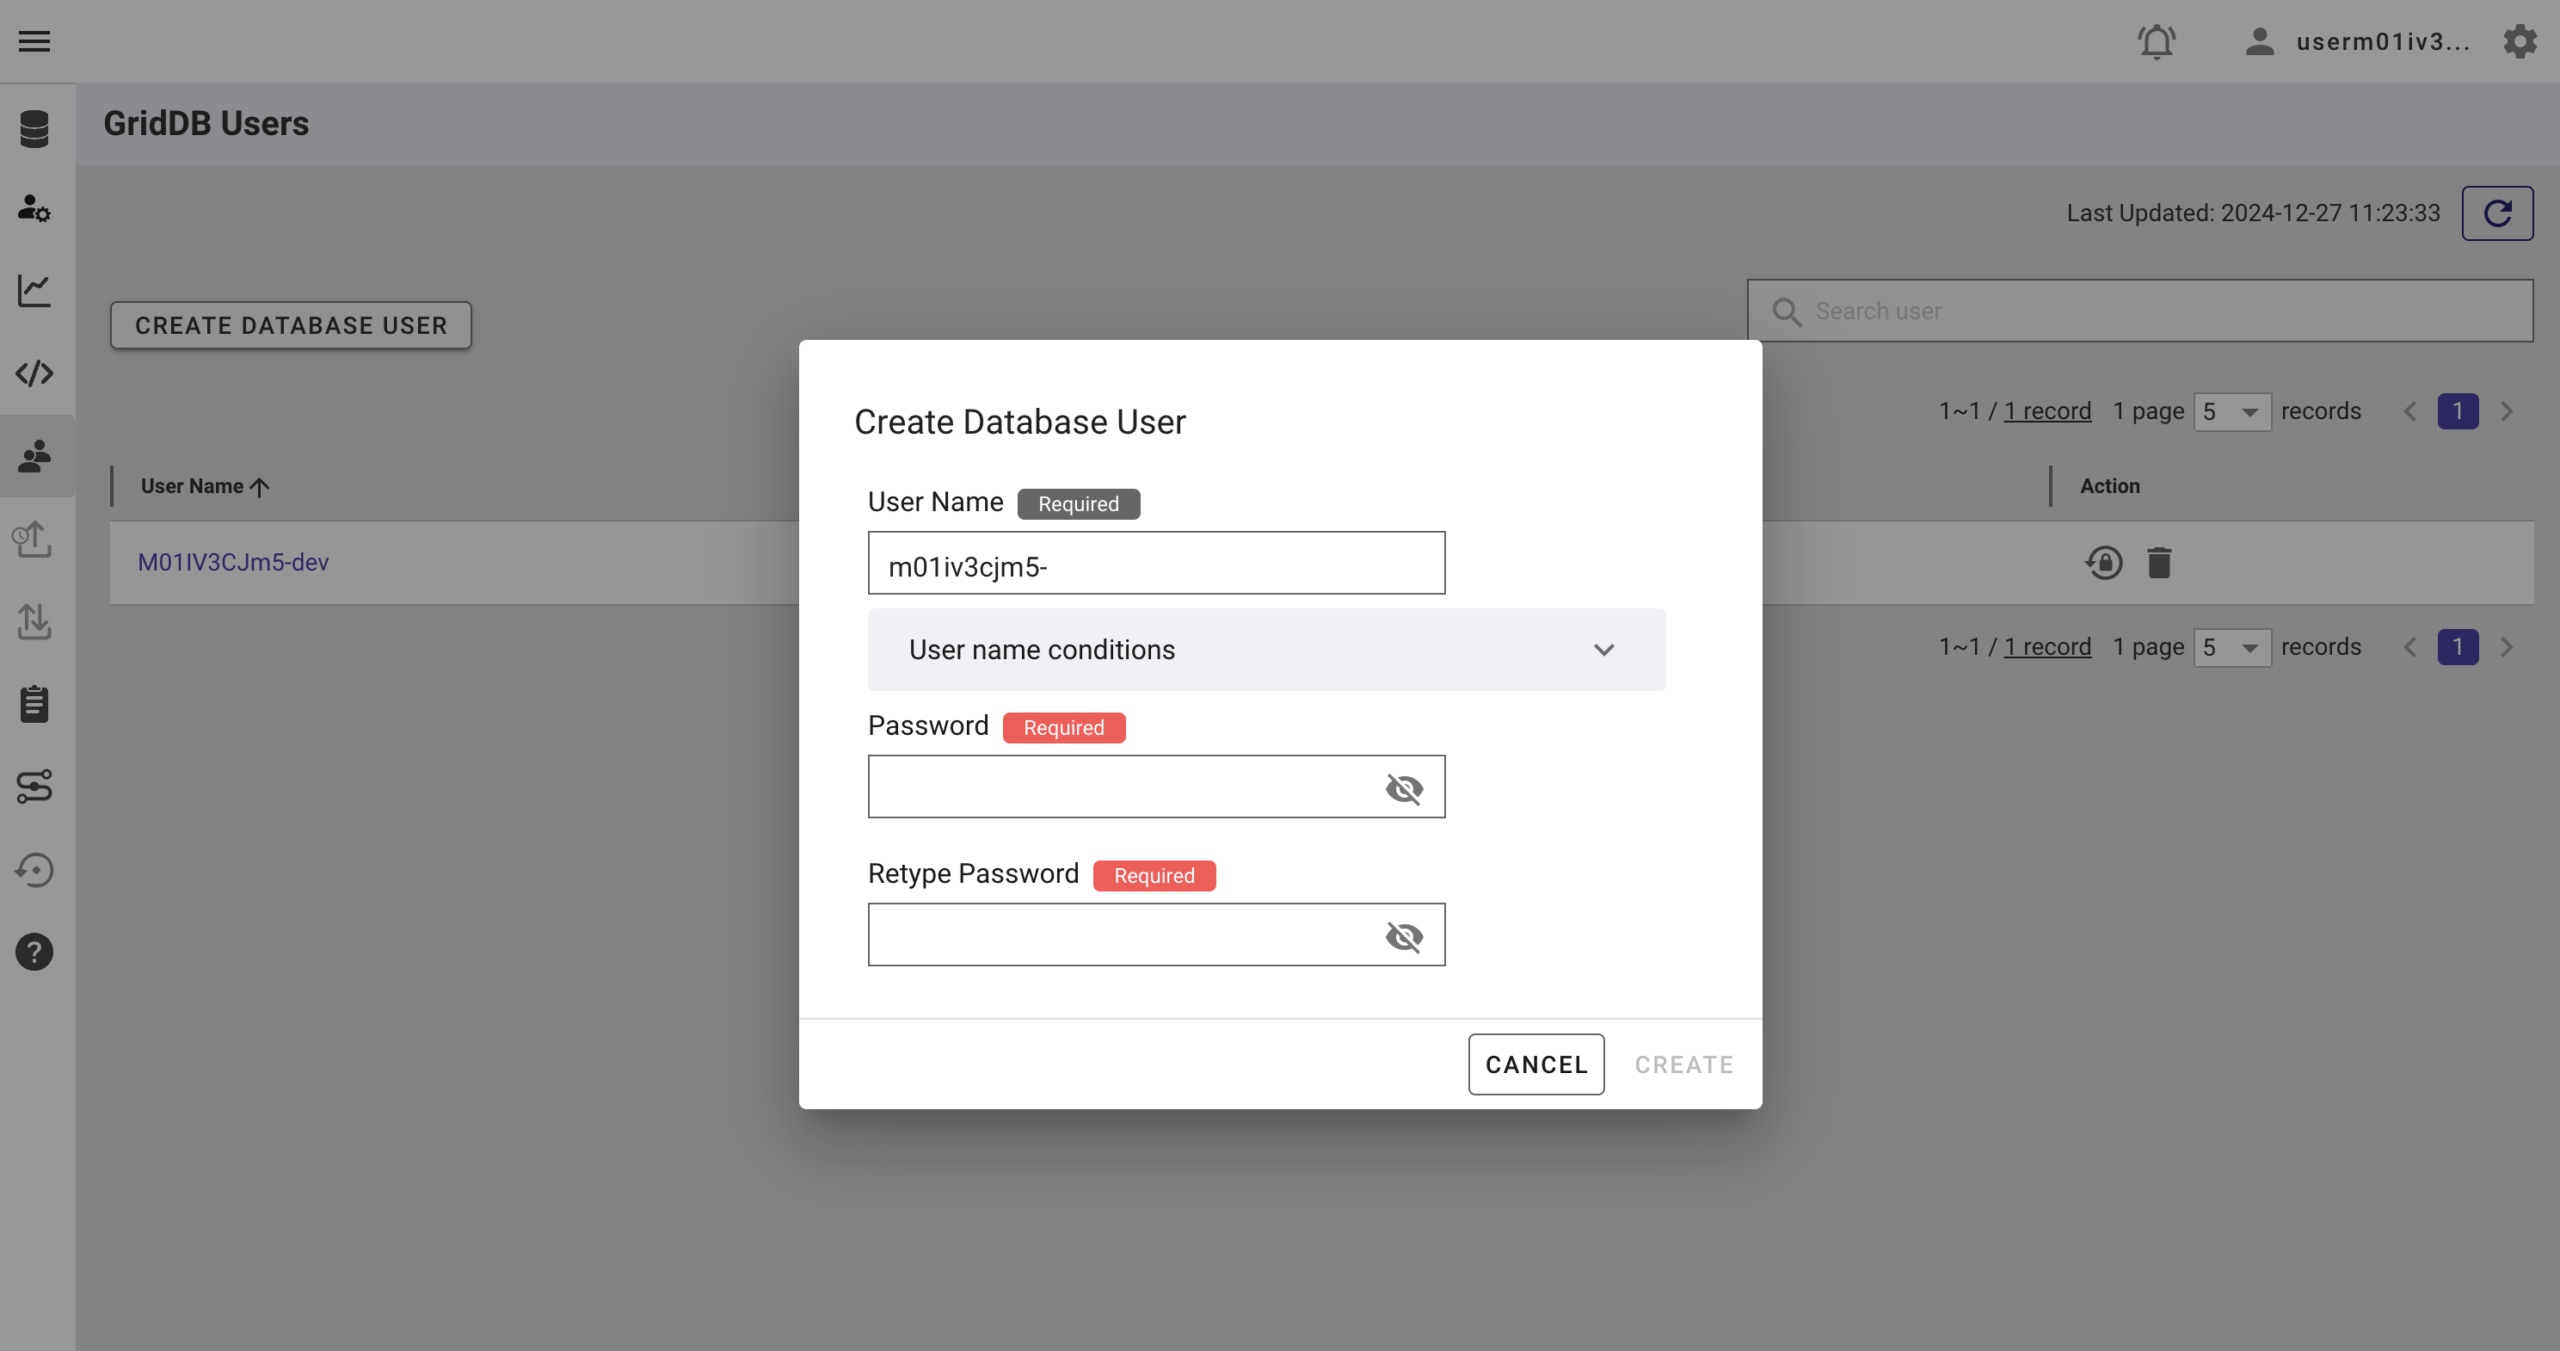
GridDB Username and Password
Go to the GridDB Users section of the GridDB Cloud portal and create or copy the username for
GRIDDB_USERNAME. The password is set when the user is created for the first time. Use this as the
GRIDDB_PASSWORD.
For more details, to get started with GridDB Cloud, please follow this quick start guide.
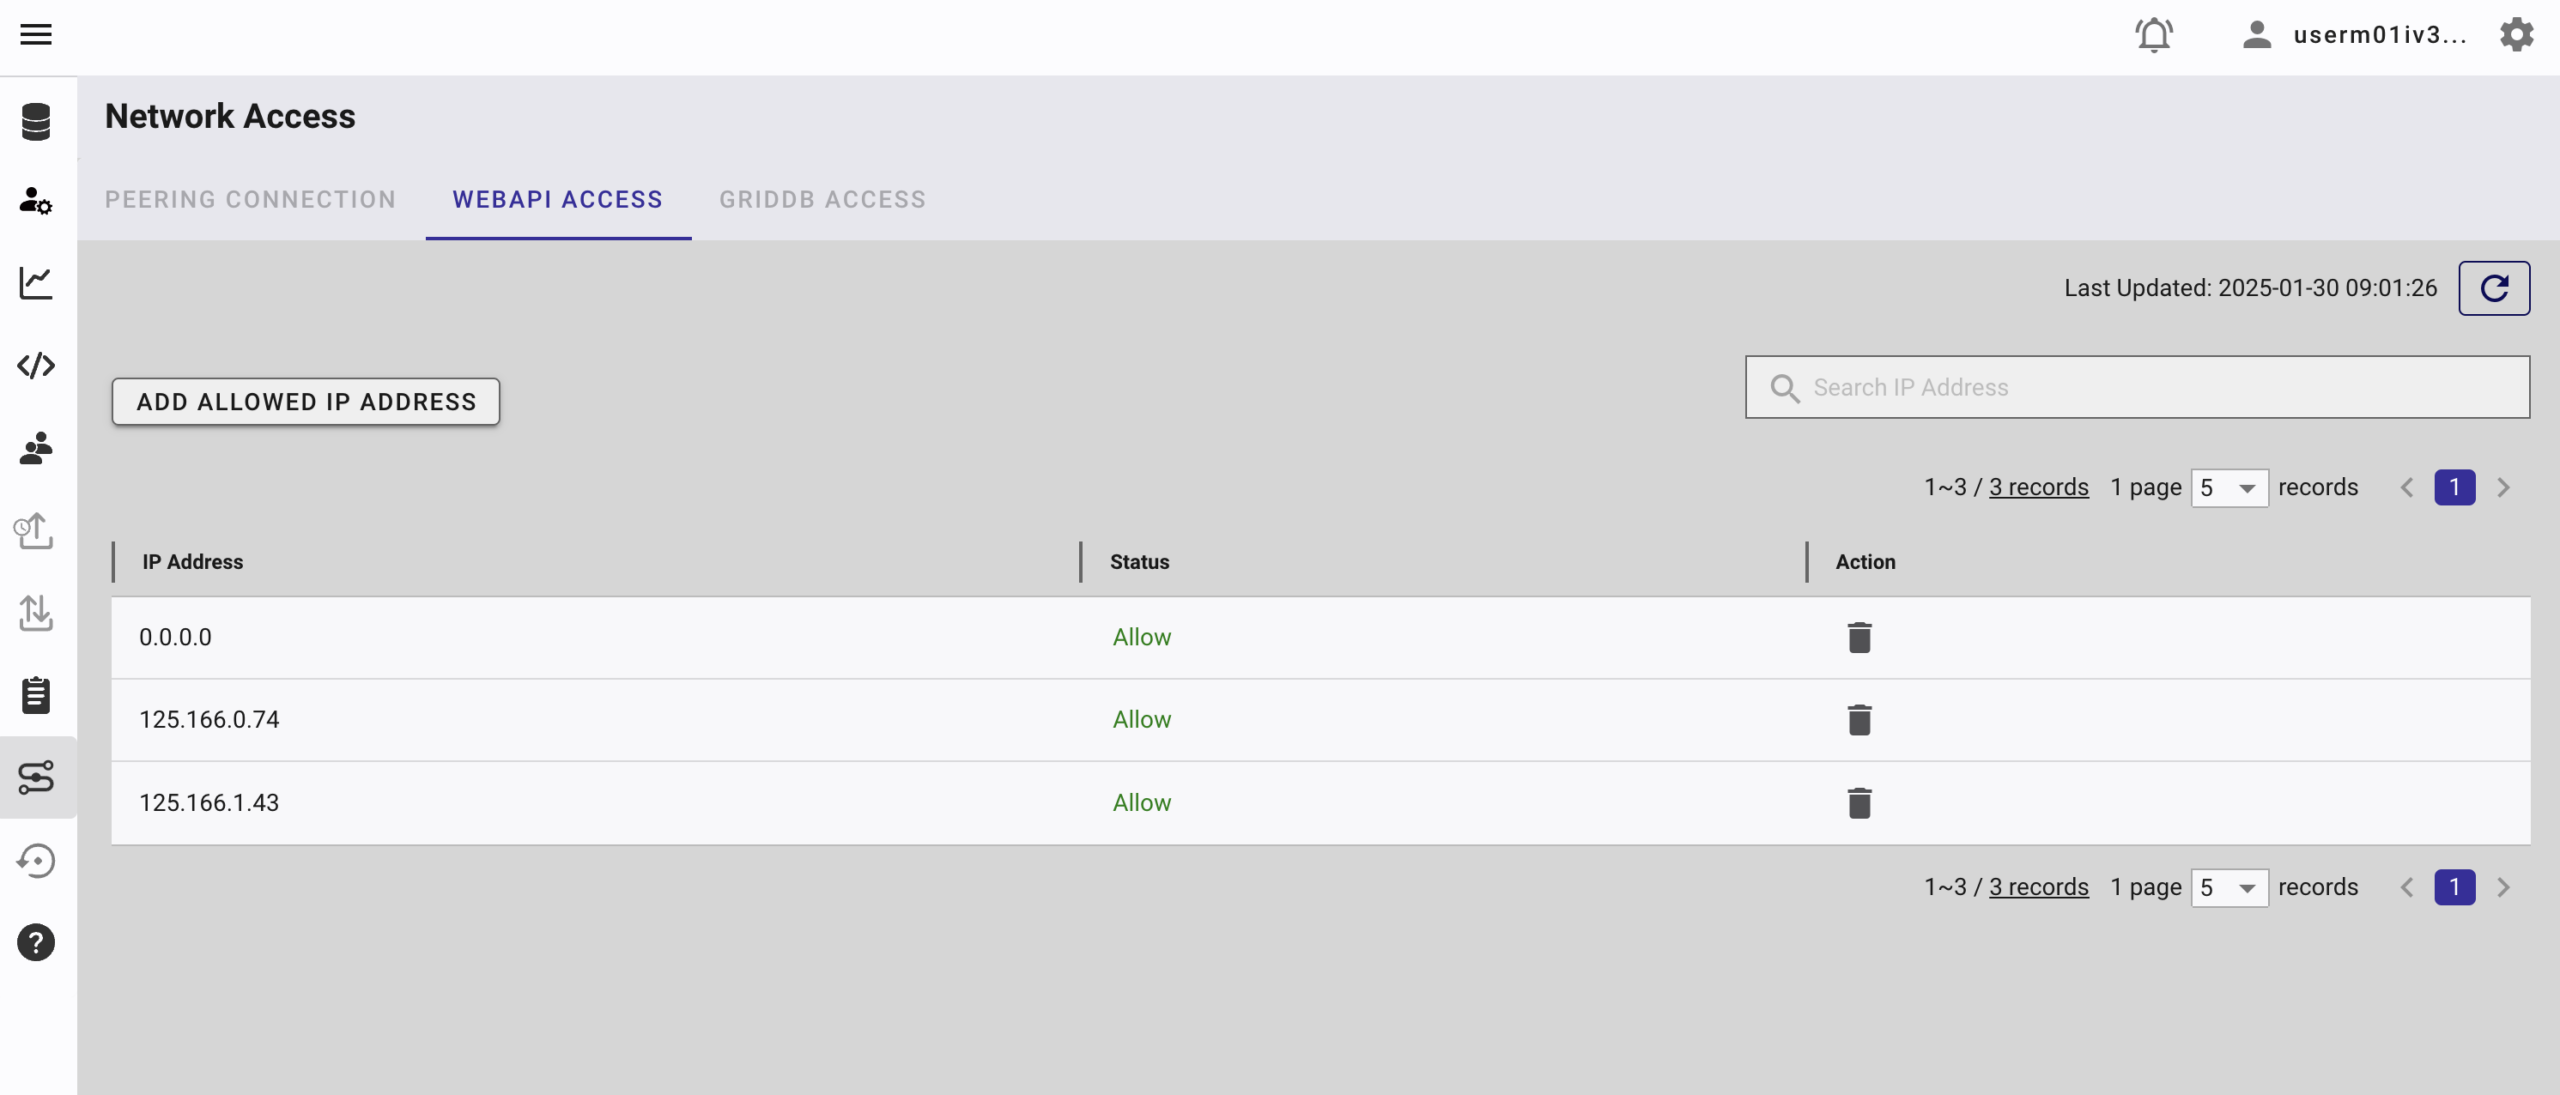
IP Whitelist
When running this project, please ensure that the IP address where the project is running is whitelisted. Failure to
do so will result in a 403 status code or forbidden access.
You can use a website like What Is My IP Address to find your public IP
address.
To whitelist the IP, go to the GridDB Cloud Admin and navigate to the Network Access menu.
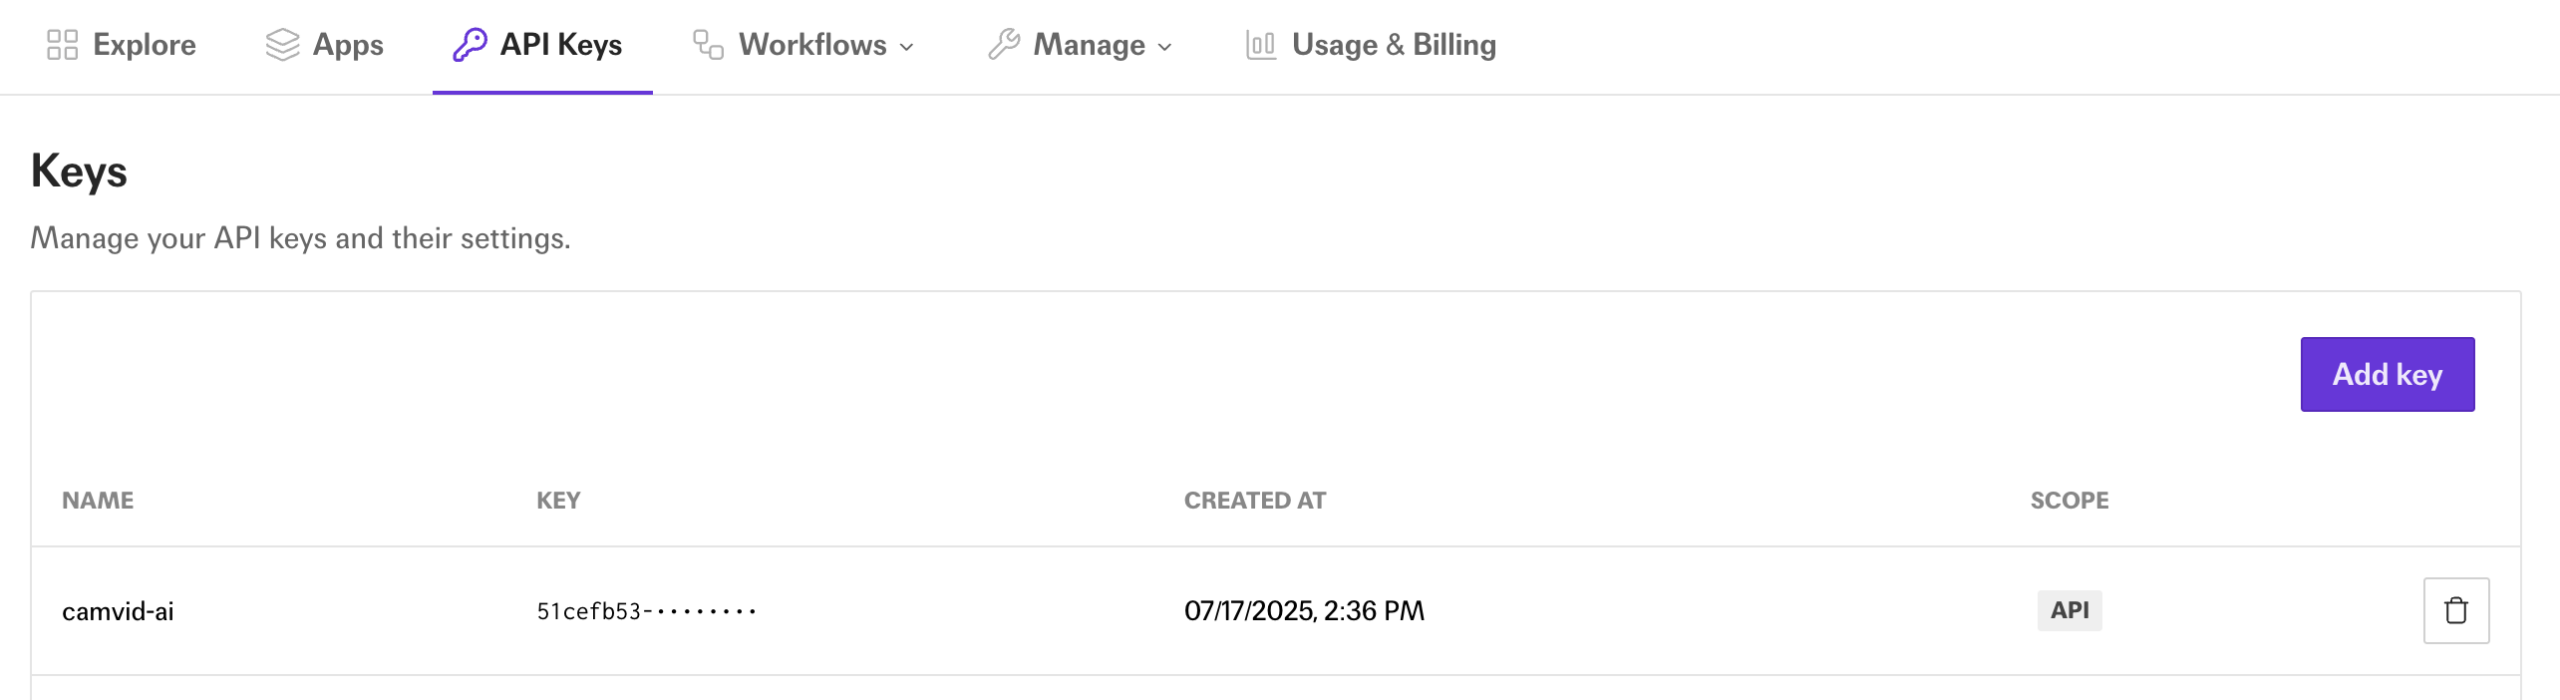
Fal Kling 2.1 API
You need a Kling 2.1 API key to use this project. You can sign up for an account at fal.ai.
After signing up, go to the Account section, and create and copy your API key.
Kling 2.1 is the latest version of Kling AI’s text/image-to-video generation engine, released in May 2025 by Kuaishou
(also known as Kwai). It’s a significant upgrade from Kling 1.6 and 2.0, bringing smoother motion, sharper visuals,
stronger prompt adherence, faster speeds, and better cost efficiency.
How to Run
1. Clone the repository
Clone the repository from https://github.com/junwatu/camtovid-ai
to your local machine.
$ git clone https://github.com/junwatu/camtovid-ai
$ cd camtovid-ai
$ cd apps
2. Install dependencies
This project uses Bun for installing package dependencies. You can download Bun from https://bun.sh.
$ bun install3. Set up environment variables
Copy file .env.example to .env and fill in the values:
# Copy this file to .env.local and add your actual API keys
# Never commit .env.local to version control

# Fal.ai API Key for Kling 2.1
# Get your key from: https://fal.ai/dashboard
FAL_KEY=


GRIDDB_WEBAPI_URL=
GRIDDB_PASSWORD=
GRIDDB_USERNAME=
Please look at the section on Prerequisites before running the project.
4. Run the project
Run the project using the following command:
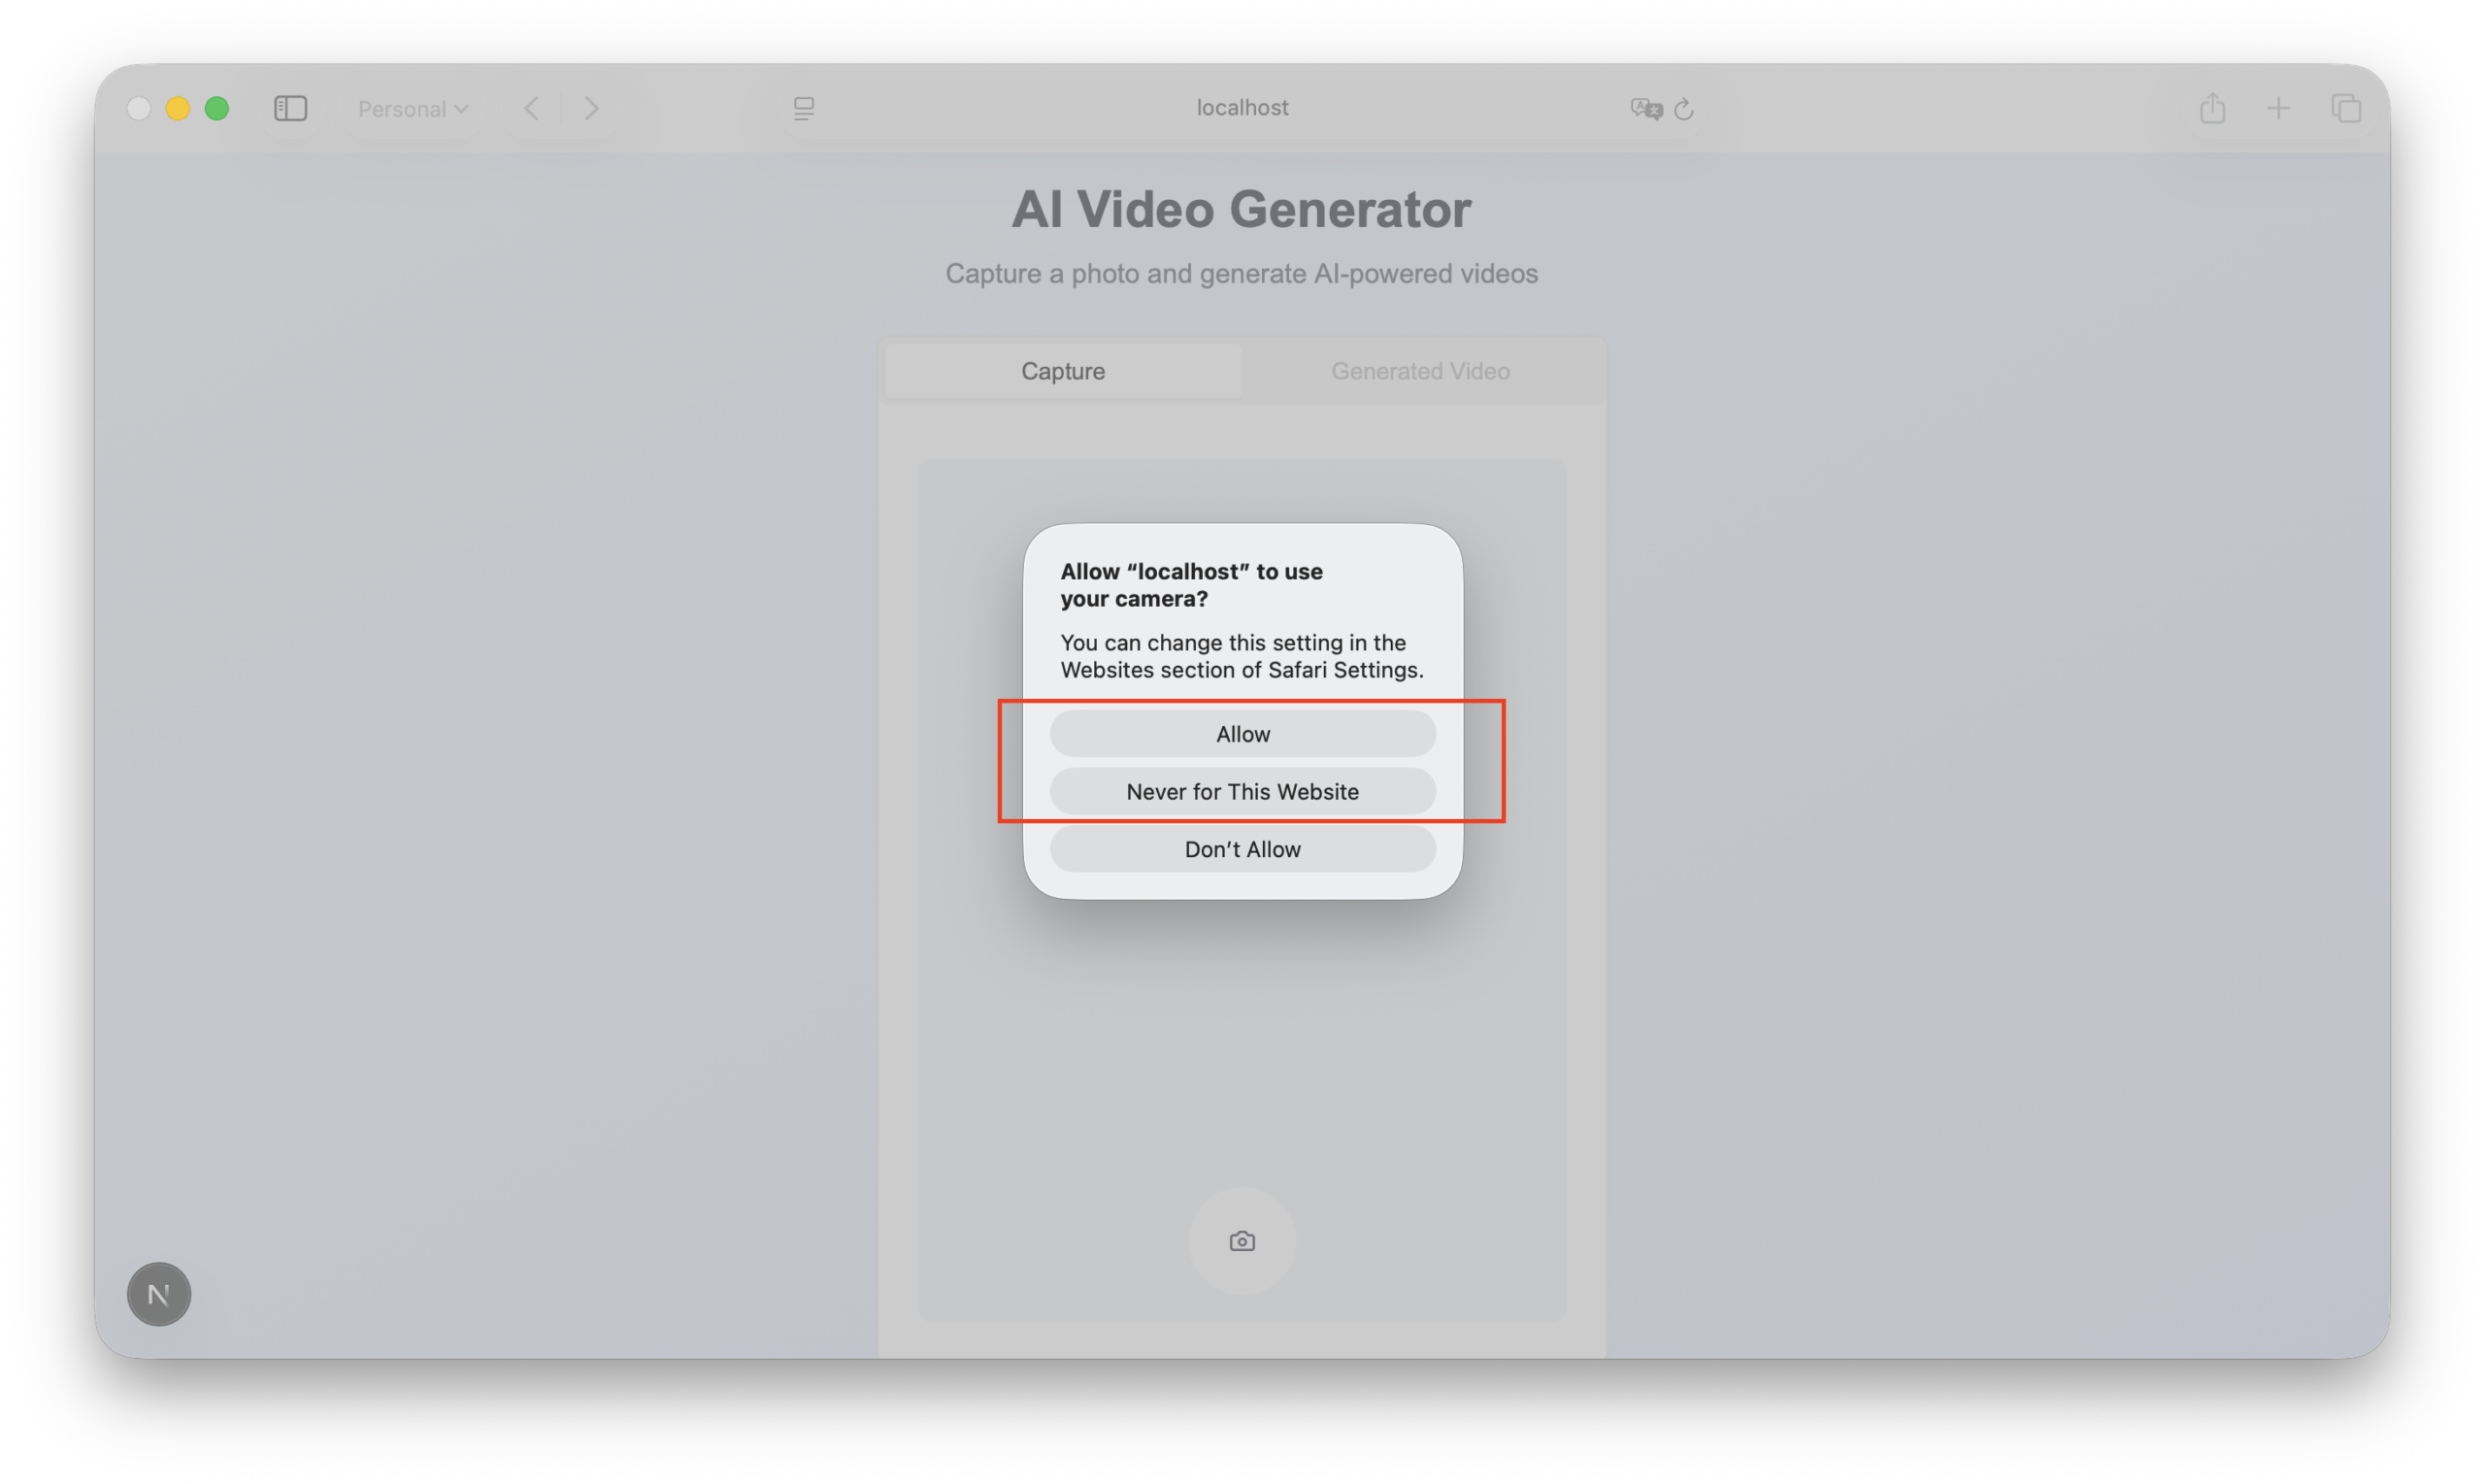
$ npm run dev5. Open the application
Open the application in your browser at http://localhost:3000. You also need to
allow the browser to access your camera. If you access the web application from a mobile device, there will be an
option to select between the rear and back camera.
Architecture
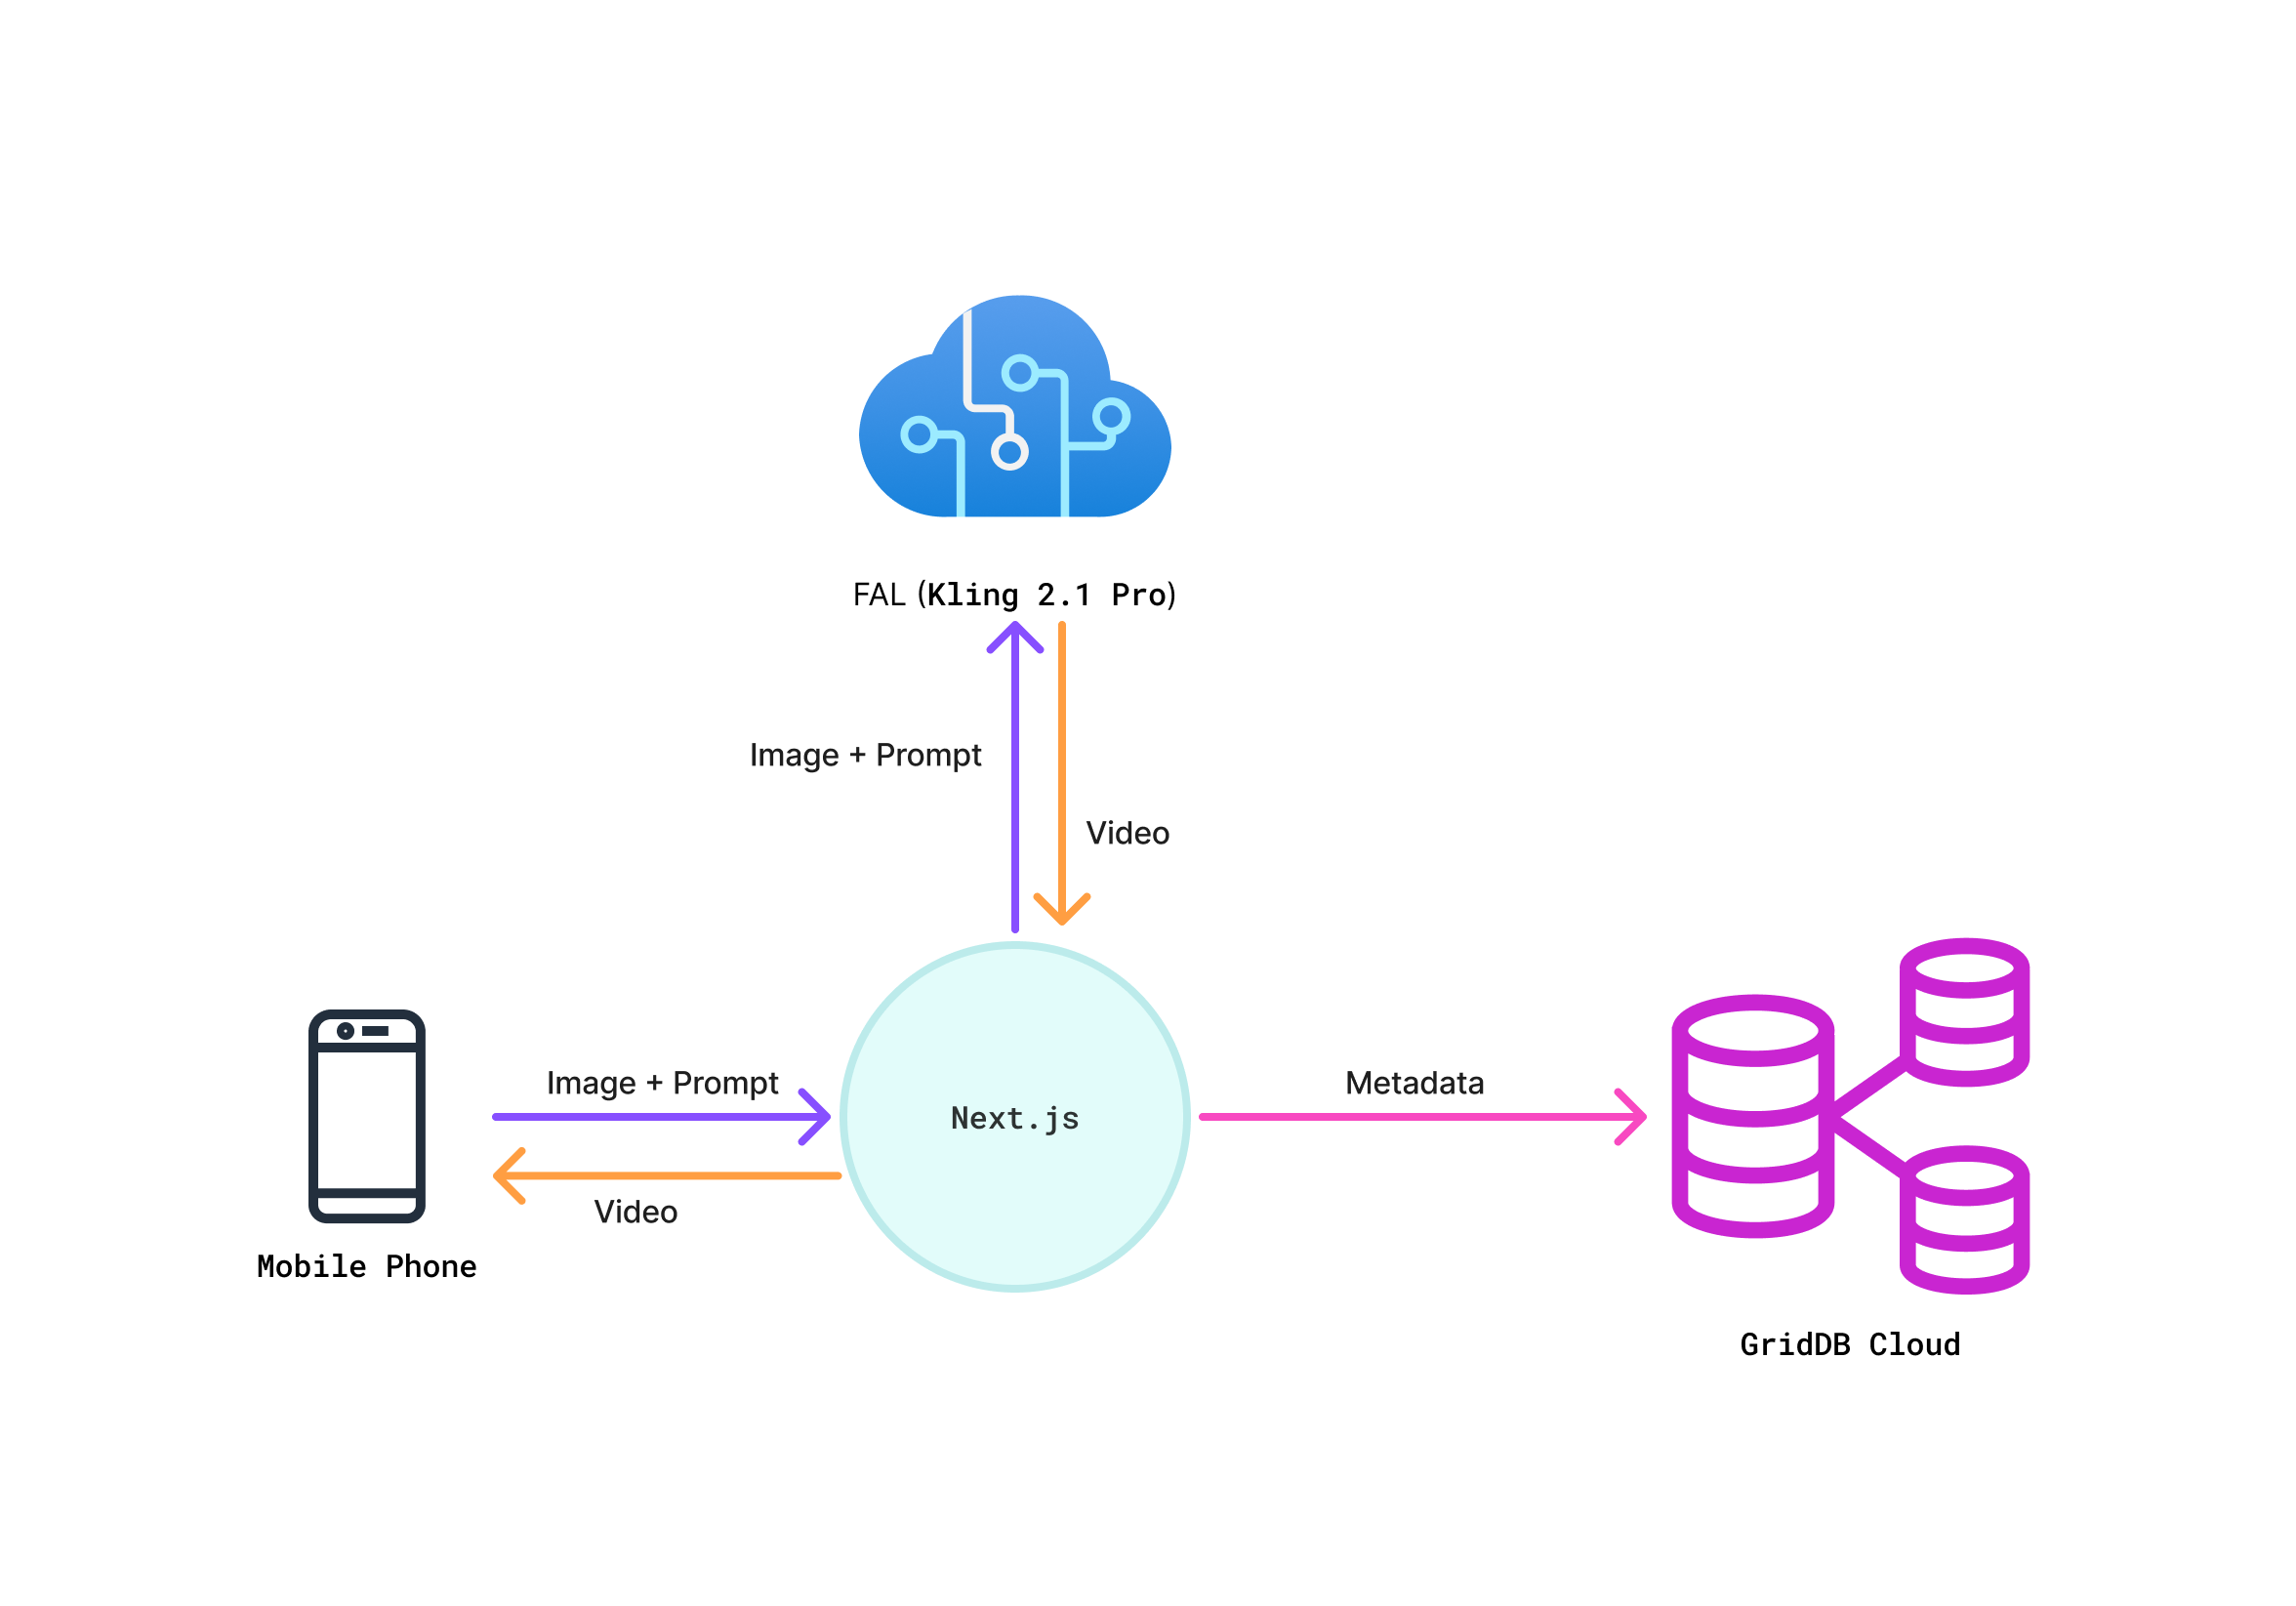
The architecture and user flow are intentionally simple for rapid development and ease of use. Users access the app
from any desktop or mobile browser. After capturing an image with their device’s camera, they enter a prompt
describing the video they want to generate.
The Next.js frontend sends both the image and prompt to Fal AI’s Kling 2.1 model. Kling 2.1 processes these inputs,
generates a video, and returns it directly to the browser client.
When generation is done, the metadata: image URL, prompt, and generated video URL will be saved to the GridDB Cloud.
Technical Implementations
Camera Captures
The use-camera.ts is a useCamera custom hook, which encapsulates all the logic for
controlling the camera, including starting, stopping, switching, and capturing a photo. The capturePhoto
function is the one that actually captures the image from the video stream and returns it as a base64-encoded JPEG.
// ... existing code ...
  const capturePhoto = useCallback(() => {
    if (videoRef.current && canvasRef.current) {
      const canvas = canvasRef.current
      const video = videoRef.current
      const context = canvas.getContext('2d')

      canvas.width = video.videoWidth
      canvas.height = video.videoHeight

      if (context) {
        context.drawImage(video, 0, 0)
        const imageData = canvas.toDataURL('image/jpeg')
        stopCamera()
        optionsRef.current.onSuccess?.('Photo captured successfully')
        return imageData
 }
 }
    optionsRef.current.onError?.('Failed to capture photo')
    return null
 }, [stopCamera])
// ... existing code ...
The app/page.tsx is the main page component. It uses the useCamera hook to get the
capturePhoto function and other camera-related state and methods. The handleCapturePhoto
function is called when the user clicks the capture button. This function calls capturePhoto from the
hook and then updates the application state with the captured image data.
// ... existing code ...
  // Handle photo capture
  const handleCapturePhoto = () => {
    const imageData = capturePhoto()
    if (imageData) {
      setCapturedImage(imageData)
      setState('captured')
 }
 }
// ... existing code ...
Image Prompt
In the app/page.tsx, there is a prompt input that only shows after a photo has been captured
(state === 'captured').
// ... existing code ...
 {/* Prompt Input Section - Only show after photo is captured */}
 {(state === "captured" || state === "generating" || state === "completed") && (
 <div>
 <div className="space-y-2">
 <Label htmlFor="prompt" className="text-lg font-semibold">
                        2. Enter Your Creative Prompt
 </Label>
 <Textarea
                        id="prompt"
                        placeholder="e.g., a majestic lion roaring on a cliff, cinematic lighting"
                        value={prompt}
                        onChange={(e) => setPrompt(e.target.value)}
                        className="min-h-[80px] text-base"
                        disabled={state === "generating"}
 />
 </div>
 </div>
 )}
 </TabsContent>

 <TabsContent value="video" className="p-6">
 <div className="space-y-6">
 {/* Video and Generation status */}
// ... existing code ...
Along with the capturedImage, this prompt will be used to generate video. This will happen
if the user clicks the Generate Video button.
Generate Video
Kling 2.1 API from the Fal needs two main parameters:
- Image reference, which is the image the user captured from the camera
- Prompt for the video creation.
Before the video generation, the captured image needed to be saved first. In this app, we use Fal server to save the
captured image.
    // ... existing code ...
      static async uploadImage(imageData: string): Promise<ImageUploadResponse> {
 try {
          // Convert data URL to blob
          const response = await fetch(imageData);
          const blob = await response.blob();

          // Create form data
          const formData = new FormData();
          formData.append('file', blob, 'captured-image.jpg');

          const uploadResponse = await fetch(`${this.baseUrl}/upload-image`, {
            method: 'POST',
            body: formData,
 });
    // ... existing code ...
The upload process is handled by the /api/upload-image endpoint. This route uses the Fal.ai client
(@fal-ai/client) to upload it to Fal.ai’s storage. It then returns the public URL of the uploaded image.
    // ... existing code ...
    import { fal } from '@fal-ai/client';
    // ... existing code ...
        // Upload file to Fal.ai storage
        const uploadUrl = await fal.storage.upload(file);

        return NextResponse.json({
          success: true,
          url: uploadUrl,
          file_name: file.name
 });
    // ... existing code ...
After successfully uploading an image and we get the image URL, the useVideoGeneration hook will call
VideoSeevice.generateVideo, passing the image URL and the user’s prompt:
    // ... existing code ...
          setUploadedImageUrl(uploadResult.url)

          // Start video generation
          setState('generating')
          setGenerationStatus('initializing')

          const result = await VideoService.generateVideo({
            image_url: uploadResult.url,
            prompt: prompt,
 })
    // ... existing code ...
The generateVideo will call the /api/generate-video endpoint, which in turn calls the Fal.ai
Kling AI model to start the video generation job.
Kling 2.1 from Fal
The AI model we use to generate video is Kling 2.1. Like other models on Fal, it
is best accessed asynchronously. After the video generation job is submitted to Fal.ai, the application enters a
monitoring phase to wait for the video to be ready. This is handled by polling for the result in an asynchronous
process.
Here, step by step, is implemented in this app until the video is ready:
1. Initiating polling.
The useVideoGeneration hook in hooks/use-video-generation.ts doesn’t just fire and forget.
After submitting the job and getting a request_id, it starts a polling mechanism to repeatedly check the
status of the generation job.
        // ... existing code ...
      if (result.success && result.request_id) {
        const imageUrl = uploadResult.url

        // Polling function
        const poll = async () => {
          try {
            const videoResult = await VideoService.getVideoResult(result.request_id!)
            const status = (videoResult as any).status

            setGenerationStatus(status)
            options.onStatusChange?.(status)

            if (status === 'COMPLETED') {
            // ... existing code ...
     } else if (status === 'FAILED' || status === 'CANCELLED') {
            // ... existing code ...
     } else {
              // Continue polling
              setTimeout(poll, pollInterval)
     }
     } catch (error) {
          // ... existing code ...
     }
     }

        poll()
     }
    // ... existing code ...
2. Checking the job status.
The poll function calls VideoService.getVideoResult, which is responsible for fetching the latest status
of the video generation job.
        // ... existing code ...
      /**
     * Get the result of a video generation task
     */
      static async getVideoResult(requestId: string): Promise<VideoResultResponse> {
     try {
          const response = await fetch(`${this.baseUrl}/get-video?request_id=${requestId}`);
          const result = await response.json();

          if (!response.ok) {
            throw new Error(result.error || 'Failed to get video result');
     }

          return result;
     } catch (error) {
     return {
            success: false,
            error: 'Failed to process request',
            details: error instanceof Error ? error.message : 'Unknown error'
     };
     }
     }
    // ... existing code ...
3. Call the API endpoint for a status check.
The VideoService calls the /api/get-video endpoint. This endpoint uses the
fal-ai client library to get the status of the job from Fal.ai using the request_id.
         // ... existing code ...
    export async function GET(request: NextRequest) {
      try {
        const { searchParams } = new URL(request.url)
        const requestId = searchParams.get('request_id')

        if (!requestId) {
          return NextResponse.json(
     { error: 'Missing request_id parameter' },
     { status: 400 }
     );
     }

        const result = await fal.queue.get(requestId);

        return NextResponse.json(result);

     } catch (error) {
        return NextResponse.json(
    // ... existing code ...
4. Handling video when the status is complete.
Once the polling mechanism receives a COMPLETED status, the useVideoGeneration hook updates
the application state with the generated video’s URL and calls the onSuccess callback that was passed to
it from the main page component.
        // ... existing code ...
            if (status === 'COMPLETED') {
              const generatedVideoUrl = (videoResult as any).data.data.video.url
              setGeneratedVideo(generatedVideoUrl)
              setState('completed')
              setIsLoading(false)
              setGenerationStatus(null)

              options.onSuccess?.(generatedVideoUrl, imageUrl, prompt)

     }
    // ... existing code ...
Once the video generation is complete, the video will be displayed in the Generated Video UI tab.
More on this in the User Interface section.
API Routes
This web app exposed some API. Here is a table summarizing all the API routes used in this web application, along with
their HTTP methods and descriptions.
| Route | HTTP Method | Description |
|---|---|---|
/api/upload-image |
POST |
Receives an image file from the client and uploads it to Fal.ai’s temporary storage, returning a URL. |
/api/generate-video |
POST |
Submits a job to the Fal.ai Kling AI model to generate a video using an image URL and a text prompt. |
/api/get-video |
GET |
Polls the Fal.ai service to check the status of a video generation job using its request_id. |
/api/save-data |
POST |
Saves the metadata for a generated video (image URL, prompt, video URL) into the GridDB database. |
Saving Data to GridDB
After the video generation is completed, the app will save the metadata to GridDB Cloud. This saves the metadata of
the generated video (the original image URL from Fal.ai, the user’s prompt, and the new video URL) to your GridDB
database.
So, here is the data schema used in the database that you can find in the lib/types/griddb.types.ts file:
// Types for container data
export interface GridDBData {
    id: string | number;
    imageURL: string;
    prompt: string;
    generatedVideoURL: string;
}
The sava data happening in the app\page.tsx main component:
    // ... existing code ...
      // Video generation management
      const {
    // ... existing code ...
 } = useVideoGeneration({
        onSuccess: async (videoUrl, imageUrl, promptText) => {
          setState('completed')
          setActiveTab('video')

    // ... existing code ...

          // Auto-save data
          const saved = await saveData({
            imageURL: imageUrl,
            prompt: promptText,
            generatedVideoURL: videoUrl,
 })
    // ... existing code ...
This saveData function calls the /api/save-data endpoint to perform the database operation.
Read Data from GridDB
The GET method in the /api/save-data/route.ts file is responsible for fetching all records
from the database.
Here’s how it works:
// ... existing code ...
// Optional: Add GET method to retrieve data
export async function GET(request: NextRequest) {
  try {
    const { searchParams } = new URL(request.url);
    const id = searchParams.get('id');
    const limit = searchParams.get('limit') || '10';
// ... existing code ...
    let query;
    if (id) {
      // Search for specific ID
      query = {
        type: 'sql-select',
        stmt: `SELECT * FROM camvidai WHERE id = ${parseInt(id)}`
 };
 } else {
      // Get recent entries
      query = {
        type: 'sql-select',
        stmt: `SELECT * FROM camvidai ORDER BY id DESC LIMIT ${parseInt(limit)}`
 };
 }

    const result = await dbClient.searchData([query]);
// ... existing code ...
This GET function handles two cases:
- Fetch by ID: If an
idis provided as a query parameter (e.g.,
/api/save-data?id=123), it fetches that specific record. - Fetch All (Recent): If no
idis provided, it fetches the most recent entries from
thecamvidaicontainer, ordering them by ID in descending order. It defaults to alimitof
10 records, but this can be changed with a query parameter (e.g.,/api/save-data?limit=50).
So, to get all the data (or at least the most recent set), you would make a GET request to
/api/save-data.
User Interface
The user interface is built using Next.js. It has three main views:
- Capture Tab.
- Prompt Input (shows only after image captured).
- Generated Video Tab.
In essence, the UI is a wizard-like workflow that moves the user through a linear sequence: Capture ->
Prompt -> Generate -> View Video.
The best way to get to know the user interface is to try it yourself! ☺️ However, here is a demo so you can see what
the app looks like.
If you have any questions about the blog, please create a Stack Overflow post here https://stackoverflow.com/questions/ask?tags=griddb .
Make sure that you use the “griddb” tag so our engineers can quickly reply to your questions.