
This article mainly introduces how to develop and realize the dynamic visualization of the data set of GridDB in a web project. The source code of the project has been uploaded to GitHub
https://github.com/jianxiang78/DataVisualization
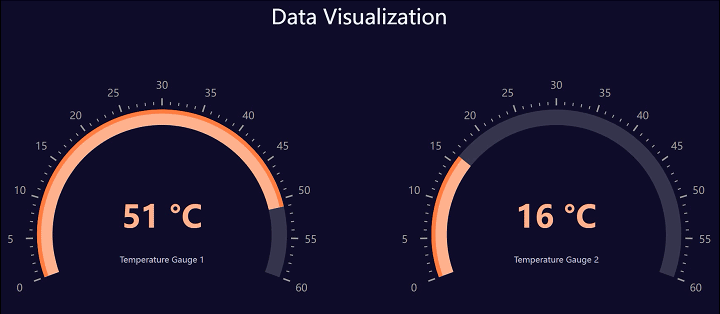
After the project runs, enter the address in the browser of the local computer http://127.0.0.1:8080, the screenshot
animation effect is as follows
Technology Stack
Operating System: Ubuntu-18.04.6
Front-end: HTML, JavaScript, ECharts 5.4.0, WebSocket
Back-end: Java 11.0.2, Spring Boot, WebSocket, Maven
Development tool: IntelliJ IDEA 2019
Database: GridDB 5.1.0
This project is a simple and complete WEB microservice system. The project simulates the data transmission of the Temperature Gauge in the Internet of Things scenario, and visualizes the changes of the data set in real time on the web. After opening the web page, the web page does not need to be refreshed, and the data changes can be displayed directly on the web page.
The data set of Temperature Gauge is stored in GridDB. In the code of the project, the timed task program simulates the data of the Internet of Things device constantly inserted into the GridDB.
The front-end uses ECharts to display the Gauge, and uses SockJs and Stomp to communicate with the back-end through WebSocket. The back-end uses SpringBoot to implement the server end of WebSocket, extract data from GridDB, and transfer the data to the front-end.
My local operating system uses Ubuntu – 18.04.6 and installs GridDB locally. The installation steps are very easy, which can be referred to on the official website. The website link is as follows
https://docs.griddb.net/gettingstarted/using-apt/#install-with-apt-get
The version of GridDB I installed is 5.1.0. After installation, there is a built-in gridstore.jar library that connects to the database. I have copied it into the project code in the “lib” directory. Because the gridstore.jar library was developed with JDK 11.0.2, the entire project also uses JDK 11.0.2 for compatibility.
How to establish communication at the front-end
This project adopts WebSocket mode, which allows the front-end and back-end to establish long link communication. In my project file index.html, introduce three JavaScript library files. The code is as follows
<script src="./js/echarts/echarts.min.js"></script>
<script src="./js/sockjs-0.3.4.js"></script>
<script src="./js/stomp.js"></script>
In the file index.html, use ECharts to display the dashboard, and use SockJs and Stomp to complete the long link of WebSocket. The custom function fromServer() implements the long link. The code is as follows
function fromServer() {
        var stomp = null;
        function connect() {
            var socket = new SockJS('/webSocketServer');
            stomp = Stomp.over(socket);
            var headers={
                "token":"data_token"
            };
            stomp.connect(headers, connectCallback ,errorCallback );
        };
        function connectCallback (frame) {
            //Callback function after successful connection
            console.log('Connected successful: ' + frame);
            stomp.subscribe('/data/iot1', function(serverResult){
                myChart1.setOption(JSON.parse(serverResult.body));
            });
            stomp.subscribe('/data/iot2', function(serverResult){
                myChart2.setOption(JSON.parse(serverResult.body));
            });
        }
        function errorCallback(frame){
            //The callback function after the connection fails. This function calls the connection function again
            console.log('Connected fails: ' + frame);
            setTimeout(connect,2000);
        }
        connect();
    }
In the code above,
var socket = new SockJS('/webSocketServer');
Define a variable socket to handshake with the backend address “/webSocketServer”. The address “/webSocketServer” is the access point set in the backend SpringBoot. This setting will be explained in the following code.
stomp = Stomp.over(socket);
Define the variable stomp and use the STOMP protocol for communication.
stomp.connect(headers, connectCallback ,errorCallback );
Start to establish a link and add two callback functions, connectCallback() and errorCallback(). Handle connection success and connection failure respectively.
How to transfer data sets on the back-end
In the SpringBoot framework, set the access point of WebSocket first. Here I set the address to “/webSocketServer”. Set in the class WebSocketConfig.java. The code is as follows
package com.auto17.dataVisualization.config;

import org.springframework.context.annotation.Configuration;
import org.springframework.messaging.simp.config.MessageBrokerRegistry;
import org.springframework.web.socket.config.annotation.EnableWebSocketMessageBroker;
import org.springframework.web.socket.config.annotation.StompEndpointRegistry;
import org.springframework.web.socket.config.annotation.WebSocketMessageBrokerConfigurer;

@Configuration
@EnableWebSocketMessageBroker
public class WebSocketConfig implements WebSocketMessageBrokerConfigurer {

    @Override
    public void registerStompEndpoints(StompEndpointRegistry registry) {
        registry.addEndpoint("/webSocketServer")
                .setAllowedOrigins("*")
                .withSockJS();
    }

    @Override
    public void configureMessageBroker(MessageBrokerRegistry registry) {
        registry.enableSimpleBroker("/data");
    }
}
The class dbConnect.java implements the operation of data sets in GridDB. In the function of this class
getConnect() Realize connection acquisition of GridDB
close() Close the connection of GridDB
put(String containerName,Iot iot) Implement the insertion of temporal data objects
queryTopOne(String containerName) Realize the extraction of the latest item of time series data
Class Iot.java is the device data entity object, and uses the annotation @RowKey of GridDB to mark the primary key
package com.auto17.dataVisualization.DTO;

import com.toshiba.mwcloud.gs.RowKey;
import java.util.Date;

public class Iot {
    @RowKey Date timestamp;
    String name;
    int value;
    public Iot(){}
    public String getName() {
        return name;
    }
    public void setName(String name) {
        this.name = name;
    }
    public int getValue() {
        return value;
    }
    public void setValue(int value) {
        this.value = value;
    }
}
In this project, in order to simulate the data transmitted by the Internet of Things devices, the class TaskSimulate.java is created to perform the scheduled task. In this class, the timing task has two functions, simulator1() and simulator2(), which represent two simulators respectively. They generate simulation data and insert it into GridDB. The code is shown below
@Component
public class TaskSimulate {
    ...
    @Scheduled(cron ="*/3 * * * * ?")
    public void simulator1() {
        ...
    }

    @Scheduled(cron ="*/5 * * * * ?")
    public void simulator2() {
        ...
    }
}
In the class IotTask.java, there are also two functions IoT1() and IoT2() that perform scheduled tasks. They cycle to extract the data of the corresponding devices from the GridDB. The obtained data is then pushed to the front-end through WebSocket. The code is shown below
package com.auto17.dataVisualization.iot;

import com.alibaba.fastjson.JSONArray;
import com.alibaba.fastjson.JSONObject;
import com.auto17.dataVisualization.DTO.Iot;
import com.auto17.dataVisualization.grid.dbConnect;
import org.slf4j.Logger;
import org.slf4j.LoggerFactory;
import org.springframework.messaging.simp.SimpMessagingTemplate;
import org.springframework.scheduling.annotation.Scheduled;
import org.springframework.stereotype.Component;

@Component
public class IotTask {
    public static SimpMessagingTemplate messagingTemplate=null;

    private final Logger logger = LoggerFactory.getLogger(IotTask.class);
    private int index;
    private Iot iot;

    //Execute every X seconds
    @Scheduled(fixedRate = 1000 * 4)
    public void IoT1(){
        String iotName="iot1";
        iot = dbConnect.queryTopOne(iotName);
        if(iot==null){
            return;
        }
        index = iot.getValue();
        logger.info("The server sends a message to the client ["+iotName+"]:");

        if(messagingTemplate!=null){
            messagingTemplate.convertAndSend(
                    "/data/"+iotName, ioTData("Temperature Gauge 1",index));
        }else {
            logger.info(iotName+" messagingTemplate is null");
        }
    }

    //Execute every X seconds
    @Scheduled(fixedRate = 1000 * 5)
    public void IoT2(){
        String iotName="iot2";
        iot = dbConnect.queryTopOne(iotName);
        if(iot==null){
            return;
        }
        index = iot.getValue();
        logger.info("The server sends a message to the client ["+iotName+"]:");
        if(messagingTemplate!=null){
            messagingTemplate.convertAndSend(
                    "/data/"+iotName, ioTData("Temperature Gauge 2",index));
        }else {
            logger.info(iotName+" messagingTemplate is null");
        }
    }

    private String ioTData(String name,int value) {
        JSONArray arrayRoot=new JSONArray();
        JSONObject data1=new JSONObject();
        JSONArray arrayNode1=new JSONArray();
        JSONObject Node1=new JSONObject();
        data1.put("name",name);
        data1.put("value",value);
        arrayNode1.add(data1);
        Node1.put("data",arrayNode1);
        arrayRoot.add(Node1);

        JSONObject data2=new JSONObject();
        JSONArray arrayNode2=new JSONArray();
        JSONObject Node2=new JSONObject();
        data2.put("name",name);
        data2.put("value",value);
        arrayNode2.add(data2);
        Node2.put("data",arrayNode2);
        arrayRoot.add(Node2);

        JSONObject ioTData=new JSONObject();
        ioTData.put("series",arrayRoot);
        return ioTData.toJSONString();
    }
}
In the above code, the function ioTData(String name, int value) converts the data into JSON format. It creates two nodes for each group of data to store the same data. This is because Echarts’ Temperature Gauge requires two node data at a time to display the effect.
This article is an overview of a simple implementation of data visualization for data sets in GridDB. In the Internet of Things business scenario, there are thousands of Internet of Things devices, and the data is massive. This article provides an idea. If you are interested, you can download the code from GitHub.
How to run easily locally
After the project code is downloaded from GitHub, it is a ZIP compressed package. After unpacking, the code is in the directory “DataVisualization”. In the IntelliJ IDEA development tool, through File ->New ->Project from Existing Sources, specify the directory “DataVisualization”, and you can load the project code in Maven mode.
In the project’s configuration file “pom. xml”, I have set the Jar library packaging configuration. Execute the “install” operation in Maven, and “micro-web.jar” will be generated under the subdirectory “target” in the module “micro-web.jar”.
The generated “micro-web.jar” is an executable Jar library with Tomcat web container. Enter in the command
Java -jar micro-web.jar
You can start the web project. After startup, enter the address in the web browser “http://127.0.0.1:8080”. You can see
the demonstration effect of the project code.