Introduction:
In this tutorial, we’re going to dive into the exciting world of real-time chat applications. Imagine being able to instantly connect with friends, family, or colleagues from anywhere in the world. That’s the power of real-time chat, and today, you’re going to learn how to build one from scratch!
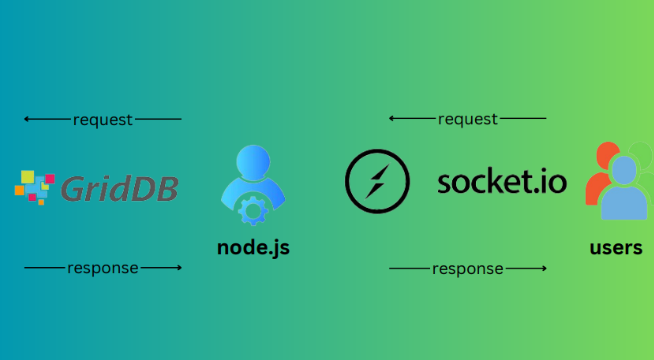
We’ll be using Node.js, a popular JavaScript runtime, to handle the server-side operations of our chat app. For the database, we’re going to utilize GridDB, a highly efficient NoSQL database that’s perfect for handling real-time data processing. Alongside these, we’ll incorporate Express, a minimalist web framework for Node.js, and Socket.io, a library that enables real-time, bidirectional event-based communication.
This tutorial is designed for those who have a basic understanding of JavaScript and are familiar with Node.js. Don’t worry if you’re not an expert; we’ll guide you through each step clearly and concisely. By the end of this tutorial, you’ll have a fully functioning real-time chat application, a deeper understanding of how these technologies work together, and a foundation you can use to build more complex applications in the future. Let’s get started!
Understanding the Technologies
NodeJS:
Node.js functions as a runtime environment that enables JavaScript code to operate outside the confines of a conventional web browser. Real-time application management is made easy using Node.js’s non-blocking, event-driven design, which leverages the Chrome V8 JavaScript engine. Its emphasis is on efficiency and responsiveness.
GridDB:
GridDB is particularly effective in real-time Internet of Things applications. It guarantees dependable and quick access with minimal latency and effective data management. GridDB is a great tool for efficient data management in chat apps since it is designed for real-time processing.
Express:
Express is a Node.js web application framework that offers numerous features for creating mobile and web applications. It is employed to build single-page, multipage, and hybrid web applications. As an overlay on top of Node.js, Express streamlines server and route management
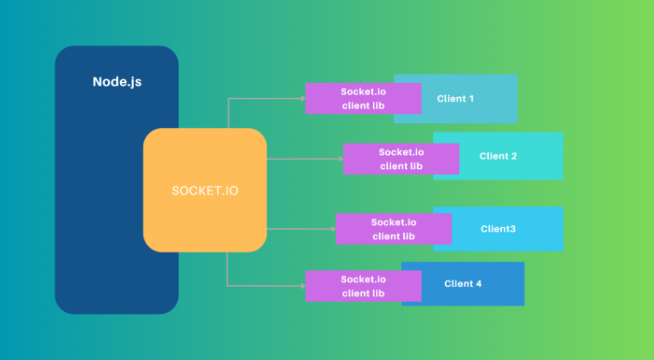
Socket.io:
A library called Socket.io is intended for real-time, event-driven web applications. It allows two-way communication between web clients and servers.
Prerequisites:
- It is essential to have a basic grasp of JavaScript.
- Make sure that Node and NPM are installed on your computer.
Step-by-Step configuration:
Create a folder by using the command:
mkdir folder_nameChange the current working directory by using the command:
cd folder_nameAfter that, open the folder you just created in Visual Studio Code, and to launch a new project, run the command:
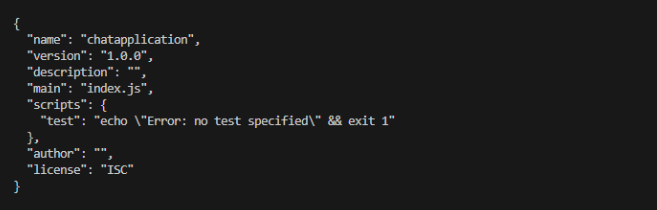
npm init -yThe output will look like this:
Now, to install Express, use the command:
npm install -save expressNow install socket.io using the command:
npm install -save socket.ioSetting Up GridDB:
Run the following commands on the system’s terminal.
To install with rpm, run the commands:
First, create the apt repo file by using:
sudo sh -c 'echo "deb https://www.griddb.net/apt griddb/5.3 multiverse" >> /etc/apt/sources.list.d/griddb.list'Then import the key by using:
wget -qO - https://www.griddb.net/apt/griddb.asc | sudo apt-key add -Next, check for the updates using:
sudo apt updateFinally, install GridDB by using:
sudo apt install griddb-metaStart the GridDB Server by using:
sudo systemctl start gridstoreStop the server by using:
sudo systemctl stop gridstoreChange the default password of admin by using the command:
export GS_HOME=/var/lib/gridstore/
export GS_LOG=/var/lib/gridstore/log/
gs_passwd admin
Due to the absence of an init script in the GridDB Community Edition, GridDB must be started manually. Establish the service’s connection to other nodes after it has been started.
gs_startnode -u username/password
gs_joincluster -u admin/admin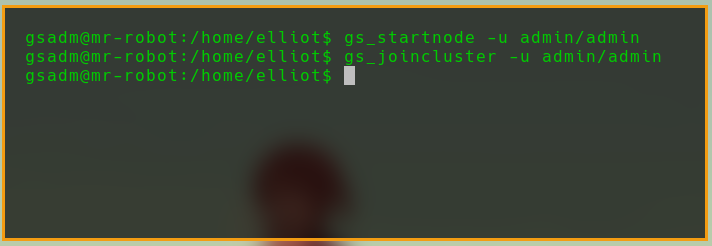
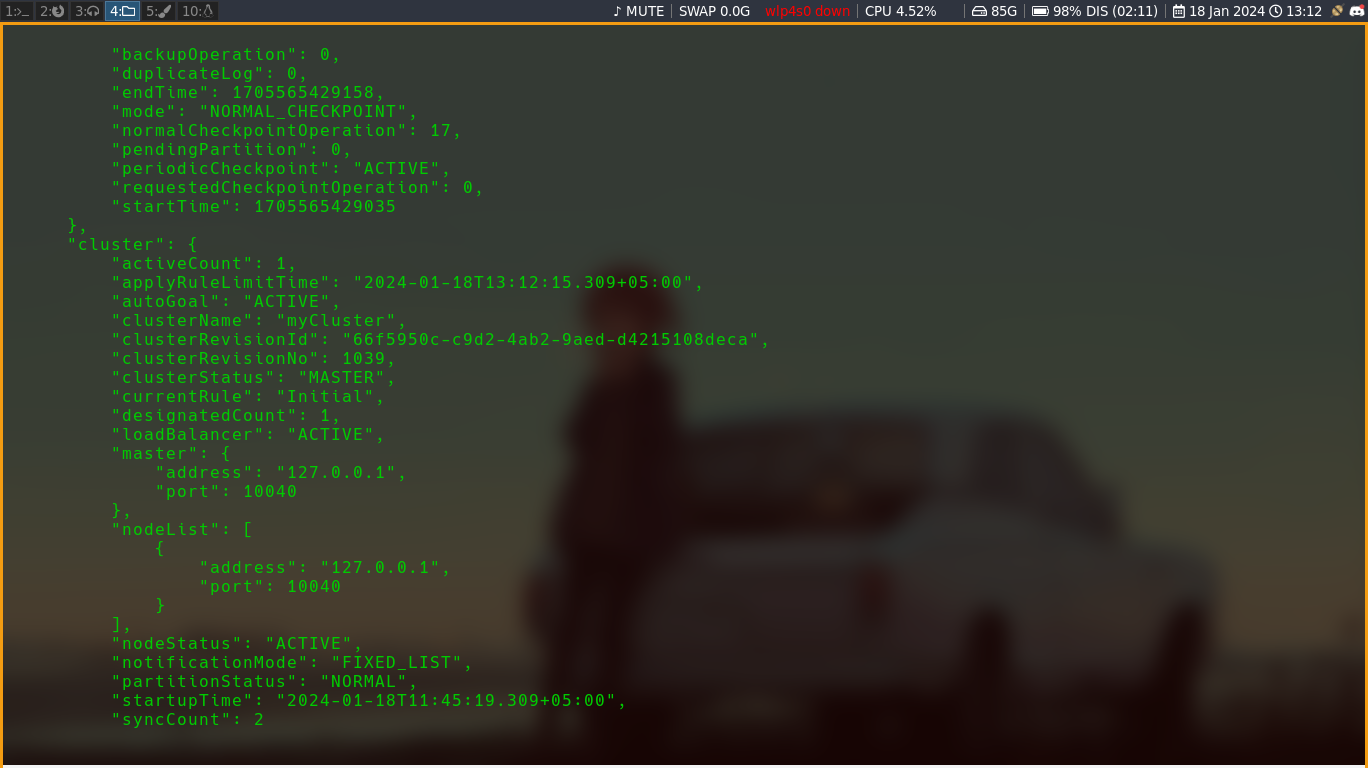
You can verify the status of GridDB by using the command:
gs_stat -u admin/adminOutput:
Then, create a file (in Visual Studio Code) called server.js that Node will use to function as the server.
Add the following code to it:
const express = require("express");
const socketio = require("socket.io");
const http = require("http");
const app = express();
const griddb = require("griddb-node-api");

const PORT = 3000;
const HOST = "0.0.0.0";
const server = http.createServer(app);
const io = socketio(server);
const factory = griddb.StoreFactory.getInstance();
const store = factory.getStore({
  notificationMember: "127.0.0.1:10001",
  clusterName: "myCluster",
  username: "admin",
  password: "admin",
});

// Schema
var timeConInfo = new griddb.ContainerInfo({
  name: "Chat",
  columnInfoList: [
    ["timestamp", griddb.Type.TIMESTAMP],
    ["username", griddb.Type.STRING],
    ["message", griddb.Type.STRING],
  ],
  type: griddb.ContainerType.TIME_SERIES,
  rowKey: true,
});

// Function to handle the "chat_message" event and store the message in GridDB
async function handleChatMessage(data) {
  try {
    let time_series;
    store
      .putContainer(timeConInfo, false)
      .then((ts) => {
        time_series = ts;
        return ts.put([new Date(), data.username, data.message]);
      })
      .then(() => {
        query = time_series.query(
          "select * where timestamp > TIMESTAMPADD(HOUR, NOW(), -6)"
        );
        return query.fetch();
      })
      .then((rowset) => {
        while (rowset.hasNext()) {
          var row = rowset.next();
          console.log(
            "Time =",
            row[0],
            "User =",
            row[1].toString(),
            "Text =",
            row[2]
          );
        }
      })
      .catch((err) => {
        if (err.constructor.name == "GSException") {
          for (var i = 0; i < err.getErrorStackSize(); i++) {
            console.log("[", i, "]");
            console.log(err.getErrorCode(i));
            console.log(err.getMessage(i));
          }
        } else {
          console.log(err);
        }
      });

    console.log("Chat message stored successfully.");
  } catch (error) {
    console.error("Error storing chat message:", error);
  }
}

// Fetch all data
const FetchAll = async function () {
  const container = await store.getContainer("Chat");

  const query = container.query(
    "select * where timestamp > TIMESTAMPADD(HOUR, NOW(), -6)"
  );
  const rowSet = await query.fetch();
  let res = [];
  while (rowSet.hasNext()) {
    const row = await rowSet.next();
    console.log("Name:", row[1].toString(), "Message:", row[2]);
    res.push({ username: row[1].toString(), message: row[2] });
  }
  return res;
};

app.use(express.static(__dirname + "/public"));

app.get("/", (req, res) => {
  res.sendFile(__dirname + "/public/index.html");
});

io.on("connection", (socket) => {
  console.log("A user connected: ", socket.id);

  socket.on("user_join", (username) => {
    io.emit("user_join", username);
  });

  socket.on("chat_message", (data) => {
    io.emit("chat_message", data);
    handleChatMessage(data);
  });

  socket.on("disconnect", () => {
    console.log("User disconnected");
  });
});

app.get("/", (req, res) => {
  res.send("Hello, World");
});

app.get("/api/messages", async (req, res) => {
  const response = await FetchAll();
  res.send(response);
});

app.post("/api/put", async (req, res) => {
  const { username, message } = req.query;
  let data = {
    username,
    message,
  };
  handleChatMessage(data);

  res.send("done");
});

server.listen(PORT, HOST);
console.log(`Running on http://${HOST}:${PORT}`);
Explanation of the code:
The above code creates a real-time chat server using Express, Socket.io, and GridDB. It connects to GridDB to store and retrieve chat messages in a time-series container with timestamp, username, and message columns. The server records user connections, disconnections, and chat messages. The handleChatMessage function asynchronously stores chat messages in GridDB. The server uses Express for the web interface and Socket-io for real-time communication. The code effectively integrates these technologies for a comprehensive chat server.
GridDB Initialization and Configuration
GridDB Store Initialization:
const factory = griddb.StoreFactory.getInstance();
const store = factory.getStore({...});
These lines initialize the connection to the GridDB store. StoreFactory.getInstance() fetches an instance of the store factory, and getStore() is then used to create a store connection with configuration details such as the cluster name, notification member (server address), and credentials.
Defining the Chat Container Schema:
var timeConInfo = new griddb.ContainerInfo({...});
This section defines the schema for a GridDB container named Chat. Containers in GridDB are similar to tables in relational databases. The schema specifies the data columns: a timestamp, a username, and a message, which are essential for a chat application. The type of the container is set to TIME_SERIES, indicating that the data is time-sequenced, which is apt for chat messages.
Creating/Accessing the Chat Container and Initial Data Insertion:
The store.putContainer() method is used to either create a new container or access an existing one based on the provided schema. The code inserts a sample record into the time series container.
GridDB Data Handling in Chat Application
Querying Recent Messages:
The code includes a query to retrieve messages from the last six hours. This is done using time_series.query(), demonstrating how GridDB can efficiently handle time-based queries, a common requirement in chat applications for fetching recent messages.
Inserting Chat Messages:
The handleChatMessage function is an asynchronous function that handles the storage of chat messages into the GridDB container. Each message, along with its timestamp and the sender’s username, is inserted into the Chat container. This function illustrates how new data is added to GridDB in real-time.
Let’s create an index.html file by clicking New File.
Add the following code to it:
<!DOCTYPE html>
<html>
  <head>
    <title>Chat App</title>
    <meta
      name="viewport"
      content="width=device-width,minimum-scale=1,initial-scale=1"
    />
    <style>
      body {
        margin: 0;
        font-family: sans-serif;
      }

      form {
        position: fixed;
        bottom: 0;
        left: 0;
        width: 100%;
        display: flex;
        box-sizing: border-box;
        padding: 0.25rem;
      }

      form input {
        border: 0;
        padding: 0.5rem;
        width: 100%;
        outline: 0;
        margin-right: 0.5rem;
        border-radius: 0.25rem;
        background: #ccc;
      }

      form button {
        width: 6rem;
        background-color: #1b8c00;
        color: white;
        border: none;
        padding: 0.5rem;
        cursor: pointer;
        border-radius: 0.25rem;
        text-transform: uppercase;
      }

      form button:hover {
        background-color: #166d01;
      }

      .messages {
        margin: 0;
        padding: 0;
        margin-bottom: 3rem;
      }

      .messages li {
        padding: 0.5rem;
      }

      .messages li:nth-child(odd) {
        background: #eee;
      }
    </style>
  </head>
  <body>
    <ul class="messages"></ul>
    <form>
      <input type="text" class="input" autocomplete="off" autofocus />
      <button>Send</button>
    </form>
    <!--Client side-->
    <script src="/socket.io/socket.io.js"></script>

    <script>
      const form = document.querySelector("form");
      const input = document.querySelector(".input");
      const messages = document.querySelector(".messages");
      const username = prompt("Please Enter Your Name");
      const socket = io();

      form.addEventListener(
        "submit",
        function (event) {
          event.preventDefault();

          // addMessage(username + ": " + input.value);

          socket.emit("chat_message", {
            username: username,
            message: input.value,
          });

          input.value = "";
          return false;
        },
        false
      );

      socket.on("chat_message", function (data) {
        addMessage(data.username + ": " + data.message);
      });

      socket.on("user_join", function (data) {
        addMessage(data + " Has Joined");
        fetch("/api/messages", {
          method: "GET",
          headers: {
            "Content-Type": "application/json",
          },
        })
          .then((res) => {
            res
              .json()
              .then((data) => {
                console.log(data);
                data.forEach((message) => {
                  addMessage(message.username + ": " + message.message);
                });
              })
              .catch((err) => {
                console.log(err);
              });
          })
          .catch((err) => {
            console.log(err);
          });
      });

      socket.on("user_leave", function (data) {
        addMessage(data + " Has Left");
      });
      socket.on("disconnect", function () {
        addMessage("You Have Disconnected");
      });

      addMessage("You Have Joined As " + username);
      socket.emit("user_join", username);

      function addMessage(message) {
        const li = document.createElement("li");
        li.innerHTML = message;
        messages.appendChild(li);
        window.scrollTo(0, document.body.scrollHeight);
      }
    </script>
  </body>
</html>
Explanation of the code:
The above code represents the client-side part of a real-time chat program. Using a <style> section to incorporate styling, the structure is conventional HTML5. An unordered list of chat messages is included in the body, along with a fixed form with an input field and a ‘Send’ button at the bottom for message entry. Real-time communication is made possible by the embedded JavaScript connecting to the server using the Socket.io framework. Login requires user input, and some activities, such as submitting a form, cause the server to receive Socket.io events. Additionally, the script updates the user interface dynamically by listening to different server-sent events.
Output:
Then, run the application by running the following command:
node server.js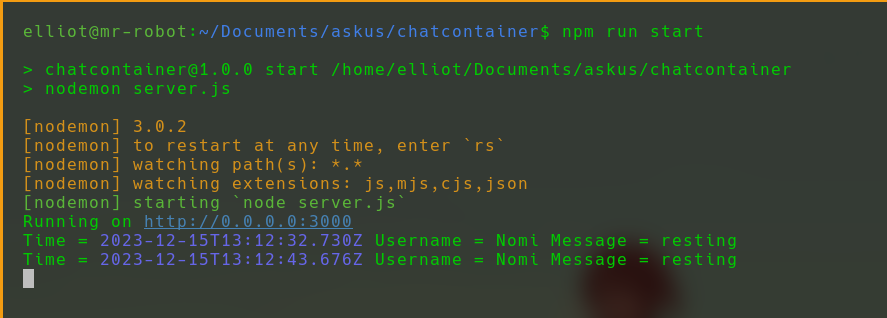
Now, open the browser and type the URL http://localhost:3000/ to launch the application as user 1. Then, open another browser window and type the same URL to launch the application as user 2.
Now, type a message in the input field and click the Send button. The message will be displayed in both the browser windows.
The output will look like this:
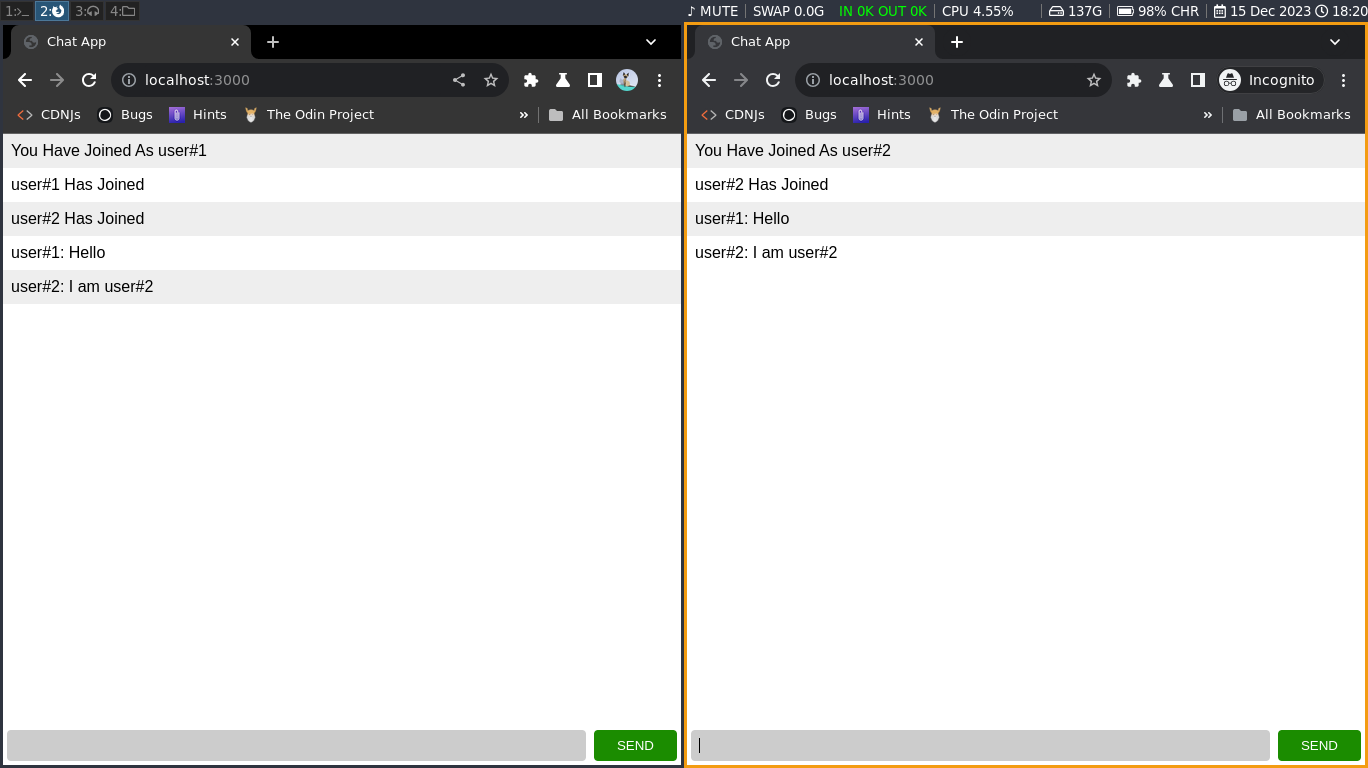
As you can see, the message is displayed in both the browser windows. The message is also stored in GridDB.
Conclusion:
In this guide, we have walked through the steps to create a real-time chat application, combining the power of Node.js with the robust data management capabilities of GridDB. This combination of technologies, along with Express for streamlined server setup and Socket.io for seamless real-time communication, forms a dynamic platform for immediate, interactive messaging.
You’ve seen how each component plays a crucial role: Node.js serves as the backbone, GridDB manages the chat data efficiently, Express simplifies the web server’s configuration, and Socket.io ensures that messages are exchanged in real time.
sarjusinghsir2580@gmail.com