In a previous blog, we discussed migrating a sample IoT dataset from PostgreSQL to GridDB. To accomplish our feat, we used the official GridDB import/export tools, walking through exactly how to use the tool, along with considering WHY a user may want to shift from using PostgreSQL over to GridDB. You can read about that process here: Using the GridDB Import/Export Tools to Migrate from PostgreSQL to GridDB
In this article, we will again consider the idea of migrating from PostgreSQL, but rather than stick to the import/export tools, we will be showcasing Apache Airflow. If you are unfamilar with Airflow, it “is a platform to programmatically author, schedule, and monitor workflows”. To put Airflow’s description into simpler terms: Airflow allows for you to use python code to schedule workflows — these worksflows usually are broken up into smaller tasks which can be orchestrated to run in a sequence of your choosing.
For this blog, we will be using Airflow to migrate the same dataset from our previous blog. And then once that feat is accomplished, we will also be scheduling a DAG ( Directed Acyclic Graph ) to periodically migrate new rows from PostgeSQL over to GridDB, ensuring that our two databases are always at parity (well, at least after our scheduled intervals).
Before we get into the technical aspects of this project, let’s first get Airflow installed onto our machine, along with all prerequisites.
Preparing and Installation
As stated, this section will go over installing this project onto your machine. The nice thing about Airflow is that they provide docker images to make installing, sharing, and extending the installation an easy endeavor. This article works off of using Airflow in a docker container, but more on that later.
Prerequisites
To follow along you will need the following:
That’s it! All other databases and libraries are installed via docker containers.
Grabbing Source Code
To grab all source code for this project, please clone the following repository: GitHub
$ git clone https://github.com/griddbnet/Blogs.git --branch apache_airflowOnce it’s cloned, you will have a folder with all of the necessary docker files and code needed to begin.
The Docker Containers
We will first go through the Dockerfiles included inside the repo shared above and then finally we will touch on the docker-compose file before running our project.
Dockerfile for Extending the Airflow Image
To start, you will notice there is a file called Dockerfile.airflow. This file extends the original apache/airflow image to add some of the Python libraries we need for our project.
The file looks like so:
FROM apache/airflow:latest-python3.10
COPY requirements.txt /requirements.txt

USER root
RUN apt-get update
  && apt-get install -y --no-install-recommends
         default-jre  wget build-essential swig
  && apt-get autoremove -yqq --purge
  && apt-get clean
  && rm -rf /var/lib/apt/lists/*

RUN wget https://repo1.maven.org/maven2/com/github/griddb/gridstore-jdbc/5.1.0/gridstore-jdbc-5.1.0.jar -P /usr/share/java

# Install GridDB c_client
WORKDIR /
RUN wget --no-check-certificate https://github.com/griddb/c_client/releases/download/v5.0.0/griddb-c-client_5.0.0_amd64.deb
RUN dpkg -i griddb-c-client_5.0.0_amd64.deb

USER airflow

RUN pip install --user --upgrade pip
RUN pip install --no-cache-dir --user -r /requirements.txt
RUN pip install --no-cache-dir apache-airflow-providers-common-sql
RUN pip install --no-cache-dir apache-airflow-providers-jdbc
RUN pip install --no-cache-dir griddb-python

ENV JAVA_HOME=/usr/share/java/gridstore-jdbc-5.1.0.jar
To start, for this project, we are installing JDBC and the GridDB Python client. We will not actually be using JDBC for the remainder of this project, but it is included because JDBC allows full use of SQL and may come in handy for future projects. More on connecting via JDBC later.
For the GridDB Python client to be installed, we need python3.10, which is why we chose to extend apache/airflow:latest-python3.10. With the GridDB Python Client installed, we can access GridDB via TQL and work through using GridDB directly through a Python script — this ties into one of the major benefits of using GridDB over PostgreSQL.
Dockerfile for Extending the GridDB Image
The next file I’d like to showcase here is Dockerfile.griddb. Here are the contents:
from griddb/griddb

USER root

# Install GridDB c_client
WORKDIR /
RUN wget --no-check-certificate https://github.com/griddb/c_client/releases/download/v5.0.0/griddb-c-client_5.0.0_amd64.deb
RUN dpkg -i griddb-c-client_5.0.0_amd64.deb

RUN wget --no-check-certificate https://github.com/griddb/cli/releases/download/v5.0.0/griddb-ce-cli_5.0.0_amd64.deb
RUN dpkg -i griddb-ce-cli_5.0.0_amd64.deb

USER gsadm
We are extending the base GridDB image solely to add in the GridDB C-Client as a prereq for other GridDB libraries; we are also adding in the GridDB CLI tool so that we may query our DB easily if needed.
Airflow’s Docker-Compose File
The most important part of the installation process is using the docker-compose.yml file provided by the Airflow team; this file contains all of the different services/containers which are needed to run the Airflow tool. The nice thing about using docker-compose is that all of the services contained within the file are automatically placed within a shared network space. Not only that, but we can bring up and bring down all services with one singular command — including those images which we extended ourselves. Handy!
I will not be showcasing the entirety of the contents here as the file is really large, but here is a snippet:
---
version: '3'
x-airflow-common:
  &airflow-common
  image: ${AIRFLOW_IMAGE_NAME:-extending_airflow:latest}
  environment:
    &airflow-common-env
    AIRFLOW__CORE__EXECUTOR: CeleryExecutor
    AIRFLOW__DATABASE__SQL_ALCHEMY_CONN: postgresql+psycopg2://airflow:airflow@postgres/airflow
    # For backward compatibility, with Airflow <2.3
    AIRFLOW__CORE__SQL_ALCHEMY_CONN: postgresql+psycopg2://airflow:airflow@postgres/airflow
    AIRFLOW__CELERY__RESULT_BACKEND: db+postgresql://airflow:airflow@postgres/airflow
    AIRFLOW__CELERY__BROKER_URL: redis://:@redis:6379/0
    AIRFLOW__CORE__FERNET_KEY: ''
    AIRFLOW__CORE__DAGS_ARE_PAUSED_AT_CREATION: 'true'
    AIRFLOW__CORE__LOAD_EXAMPLES: 'true'
    AIRFLOW__API__AUTH_BACKENDS: 'airflow.api.auth.backend.basic_auth'
    _PIP_ADDITIONAL_REQUIREMENTS: ${_PIP_ADDITIONAL_REQUIREMENTS:-}
  volumes:
    - ./dags:/opt/airflow/dags
    - ./logs:/opt/airflow/logs
    - ./plugins:/opt/airflow/plugins
  user: "${AIRFLOW_UID:-50000}:0"
  depends_on:
    &airflow-common-depends-on
    redis:
      condition: service_healthy
    postgres:
      condition: service_healthy

  griddb-server:
    build:
      context: .
      dockerfile: Dockerfile.griddb
    expose:
      - "10001"
      - "10010"
      - "10020"
      - "10040"
      - "20001"
      - "41999"
    environment:
      NOTIFICATION_MEMBER: 1
      GRIDDB_CLUSTER_NAME: myCluster


  postgres:
    image: postgres:13
    environment:
      POSTGRES_USER: airflow
      POSTGRES_PASSWORD: airflow
      POSTGRES_DB: airflow
    volumes:
      - postgres-db-volume:/var/lib/postgresql/data
      - ./dags:/var/lib/postgresql/dags
    ports:
      - 5432:5432
    healthcheck:
      test: ["CMD", "pg_isready", "-U", "airflow"]
      interval: 5s
      retries: 5
    restart: always

      airflow-webserver:
    <<: *airflow-common
    command: webserver
    ports:
      - 8080:8080
    healthcheck:
      test: ["CMD", "curl", "--fail", "http://localhost:8080/health"]
      interval: 10s
      timeout: 10s
      retries: 5
    restart: always
    depends_on:
      <<: *airflow-common-depends-on
      airflow-init:
        condition: service_completed_successfully
As can be seen here, this file contains instructions for running various containers, including the two databases being showcased here. You will also notice that the GridDB service is being build directly from the local Dockerfile.griddb file. Astute observers may also notice that Airflow is not getting the same treatment despite it also having its own Dockerfile in this repository.
The reason for that is that the original Airflow compose orchestration file uses the x-airflow-common environment variables to keep things consistent with this file among the many different services. To play nice with this sort of docker-compose file building, we must build our image locally so that the compose file can use that pre-built image for the purposes of this project.
Running the Docker Containers
As stated above, the very first thing we must do is build our Dockerfile.airflow image, and once it’s done, we can finally use the docker-compose command to run everything at once.
$ docker build -f Dockerfile.airflow . --tag extending_airflow:latestOnce this image is built, you should be able to see the extending_airflow:latest image in your local environment ($ docker images).
And now that this is ready, we can go ahead and run all of our services.
$ docker-compose up -d[+] Running 8/8
⠿ Container griddb-airflow Running 0.0s
⠿ Container airflow-redis-1 Healthy 18.6s
⠿ Container postgres-airflow Healthy 18.6s
⠿ Container airflow-airflow-init-1 Exited 37.2s
⠿ Container airflow-airflow-triggerer-1 Started 37.9s
⠿ Container airflow-airflow-scheduler-1 Started 37.9s
⠿ Container airflow-airflow-worker-1 Started 37.9s
⠿ Container airflow-airflow-webserver-1 Started 37.5s
This will go through and grab all relevant images from dockerhub or build the images locally (Dockerfile.griddb) and then once it’s ready, all containers will be running directly on your machine.
This can be verified by running the process status command:
$ docker psCONTAINER ID IMAGE COMMAND CREATED STATUS PORTS NAMES
ad1511b22415 extending_airflow:latest "/usr/bin/dumb-init …" About a minute ago Up About a minute (healthy) 0.0.0.0:8080->8080/tcp, :::8080->8080/tcp 3_airflow_migration-airflow-webserver-1
68bdef86bf4f extending_airflow:latest "/usr/bin/dumb-init …" About a minute ago Up About a minute (healthy) 8080/tcp 3_airflow_migration-airflow-scheduler-1
b020473ce932 extending_airflow:latest "/usr/bin/dumb-init …" About a minute ago Up About a minute (healthy) 8080/tcp 3_airflow_migration-airflow-triggerer-1
69c99ea8ce87 extending_airflow:latest "/usr/bin/dumb-init …" About a minute ago Up About a minute (healthy) 8080/tcp 3_airflow_migration-airflow-worker-1
9c778c1f1d72 3_airflow_migration_griddb-server "/bin/bash /start-gr…" About a minute ago Up About a minute 10001/tcp, 10010/tcp, 10020/tcp, 10040/tcp, 20001/tcp, 41999/tcp griddb-airflow
921cc78b8c1b redis:latest "docker-entrypoint.s…" About a minute ago Up About a minute (healthy) 6379/tcp 3_airflow_migration-redis-1
0ba780dd6b99 postgres:13 "docker-entrypoint.s…" About a minute ago Up About a minute (healthy) 0.0.0.0:5432->5432/tcp, :::5432->5432/tcp postgres-airflow
Using Apache Airflow
Now that we have our tool up and running, the next thing we will want to do is of course interface with it. One of the containers/services within our docker-compose file hosts a webserver with a nice UI used for managing your workflows.
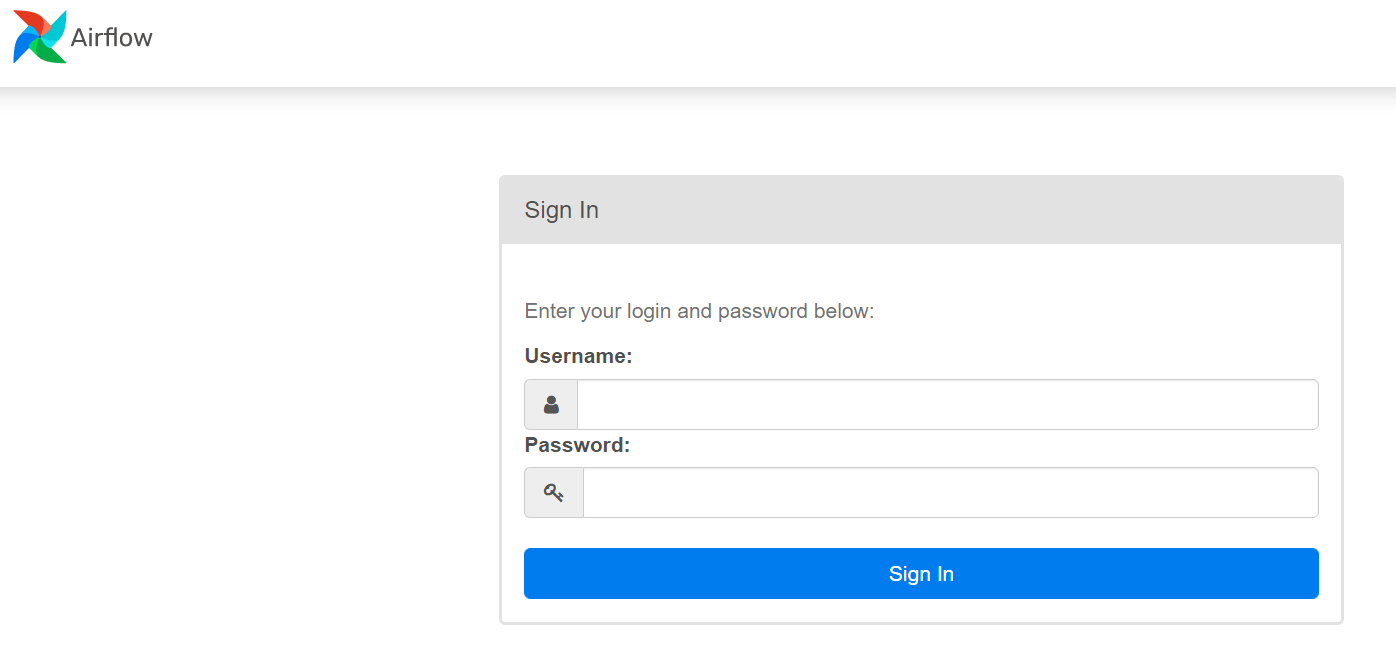
So, in a browser, head over to http://localhost:8080/ and enter in your credentials (username and password are both airflow). From here, you will a big list of premade DAGs, these are the workflows which we manage to orchestrate our data flows. In our case, we want to make two different DAGs, one for the one-time migration of all of our Postgresql data, and then another for a continuous migration.
But before we do that, let’s first make sure our newly created PostgreSQL database has the data we wish to showcase being migrated over.
Using the Airflow UI to Make Connections to our Databases
Before we head into writing our Python code (DAGs), let’s first make sure our Airflow scheduler/worker/webserver can interact with our GridDB server and PostgreSQL databases. As explained before, because all of these services share a docker-compose file, they will automatically all share the same network space.
First let’s connect to PostgreSQL.
Connect to PostgreSQL
So first let’s connect to our PostgreSQL database:
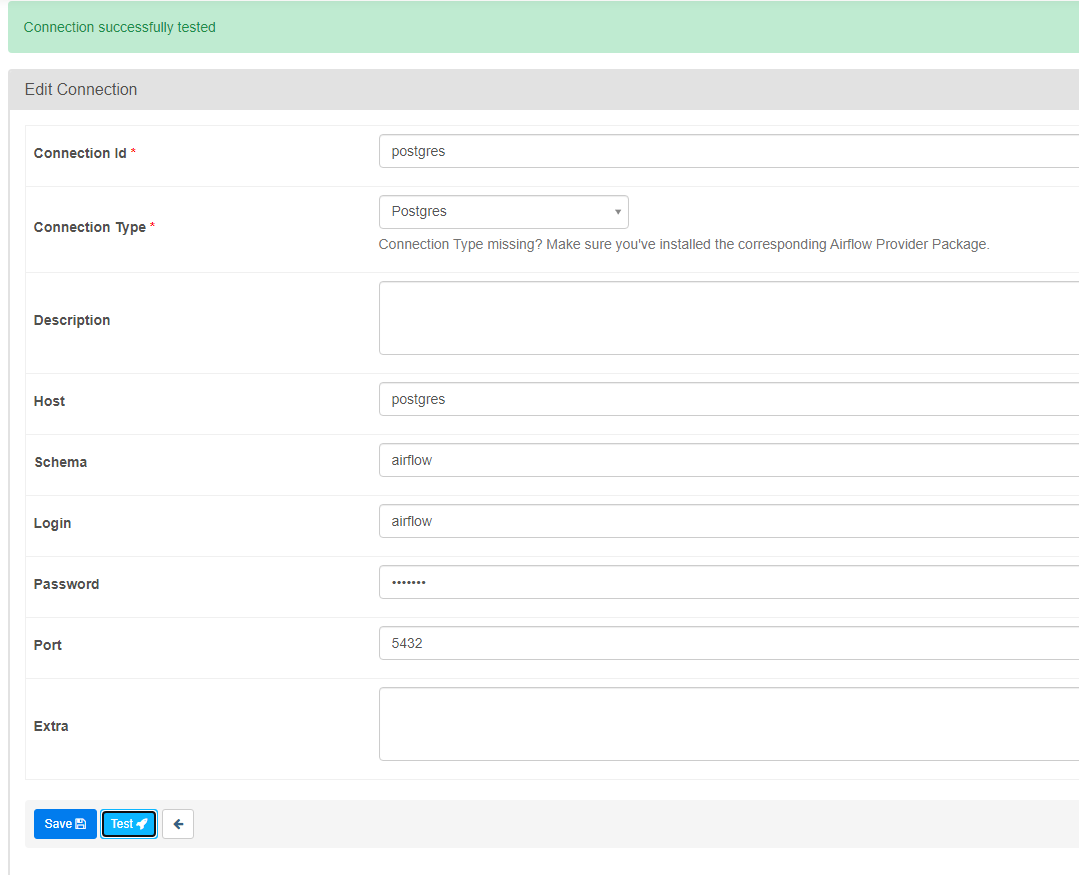
From the browser, navigate over to Admin –> Connections.
Now we can make an explicit connection to our targeted database. For PostgreSQL, select it from the connection type dropdown and then enter in your credentials
Host: postgres
Schema: airflow
Login: airflow
Password: airflow
Port: 5432
Once you hit test, it should show up as successful. And as a note, the host is the name of your service from within the docker-compose file (the service name is its hostname which equates to its IP address in a shared network).
Connect to GridDB
To connect to GridDB you can connect via JDBC in the same vein as the way mentioned above.
Connection Type: JDBC Connection
Connection URL: jdbc:gs://griddb-server:20001/myCluster/public
Login: admin
Password: admin
Driver Path: /usr/share/java/gridstore-jdbc-5.1.0.jar
Driver Class: com.toshiba.mwcloud.gs.sql.Driver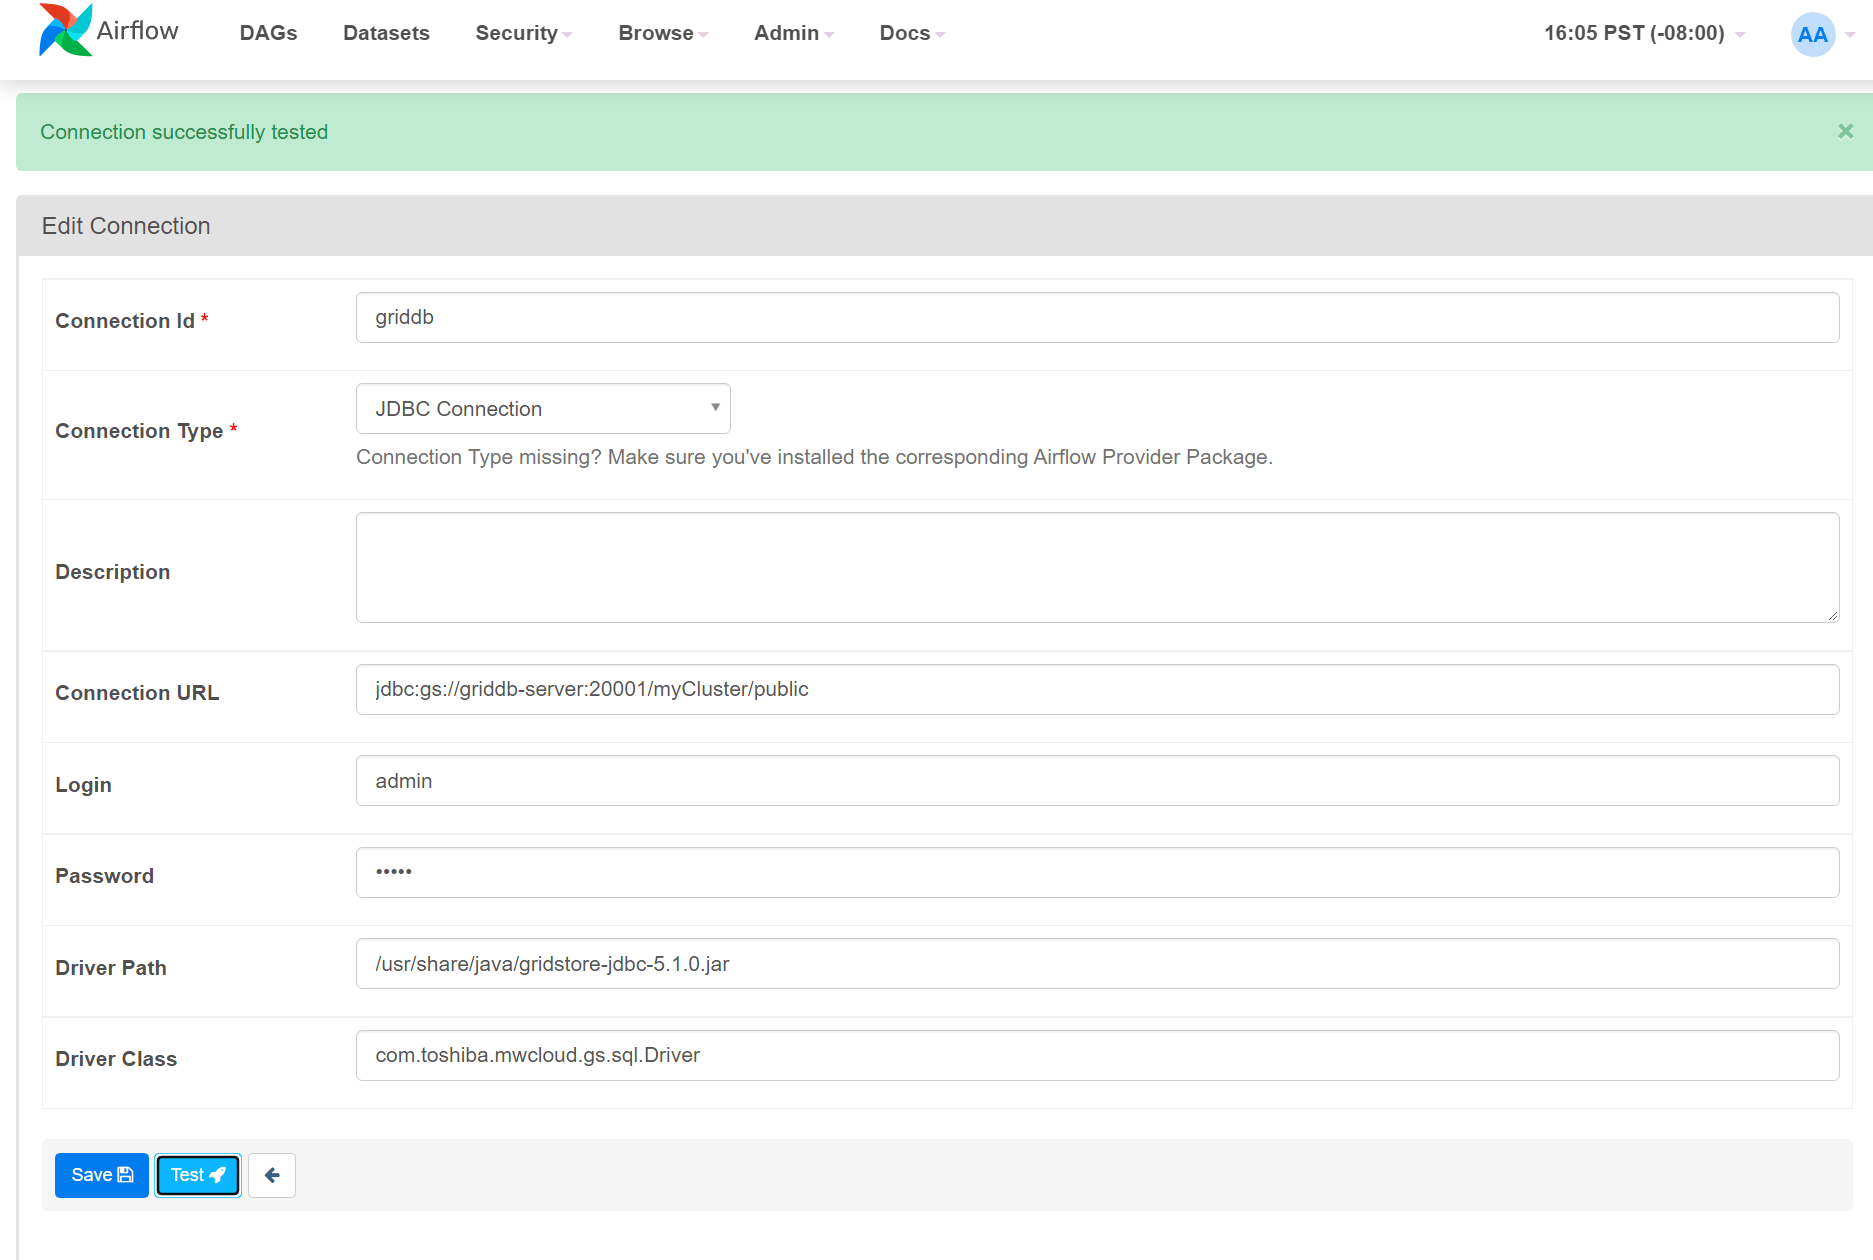
But you can also connect via the Python client:
import griddb_python as griddb

factory = griddb.StoreFactory.get_instance()
DB_HOST = "griddb-server:10001" #griddb-server is the hostname of the service
DB_CLUSTER = "myCluster"
DB_USER = "admin"
DB_PASS = "admin"

gridstore = factory.get_store(
    notification_member=DB_HOST, cluster_name=DB_CLUSTER, username=DB_USER, password=DB_PASS
)
The above Python code is only inserted inside the Python DAGs in which you intend to use GridDB, it is not made explicit in the Connections tab of your UI.
Ingesting Data into PostgreSQL Container Database
For demo purposes, we will ingest the relevant data that we need into our database by copying over the CSV to our PostgreSQL container and then using the COPY command.
First up we will be copying over a .csv file over from our local machine to the PostgreSQL container. This can be accomplished by using the image name (airflow-postgres-1, named by our docker-compose file) and the docker cp command. As for the file we are copying over, you can find it within dags/data/device.csv.
$ docker cp dags/data/device.csv postgres-airflow:/tmp/The docker cp command is executed similarly to the scp or cp command in normal CLI operations.
Once you copy over the csv file, please ssh into your PostgreSQL container:
$ docker exec -it airflow-postgres-1 bashOnce in there, drop into the psql shell as the user airflow.
# psql -U airflow
psql (13.9 (Debian 13.9-1.pgdg110+1))
Type "help" for help.

airflow=#
From here, it’s trivial to ingest the CSV data into our DB. First we create our table and then tell our database to copy the CSV rows into that table.
airflow=# CREATE TABLE if not exists device ( ts timestamp, device varchar(30), co float8, humidity float8, light bool, lpg float8, motion bool, smoke float8, temp float8 );CREATE TABLE
And then COPY everything
airflow=# copy device(ts, device, co, humidity, light, lpg, motion, smoke, temp) from '/tmp/device.csv' DELIMITER ',' CSV HEADER;Migrating from PostgreSQL to GridDB
And now we will create our first DAG to accomplish our task. Because Airflow is built on Python, our DAGs are simply Python code with some simple dressing. Before we get into the file snippet, I will point out that since we are using the GridDB Python client, we can easily interface with our GridDB database from directly within our Airflow DAG. So when you see the code involved, a lot of it will not be too different from a normal python application.
Airflow-Specific Python Code
Anyway, here is is a snippet of our GridDB Migration DAG. This first portion will be kept to only showcasing the Airflow-specific portion of the code. First, we will import the Airflow libraries necessary to finish our task.
from airflow import DAG
from airflow.providers.postgres.operators.postgres import PostgresOperator
from airflow.hooks.postgres_hook import PostgresHook

from airflow.operators.python import PythonOperator

default_args = {
    'owner': 'israel',
    'retries': 5,
    'retry_delay': timedelta(minutes=5)
}

with DAG(
    dag_id='dag_migrating_postgres_to_griddb_v04',
    default_args=default_args,
    start_date=datetime(2021, 12, 19),
    schedule_interval='@once'
) as dag:

    task1 = PythonOperator(
        task_id='migrate_from_postgres_to_griddb',
        python_callable=migrate_from_postgres_to_griddb
    )

    task1
Once that’s out of the way, we will put in config options for our DAG, namely its ID (name) and our chosen interval for this task to be run. One thing I will point out about this specific DAG: the scheduled interval is simply @once, which means once we run this DAG once, will cease to schedule itself to run again — the continuous migration will be handled by a separate DAG.
Moving on, at the very bottom of the file we select a sequence of what tasks we would like done and in what order. For this workflow, we are simply calling one thing, task1, which simply calls a python function migrate_from_postgres_to_griddb.
The actual migration works how you may expect: it will query PostgreSQL, take all relevant data, transform it for our needs, and then put into our GridDB server.
Connecting and Querying PostgreSQL within DAG
Here is that Python function which handles the actual migration:
def migrate_from_postgres_to_griddb(**context):
    """
    Queries Postgres and places all data into GridDB
    """

    gridstore = factory.get_store(
        notification_member=DB_HOST, cluster_name=DB_CLUSTER, username=DB_USER, password=DB_PASS
    )

    postgres = PostgresHook(postgres_conn_id="postgres")
    conn = postgres.get_conn()
    cursor = conn.cursor()
    cursor.execute("SELECT * FROM device;")
Similar to our previous blog, we are not simply taking the PostgreSQL table as is and placing it within our GridDB databse. Instead what we are doing is following a more IoT-centric schema, one in which each sensor in a dataset has its own container (table). But before we get into that, we must first make the necessary connections to each database.
To connect to PostgreSQL, we can pull directly from the connection we established earlier in this article. To do so within our DAG, we can import the PostgresHook python library that we introduced into the container with our Dockerfile.airflow file. And then we simply point to our Postgres’s connection ID: postgres = PostgresHook(postgres_conn_id="postgres").
Once connected we can use the cursor to conduct our queries; in this case we simply want to grab all data from our device table.
Connecting To GridDB
Similarly, we can connect to our GridDB server by either utilizing the JdbcHook similar to the steps above for PostgreSQL, or we can use the GridDB Python Client. Using the Python client allows for use similar to any other Python application and is a bit easier to use, so we will be utilizing this method. As for the connection details, because these services share a docker-compose environment, we can simply use the hostname.
factory = griddb.StoreFactory.get_instance()
DB_HOST = "griddb-server:10001"
DB_CLUSTER = "myCluster"
DB_USER = "admin"
DB_PASS = "admin"

  gridstore = factory.get_store(
        notification_member=DB_HOST, cluster_name=DB_CLUSTER, username=DB_USER, password=DB_PASS
  )
The rest of the details are the defaults used for GridDB in FIXED_LIST mode. And indeed, if you are working on Python code with GridDB outside of the context of Docker containers, you would be able to connect the same way, you’d just need to replace the DB_HOST with the proper ip address (port stays the same).
Once connected, we can try transforming our rows from PostgreSQL and placing those rows into our GridDB.
Creating Containers with GridDB
As explained above, we will need to take all of our rows from PostgreSQL and split them out into three different containers on the GridDB side. Each unique device name from our original dataset should be the key in the new Time Series Container for our data. So let’s make those three containers first — we can accomplish this within our DAG using Python code. We can also set the schema upon creation time as well:
def create_container(gridstore, device_name):
    gridstore.drop_container(device_name)
    conInfo = griddb.ContainerInfo(name=device_name,
                column_info_list=[["ts", griddb.Type.TIMESTAMP],
                                    ["co", griddb.Type.DOUBLE],
                                    ["humidity", griddb.Type.DOUBLE],
                                    ["light", griddb.Type.BOOL],
                                    ["lpg", griddb.Type.DOUBLE],
                                    ["motion", griddb.Type.BOOL],
                                    ["smoke", griddb.Type.DOUBLE],
                                    ["temperature", griddb.Type.DOUBLE]],
                type=griddb.ContainerType.TIME_SERIES)
    # Create the container
    try:
        gridstore.put_container(conInfo)
        print(conInfo.name, "container successfully created")
    except griddb.GSException as e:
        for i in range(e.get_error_stack_size()):
            print("[", i, "]")
            print(e.get_error_code(i))
            print(e.get_location(i))
            print(e.get_message(i))
Here we are going to create a container with the schema as seen in column_info_list. We split this out into its own function because it will need to be run three separate times for each unique sensor.
So eventually we can run something simple like this:
  container_name_list = ["device1", "device2", "device3"]

  for container_name in container_name_list:
      create_container(gridstore, container_name)
Transforming Data from PostgreSQL for GridDB Ingestion
Now finally let’s place our original data into a dataframe so that its easier to manipulate and split out. From there we simply put each new object containing our rows into GridDB:
    cursor.execute("SELECT * FROM device;")
    import pandas as pd
    rows = pd.DataFrame(cursor.fetchall())

    dfs = dict(tuple(rows.groupby([1])))

    device1 = dfs['b8:27:eb:bf:9d:51']
    device1 = device1.drop([1], axis=1)
    device1 = device1.values.tolist()

    device2 = dfs['00:0f:00:70:91:0a']
    device2 = device2.drop([1], axis=1)
    device2 = device2.values.tolist()

    device3 = dfs['1c:bf:ce:15:ec:4d']
    device3 = device3.drop([1], axis=1)
    device3 = device3.values.tolist()
Each deviceX object will contain all rows which can be placed directly into GridDB with multi_put:
    try:
        d1_cont = gridstore.get_container("device1")
        d1_cont.multi_put(device1)

        d2_cont = gridstore.get_container("device2")
        d2_cont.multi_put(device1)

        d3_cont = gridstore.get_container("device3")
        d3_cont.multi_put(device1)

    except griddb.GSException as e:
        for i in range(e.get_error_stack_size()):
            print("[", i, "]")
            print(e.get_error_code(i))
            print(e.get_location(i))
            print(e.get_message(i))
And from there our GridDB database should have three new containers populated with all relevant sensor information from our Kaggle dataset.
Continuous Migration
Now that our databases are up to parity, let’s move on to the next step. Let’s say your sensor data keeps emitting data to PostgreSQL that you would like to send over to GridDB. With a regularly scheduled DAG, we can make sure all new rows are pushed to GridDB.
The idea will be that we query each sensor’s container and find the latest (MAX) timestamp of data which is then cross referenced with PostgreSQL. If the data is newer or “bigger” on PostgreSQL, we take all offending rows and push them into the proper container.
Querying for MAX Timestamp on GridDB
After making our connection to GridDB, we need to formulate our query. In this case, because TQL operates on a per container basis, there is no need to specify the container name within the query itself. This means we only need to formulate one string and it can be reused for all containers:
    try:
        d1_cont = gridstore.get_container("device1")
        d2_cont = gridstore.get_container("device2")
        d3_cont = gridstore.get_container("device3")

        sql = "SELECT MAX(ts)"

        d1_query = d1_cont.query(sql)
        d2_query = d2_cont.query(sql)
        d3_query = d3_cont.query(sql)
Here we are using the TQL aggregation query of MAX which will find for us the absolute latest timestamp (ts) in our container.
Querying PostgreSQL Using GridDB Timestamp Values
Once that value is saved, we simply use it to query PostgreSQL:
        d1_rs = d1_query.fetch()
        d2_rs = d2_query.fetch()
        d3_rs = d3_query.fetch()

        d1_row = d1_rs.next().get(griddb.Type.TIMESTAMP)
        d1_latest_time = d1_row.replace(microsecond=999999) # adding in max microseconds as GridDB does not save these values

        d2_row = d2_rs.next().get(griddb.Type.TIMESTAMP)
        d2_latest_time = d2_row.replace(microsecond=999999)

        d3_row = d3_rs.next().get(griddb.Type.TIMESTAMP)
        d3_latest_time = d3_row.replace(microsecond=999999)


        d1_sql = "SELECT DISTINCT ON (ts) * FROM device WHERE ts > '" + str(d1_latest_time)+ "' AND device = 'b8:27:eb:bf:9d:51' ORDER BY ts DESC;"
        d2_sql = "SELECT DISTINCT ON (ts) * FROM device WHERE ts > '" + str(d2_latest_time)+ "' AND device = '00:0f:00:70:91:0a' ORDER BY ts DESC;"
        d3_sql = "SELECT DISTINCT ON (ts) * FROM device WHERE ts > '" + str(d3_latest_time)+ "' AND device = '1c:bf:ce:15:ec:4d' ORDER BY ts DESC;"

        cursor.execute(d1_sql)
        d1_result = cursor.fetchall()

        cursor.execute(d2_sql)
        d2_result = cursor.fetchall()

        cursor.execute(d3_sql)
        d3_result = cursor.fetchall()
We now have three different objects which contain the rows later than the GridDB counterpart. So next is checking if the list is empty, if not, we place the rows into GridDB:
    if not d1_result:
        print("Device1 contains 0 new rows to add")
    else:
        print(d1_latest_time)
        print(d1_sql)
        print("Device1 contains " + str(len(d1_result)) + " new rows to add")
        for row in d1_result:
            print("putting row to device1 in GridDB")
            row = list(row)
            del row[1] #get rid of device name
            print(row)
            d1_cont.put(row)

    if not d2_result:
        print("Device2 contains 0 new rows to add")
    else:
        print(d2_latest_time)
        print(d2_sql)
        print("Device2 contains " + str(len(d2_result)) + " new rows to add")
        for row in d2_result:
            print("putting row to device2 in GridDB")
            row = list(row)
            del row[1] #get rid of device name
            print(row)
            d2_cont.put(list(row))

    if not d3_result:
        print("Device3 contains 0 new rows to add")
    else:
        print("Device3 contains " + str(len(d3_result)) + " new rows to add")
        print(d3_latest_time)
        print(d3_sql)
        for row in d3_result:
            print("putting row to device3 in GridDB")
            row = list(row)
            del row[1]
            print(row)
            d3_cont.put(list(row))
And now that our DAGs are ready, we can head over to the UI and turn these things on and see if they will run and do what we expect.
Activating DAGs and Checking the Results
Let’s head back over to the UI and activate these DAGs. Our DAG which simply does an initial bulk migration is scheduled to run only once. Let’s turn that one on and make sure it runs. Use the search bar search DAGs and search GridDB.
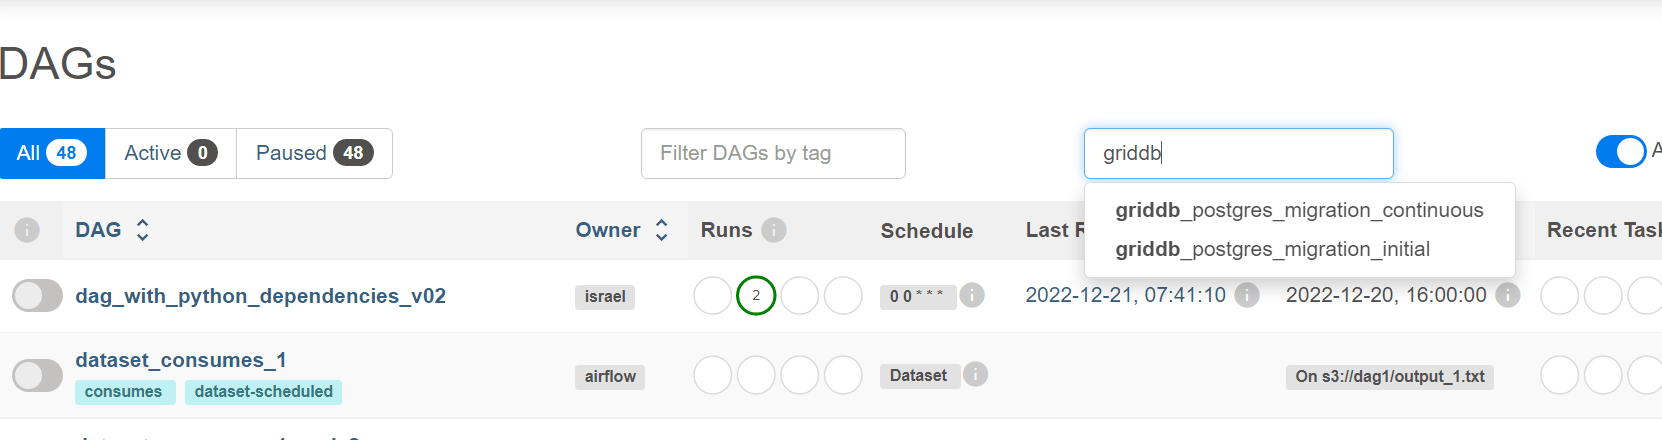
First, let’s turn on the DAG with the ID of griddb_postgres_migration_initial. Once you click on it, there is a small switch next to its name where you can toggle it on/off.
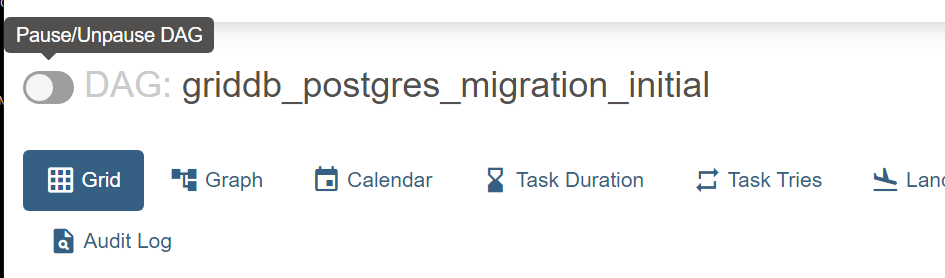
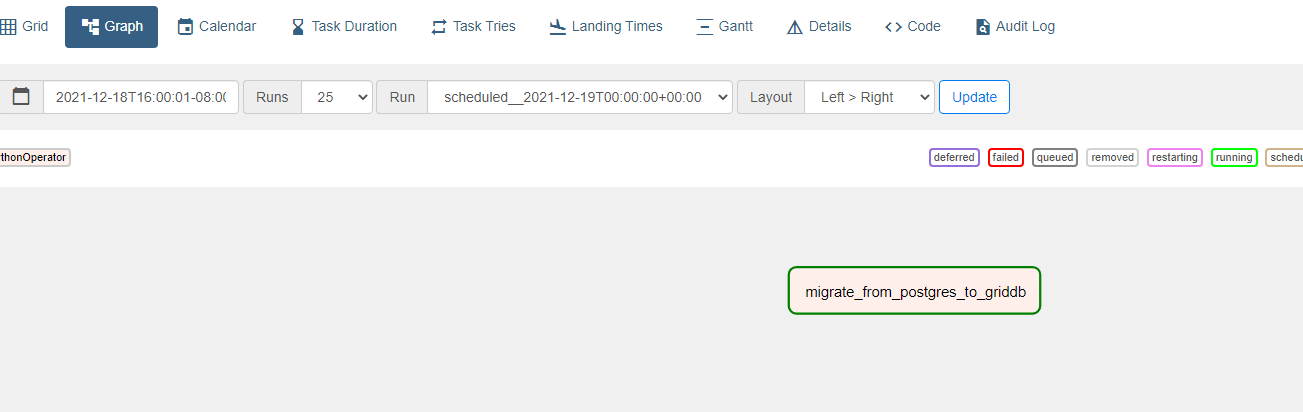
Once it is turned on, because we set the start date into the past and the scheduled interval as just once, it will run immediately and then cease firing. To check its logs, click on the graph button and then find your task inside a DAG map. Since we only have one task, it’s simply one small square sitting in space.
From there you can click the log button at the top. And a small tip if the results of your DAG are not exactly what you expect: instead of finagling with the scheduling or waiting for another run, you can click the clear button which will auto-force the DAG to run again.
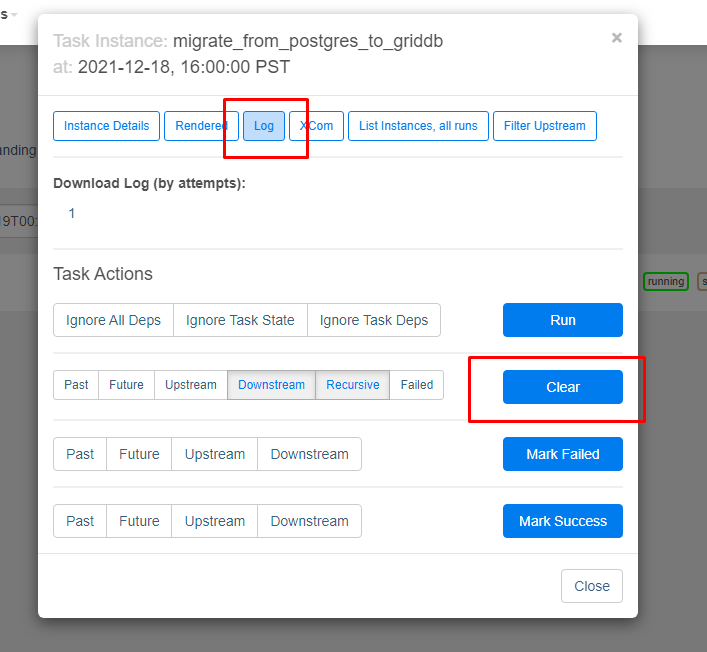
And now you can look at the logs to see if your task completed successfully.
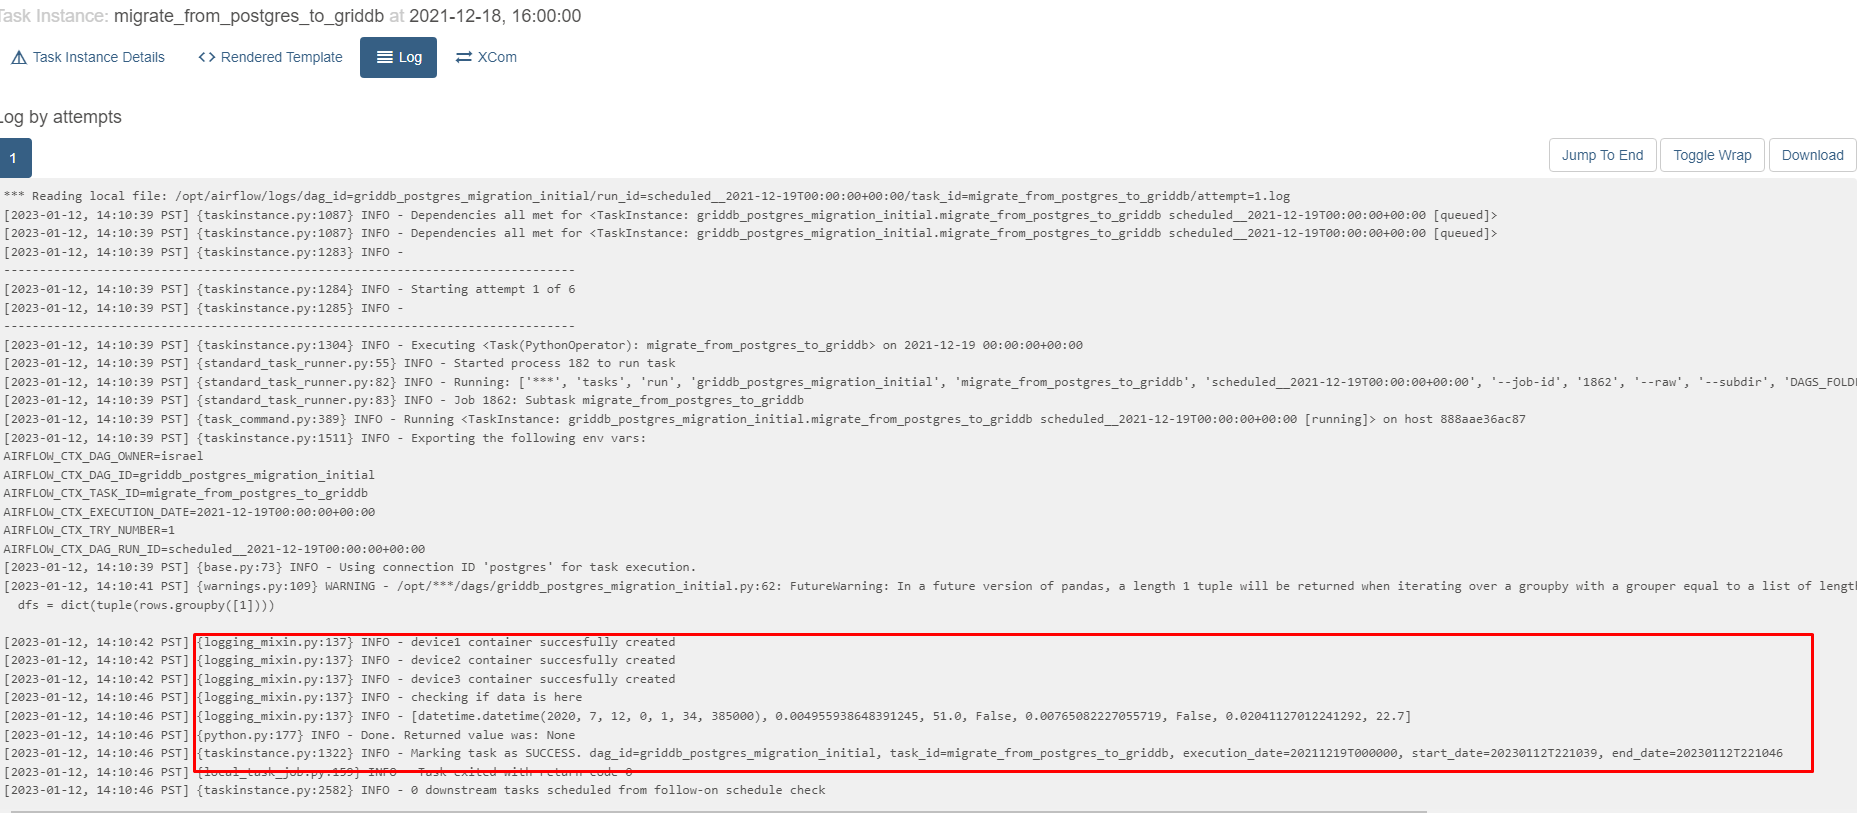
Querying GridDB
Luckily for us, it appears as though three containers were successfully made. To double check we can write some python code in a DAG to make sure we can query data from those containers or we can SSH into the GridDB container and drop into the CLI shell and query that way.
You can drop into the shell like so:
$ docker exec -it griddb-airflow gs_shThe connection attempt was successful(NoSQL).
The connection attempt was successful(NewSQL).
gs>
And from there you can check your container information
gs[public]> showcontainer device2
Database    : public
Name        : device2
Type        : TIME_SERIES
Partition ID: 38
DataAffinity: -

Compression Method : NO
Compression Window : -
Row Expiration Time: -
Row Expiration Division Count: -

Columns:
No  Name                  Type            CSTR  RowKey   Compression
------------------------------------------------------------------------------
 0  ts                    TIMESTAMP       NN    [RowKey]
 1  co                    DOUBLE
 2  humidity              DOUBLE
 3  light                 BOOL
 4  lpg                   DOUBLE
 5  motion                BOOL
 6  smoke                 DOUBLE
 7  temperature           DOUBLE
And run a query:
gs[public]> select * from device2;
111,817 results. (13 ms)
gs[public]> get 3
ts,co,humidity,light,lpg,motion,smoke,temperature
2020-07-12T00:01:34.735Z,0.00284008860710157,76.0,false,0.005114383400977071,false,0.013274836704851536,19.700000762939453
2020-07-12T00:01:46.869Z,0.002938115626660429,76.0,false,0.005241481841731117,false,0.013627521132019194,19.700000762939453
2020-07-12T00:02:02.785Z,0.0029050147565559607,75.80000305175781,false,0.0051986974792943095,false,0.013508733329556249,19.700000762939453
The 3 results had been acquired.
Continuous Migration
Next we will be starting our next DAG which we set on a scheduled interval of every hour:
with DAG(
    dag_id='griddb_postgres_migration_continuous',
    default_args=default_args,
    start_date=datetime(2022, 12, 19),
    schedule_interval='0 * * * *'
The styling of the schedule_interval is in the style cron, but if you are not too familiar, there are also shortcuts available. We could, for example, instead choose to type in ‘@hourly’ and that would be just as valid.
In any case, let’s add some rows to our PostgreSQL database manually and see the continuous migration in action. For now, let’s leave this off and put some rows in
$ docker exec -it postgres-airflow bash
/# psql -U airflow
psql (13.9 (Debian 13.9-1.pgdg110+1))
Type "help" for help.
And now let’s add some rows.
postgres=# INSERT INTO device VALUES (now(), 'b8:27:eb:bf:9d:51', 0.003551, 50.0, false, 0.00754352, false, 0.0232432, 21.6);INSERT 0 1
You can do this however many times you’d like as a test. You can even try inserting with different sensor names too,to make an attempt at inserting into different containers.
Once we’ve done that, let’s turn on our DAG and check the logs.
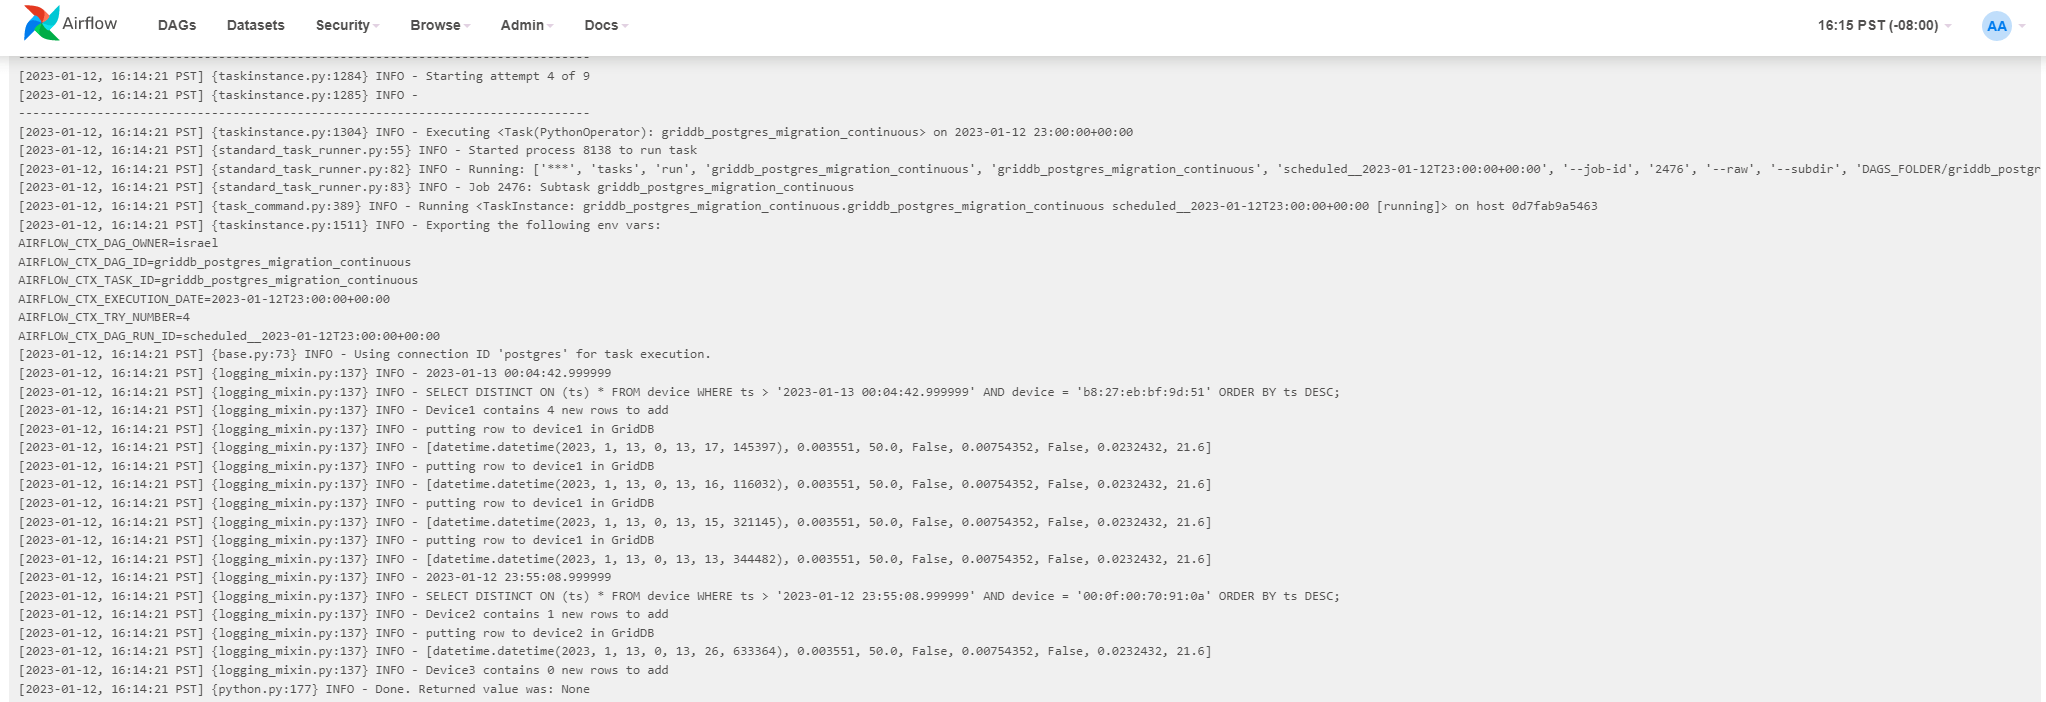
In my shell I added five new rows total amongst the different containers. You can see the results here:
[2023-01-12, 16:14:21 PST] {logging_mixin.py:137} INFO - SELECT DISTINCT ON (ts) * FROM device WHERE ts > '2023-01-13 00:04:42.999999' AND device = 'b8:27:eb:bf:9d:51' ORDER BY ts DESC;
[2023-01-12, 16:14:21 PST] {logging_mixin.py:137} INFO - Device1 contains 4 new rows to add
[2023-01-12, 16:14:21 PST] {logging_mixin.py:137} INFO - putting row to device1 in GridDB
[2023-01-12, 16:14:21 PST] {logging_mixin.py:137} INFO - [datetime.datetime(2023, 1, 13, 0, 13, 17, 145397), 0.003551, 50.0, False, 0.00754352, False, 0.0232432, 21.6]
[2023-01-12, 16:14:21 PST] {logging_mixin.py:137} INFO - putting row to device1 in GridDB
[2023-01-12, 16:14:21 PST] {logging_mixin.py:137} INFO - [datetime.datetime(2023, 1, 13, 0, 13, 16, 116032), 0.003551, 50.0, False, 0.00754352, False, 0.0232432, 21.6]
[2023-01-12, 16:14:21 PST] {logging_mixin.py:137} INFO - putting row to device1 in GridDB
[2023-01-12, 16:14:21 PST] {logging_mixin.py:137} INFO - [datetime.datetime(2023, 1, 13, 0, 13, 15, 321145), 0.003551, 50.0, False, 0.00754352, False, 0.0232432, 21.6]
[2023-01-12, 16:14:21 PST] {logging_mixin.py:137} INFO - putting row to device1 in GridDB
[2023-01-12, 16:14:21 PST] {logging_mixin.py:137} INFO - [datetime.datetime(2023, 1, 13, 0, 13, 13, 344482), 0.003551, 50.0, False, 0.00754352, False, 0.0232432, 21.6]
[2023-01-12, 16:14:21 PST] {logging_mixin.py:137} INFO - 2023-01-12 23:55:08.999999
[2023-01-12, 16:14:21 PST] {logging_mixin.py:137} INFO - SELECT DISTINCT ON (ts) * FROM device WHERE ts > '2023-01-12 23:55:08.999999' AND device = '00:0f:00:70:91:0a' ORDER BY ts DESC;
[2023-01-12, 16:14:21 PST] {logging_mixin.py:137} INFO - Device2 contains 1 new rows to add
[2023-01-12, 16:14:21 PST] {logging_mixin.py:137} INFO - putting row to device2 in GridDB
[2023-01-12, 16:14:21 PST] {logging_mixin.py:137} INFO - [datetime.datetime(2023, 1, 13, 0, 13, 26, 633364), 0.003551, 50.0, False, 0.00754352, False, 0.0232432, 21.6]
[2023-01-12, 16:14:21 PST] {logging_mixin.py:137} INFO - Device3 contains 0 new rows to add
[2023-01-12, 16:14:21 PST] {python.py:177} INFO - Done. Returned value was: None
[2023-01-12, 16:14:21 PST] {taskinstance.py:1322} INFO - Marking task as SUCCESS. dag_id=griddb_postgres_migration_continuous, task_id=griddb_postgres_migration_continuous, execution_date=20230112T230000, start_date=20230113T001421, end_date=20230113T001421
And then of course, if you want to be diligent, you can pop back on over to the GridDB shell and make sure your rows are being inserted
gs[public]> tql device1 select MAX(ts);
1 results. (15 ms)
gs[public]> get
Result
2023-01-13T00:13:17.145Z
The 1 results had been acquired.
It matches!
Conclusion
And with that, we have successfully set up Apache Airflow via docker and have allowed for our data to be continuously migrating over from PostgreSQL to GridDB.