Creating a daily meal plan app is like designing a roadmap for your body. It ensures you get to eat a balanced diet that will fuel your body and make you live a healthy life.
With a well-thought-out daily meal plan, you can meet your nutritional needs while improving your energy levels and overall health.
So, here’s a detailed breakdown of the process required to create a daily meal plan application using technologies like ReactJS, NodeJS, ExpressJS, and GridDB.
Introduction
According to WHO (World Health Organization), 1 billion people worldwide are obese and an additional 167 million people will be added to that number by 2025. This explains the importance of dieting and why everyone should eat healthily with a daily meal plan.
Dieting is neither easy nor fun, but accountability in any form would enable anyone to achieve their dieting goals. This daily meal plan web application was made to help users build meal plans that would ensure they maintain a healthy diet.
GridDB is the database that will be used to store meal plans.
In this article, we will use what is called the GERN stack (GridDB, ExpressJS, ReactJS, and NodeJS) to build a Fullstack meal planning web application.
The Application
While I installed WSL (Windows Subsystem for Linux) on my Windows to have access to Linux (Ubuntu) on my machine, you could also follow along with this tutorial using Docker. The GridDB documentation provides you with a detailed installation process to successfully install the database on your computer. There are also top-notch YouTube videos on their YouTube channel for those who prefer videos to written documentation. The entire code for the web application is available on Github.
Open your terminal and clone the repo using this command
git clone https://github.com/griddbnet/Blogs.git --branch meal-plannerThe App Classification
This application is divided into 2 parts –
- The Backend
- The Frontend
Prerequisites
- GridDB version 5.3.0
- Node v12.22.9
The Backend
The backend in this project ensures the correct meal data is gotten from the frontend, and then saved to the GridDB database. We are able to perform functionalities with the GridDB database.
The proper CRUD functionalities are carried out in the app.
These are the packages that are needed to build the backend.
-
ExpressJs: A minimalist NodeJS framework that is used for building RESTful APIs.
-
Morgan: A NodeJS middleware that is used to log HTTP requests.
-
GridDB Node API: The GridDB client for NodeJS
-
Joi: A schema description language and data validator for JavaScript
-
UUID: This package will be used to create a random ID.
Step-by-Step Guide to Building the Meal Plan App
Follow the steps as explained below;
Step 1: Create a Server Folder
Create a “server” folder and initialize npm to generate a package.json file. You can name the folder anything you want:
npm iStep 2: Install Required Packages
We are going to install all the required packages at once by running the following line of code:
npm i express morgan joi uuid griddb-node-api corsAddition
While it is not required to install nodemon, it’s nice to have in development so that the server would restart automatically when any change is saved. This is the command to install nodemon as a dev dependency:
npm i -D nodemon{
"name": "meal-planner-server",
"version": "1.0.0",
"description": "backend for meal planner",
"main": "server.js",
"scripts": {
"test": "echo \"Error: no test specified\" && exit 1",
"dev": "nodemon server.js"
},
"keywords": [
"meal-planner",
"meal",
"planner",
"griddb",
"griddb_node"
],
"author": "Oyafemi Babajide",
"license": "ISC",
"dependencies": {
"cors": "^2.8.5",
"express": "^4.18.2",
"griddb_node": "^0.8.4",
"griddb-node-api": "^0.8.6",
"joi": "^17.11.0",
"morgan": "^1.10.0",
"uuid": "^9.0.1"
},
"devDependencies": {
"nodemon": "^3.0.1"
}
}Step 3: Create Server.js File
Create a server.js file and insert the following code:
const express = require("express");
const morgan = require("morgan");
const app = express();
const cors = require("cors")
const PORT = 4000 || process.env.PORT;
app.use(morgan("dev"));
app.use(express.json());
app.use(express.urlencoded({ extended: false }));
app.use(cors("*"))
app.use("/api", require("./routes/mealRoutes"));
app.listen(PORT, () => {
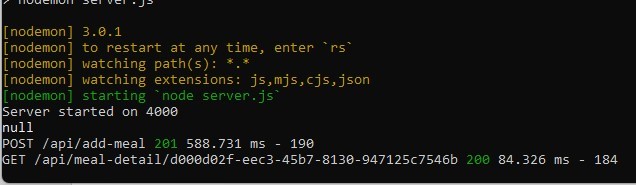
console.log(`Server started on ${PORT}`);
});If you installed nodemon as a dev dependency, you’ll need to add this line of code to the “scripts” section in your package.json file:
"dev": "nodemon index.js"Step 4: Run the Application
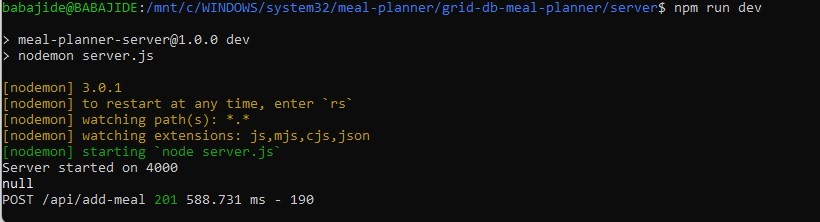
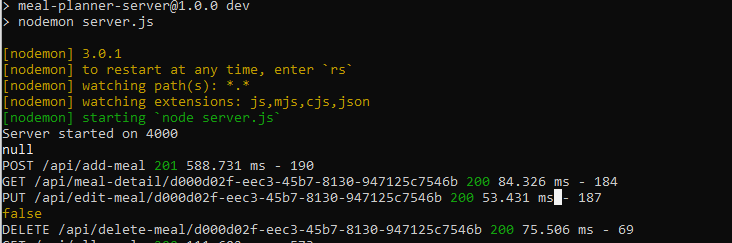
If you installed nodemon, you could use ‘npm start’ to start the application, however, this would require you to restart the application any time you make changes, going against what nodemon is intended for. The following method doesn’t require you to restart the application when you make any changes (the benefit of nodemon):
npm run dev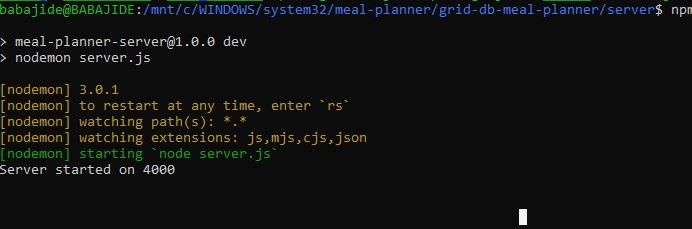
Step 5: Setup the GridDB Database
We will connect to the GridDB database using the griddb-node-api package. We then set the container name of the project. I chose “meal-planner” because it is related to the project. However, you can call it whatever you want.
const griddb = require("griddb-node-api");

const containerName = "meal-planner";

const initStore = async () => {
  const factory = griddb.StoreFactory.getInstance();
  try {
    // Connect to GridDB Cluster
    const store = await factory.getStore({
      host: "127.0.0.1",
      port: 10001,
      clusterName: "myCluster",
      username: "admin",
      password: "admin",
    });
    return store;
  } catch (e) {
    throw e;
  }
};

function initContainer() {
  const conInfo = new griddb.ContainerInfo({
    name: containerName,
    columnInfoList: [
      ["id", griddb.Type.STRING],
      ["title", griddb.Type.STRING],
      ["calories", griddb.Type.DOUBLE],
      ["fat", griddb.Type.DOUBLE],
      ["cabs", griddb.Type.DOUBLE],
      ["protein", griddb.Type.DOUBLE],
      ["days", griddb.Type.STRING],
      ["breakfast", griddb.Type.STRING],
      ["lunch", griddb.Type.STRING],
      ["dinner", griddb.Type.STRING],
      ["snack1", griddb.Type.STRING],
      ["snack2", griddb.Type.STRING],
      ["snack3", griddb.Type.STRING],
    ],
    type: griddb.ContainerType.COLLECTION,
    rowKey: true,
  });

  return conInfo;
}

async function createContainer(store, conInfo) {
  try {
    const collectionDB = await store.putContainer(conInfo);
    return collectionDB;
  } catch (err) {
    console.error(err);
    throw err;
  }
}

async function initGridDbTS() {
  try {
    const store = await initStore();
    const conInfo = await initContainer();
    const collectionDb = await createContainer(store, conInfo);
    return { collectionDb, store, conInfo };
  } catch (err) {
    console.error(err);
    throw err;
  }
}
The initStore function connects the app to the GridDB Cluster using the host, port, clusterName, username, and password. The initContainer function is used to set the columns for the container and the datatypes for the different columns. The createContainer creates the container while initGridDbTS initializes the database connection.
Step 6: Create a Meal plan
To create a meal plan;
router.post("/add-meal", addMealPlan);We use the Joi package to validate the request body sent from the frontend and then insert into the container that is created in step 6.
//meal plan validation rules
const mealPlanValidation = async (field) => {
  const schema = Joi.object({
    title: Joi.string().required(),
    calories: Joi.number().integer().required(),
    fat: Joi.number().integer().required(),
    cabs: Joi.number().integer().required(),
    protein: Joi.number().integer().required(),
    days: Joi.array()
      .items(
        Joi.string().valid(
          "sunday",
          "monday",
          "tuesday",
          "wednesday",
          "thursday",
          "friday",
          "saturday"
        )
      )
      .max(7)
      .min(1)
      .required(),
    breakfast: Joi.string().required(),
    lunch: Joi.string().required(),
    dinner: Joi.string().required(),
    snack1: Joi.string().required(),
    snack2: Joi.string().required(),
    snack3: Joi.string().required(),
  });
  try {
    return await schema.validateAsync(field, { abortEarly: false });
  } catch (err) {
    return err;
  }
};


async function insert(data, container) {
  try {
    await container.put(data);
    return { status: true };
  } catch (err) {
    if (err.constructor.name == "GSException") {
      for (var i = 0; i < err.getErrorStackSize(); i++) {
        console.log("[%d]", i);
        console.log(err.getErrorCode(i));
        console.log(err.getMessage(i));
      }

      return { status: false, error: err.toString() };
    } else {
      console.log(err);
      return { status: false, error: err };
    }
  }
}
Before that, the uuid package is used to generate a random id. After the meal plan is saved to the database, we then query the meal plan using the created random id to get the details of the saved meal plan.
async function queryByID(id, conInfo, store) {
try {
const cont = await store.putContainer(conInfo);
const row = await cont.get(id);
return row;
} catch (err) {
console.log(err, "here");
}
}
const addMealPlan = async (req, res) => {
//validate req.body
const { collectionDb, store, conInfo } = await initGridDbTS();
const { details } = await mealPlanValidation(req.body);
if (details) {
let allErrors = details.map((detail) => detail.message.replace(/"/g, ""));
return responseHandler(res, allErrors, 400, false, "");
}
try {
const {
title,
calories,
fat,
cabs,
protein,
days,
breakfast,
lunch,
dinner,
snack1,
snack2,
snack3,
} = req.body;
const id = uuidv4();
const data = [
id,
title,
calories,
fat,
cabs,
protein,
days.join(";"),
breakfast,
lunch,
dinner,
snack1,
snack2,
snack3,
];
const saveStatus = await insert(data, collectionDb);
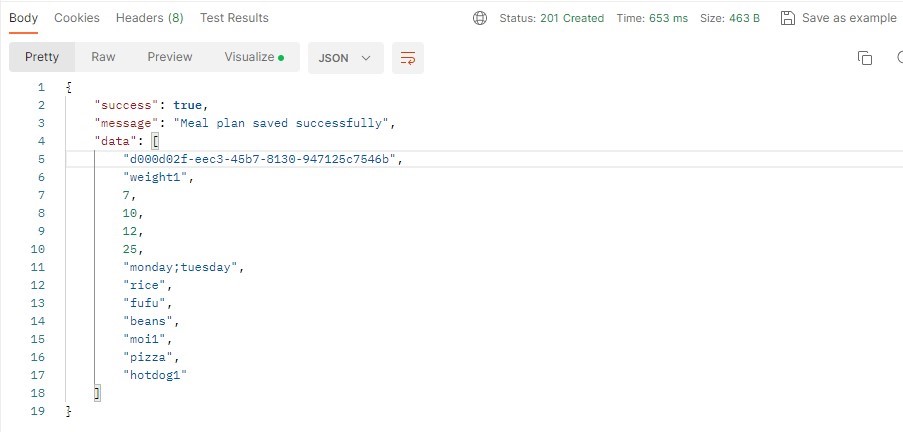
if (saveStatus.status) {
const result = await queryByID(id, conInfo, store);
return responseHandler(
res,
"Meal plan saved successfully",
201,
true,
result
);
}
return responseHandler(
res,
"Unable to save meal plan",
400,
false,
saveStatus.error
);
} catch (error) {
responseHandler(res, "Error saving meal plan", 400, false, error);
}
};The meal plan details are then sent to the frontend as a json response.
Step 7: Get a Meal Plan Details
The id of the meal plan that is required is gotten from the params of the request data.
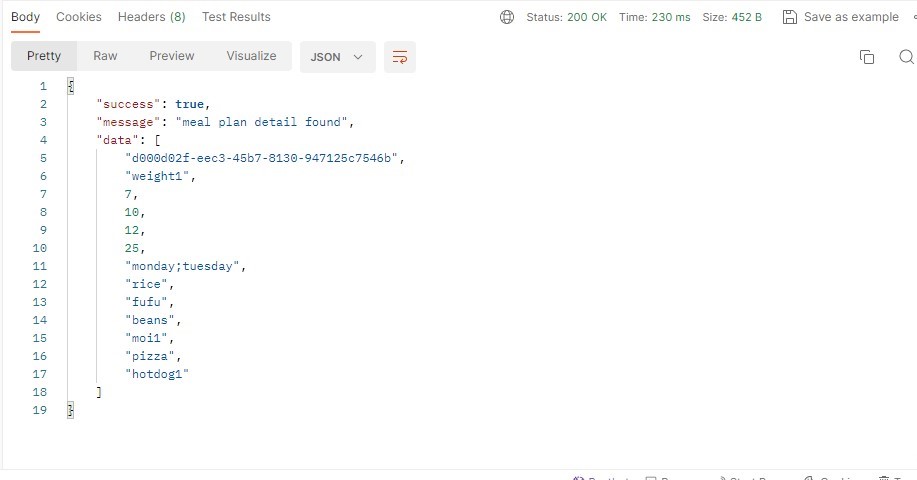
router.get("/meal-detail/:id", mealPlanDetails);Then id of the meal plan is then queried with the data in the database and a 200 response with the meal plan data is sent if the meal plan is found.
const mealPlanDetails = async (req, res) => {
  const { store, conInfo } = await initGridDbTS();
  const { id } = req.params;

  const result = await queryByID(id, conInfo, store);

  return result
    ? responseHandler(res, "meal plan detail found", 200, true, result)
    : responseHandler(res, "No meal plan found", 400, false, "");
};
Step 8: Edit a Meal Plan
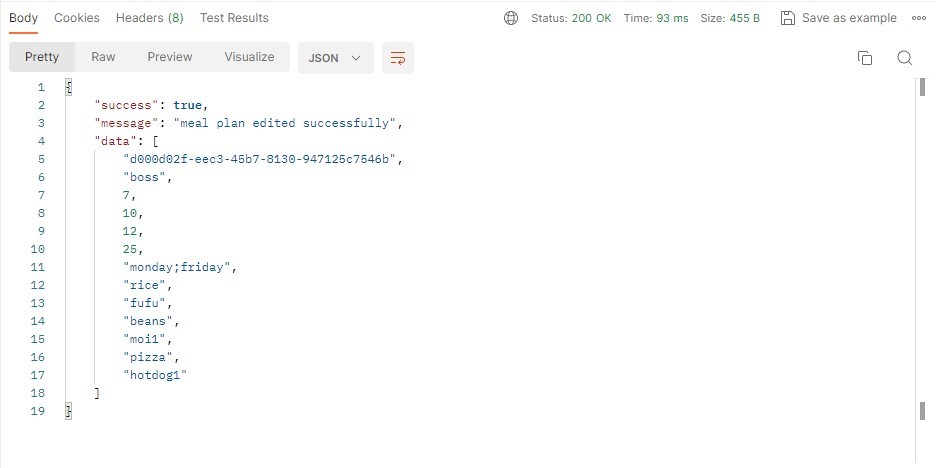
router.put("/edit-meal/:id", editMealPlan);To edit a meal plan, again the id of the required meal plan is sent in the params of the request. The meal plan is queried using the given id and the old details of the meal plan is replaced by the new ones.
const editMealPlan = async (req, res) => {
  const { store, conInfo } = await initGridDbTS();
  const { id } = req.params;

  const result = await queryByID(id, conInfo, store);

  if (!result) {
    return responseHandler(res, "incorrect meal plan ID", 400, false, "");
  }

  const {
    title,
    calories,
    fat,
    cabs,
    protein,
    days,
    breakfast,
    lunch,
    dinner,
    snack1,
    snack2,
    snack3,
  } = req.body;

  const data = [
    id,
    title,
    calories,
    fat,
    cabs,
    protein,
    days.join(";"),
    breakfast,
    lunch,
    dinner,
    snack1,
    snack2,
    snack3,
  ];

  const check = await editByID(store, conInfo, data);

  if (check[0]) {
    const result2 = await queryByID(id, conInfo, store);

    return responseHandler(
      res,
      "meal plan edited successfully",
      200,
      true,
      result2
    );
  }
  return responseHandler(res, "Error editing meal plan", 400, false, "");
};

const editByID = async (store, conInfo, data) => {
  try {
    const cont = await store.putContainer(conInfo);
    const res = await cont.put(data);
    return [true, ""];
  } catch (err) {
    return [false, err];
  }
};
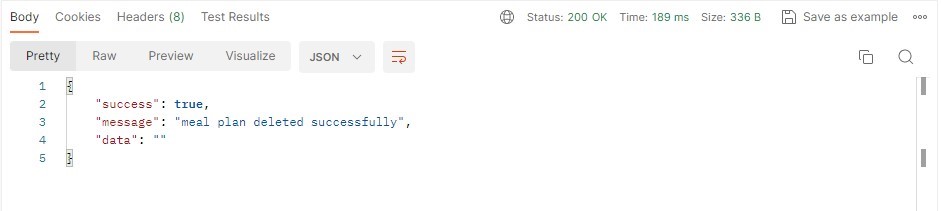
Step 9: Delete a Meal Plan
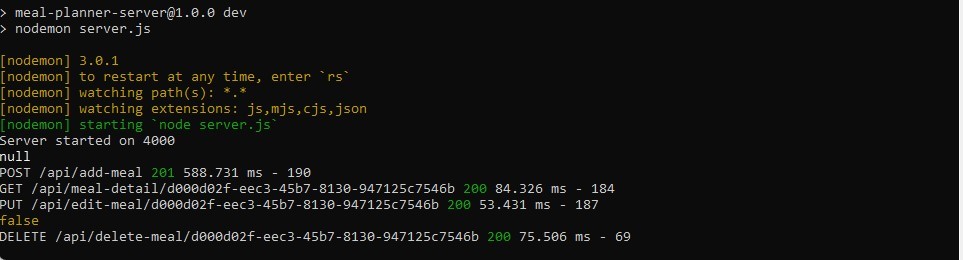
router.delete("/delete-meal/:id", deleteMealPlan);The id is gotten from the params or the request data and that is used to delete the row containing the required meal plan.
const deleteMealPlan = async (req, res) => {
  const { store, conInfo } = await initGridDbTS();
  const { id } = req.params;

  const result = await deleteByID(store, id, conInfo);

  return result[0]
    ? responseHandler(res, "meal plan deleted successfully", 200, true, "")
    : responseHandler(res, "Error deleting meal plan", 400, false, "");
};


//Delete entry
const deleteByID = async (store, id, conInfo) => {
  try {
    const cont = await store.putContainer(conInfo);
    let res = await cont.remove(id);

    return [true, res];
  } catch (error) {
    return [false, error];
  }
};
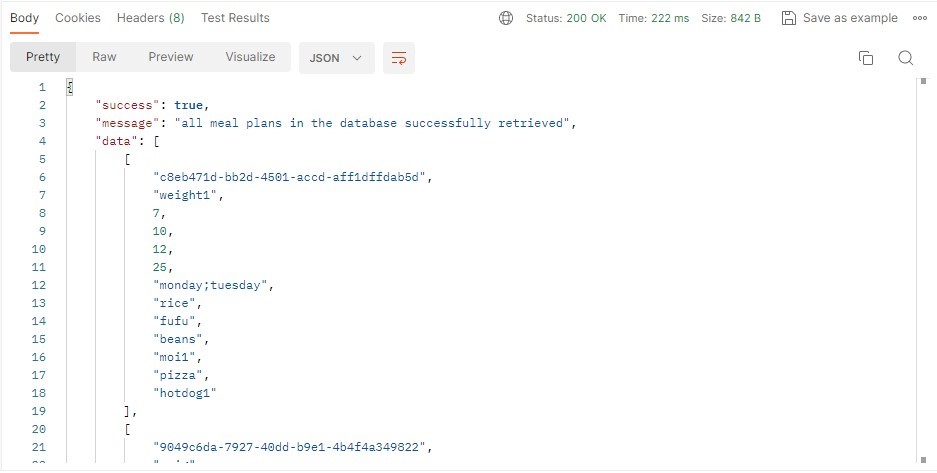
Step 10: Get List of All Meal Plans in the Database
To get list of all meal plans in the database, you have to do this;
router.get("/all-meals", getAllMealPlans);This returns all the meal plans in the database.
const getAllMealPlans = async (req, res) => {
  const { store, conInfo } = await initGridDbTS();
  const result = await queryAll(conInfo, store);

  return result.length
    ? responseHandler(
        res,
        "all meal plans in the database successfully retrieved",
        200,
        true,
        result.results
      )
    : responseHandler(res, "Unable to retrieve meal plans", 400, false, "");
};

async function queryAll(conInfo, store) {
  const sql = `SELECT *`;
  const cont = await store.putContainer(conInfo);
  const query = await cont.query(sql);
  try {
    const rowset = await query.fetch();
    const results = [];

    while (rowset.hasNext()) {
      const row = rowset.next();
      results.push(row);
    }
    return { results, length: results.length };
  } catch (err) {
    console.log(err);
    return err;
  }
}
The Frontend
The beauty of this meal plan app is that the UI allows users to add, view, edit, and delete a meal plan. The following libraries were used to build the UI for this project:
ReactJs:
ReactJS is a JavaScript library built and maintained by Meta for building user interfaces.
Material UI:
Material UI is a comprehensive library of components from Google’s Material Design system.
Redux Toolkit:
Redux Toolkit is a state management library.
To view the frontend of the app change to the client directory.
cd clientNow install the required dependencies
npm iThen run the app using
npm start
The meal plan list page would show up.
For those who want to build the UI from scratch, the link to the Figma design file has been provided.
Conclusion
The daily meal plan app created has a dynamic and user-friendly interface. What makes it special is the easy integration of the GridDB database to store, edit, and retrieve meal-related data. This ensures you can set up API calls easily fetch meal plan data from the database. Whether you’re aiming to meet your fitness goals or just want to treat your taste buds, this daily meal plan app is all you need.
If you have any questions about the blog, please create a Stack Overflow post here https://stackoverflow.com/questions/ask?tags=griddb .
Make sure that you use the “griddb” tag so our engineers can quickly reply to your questions.