
Outline
In this tutorial, we will see how we can turn our Machine Learning model into a web API to make real-time predictions using Python. The outline of the article will be as follows:
- Prerequisites and Environment setup
- Creating a Machine Learning Model
- Serialization and Deserialization of the Machine Learning Model
- Developing an API using Python’s Flask
- Making real-time predictions
Prerequisites and Environment setup
This tutorial is carried out in Anaconda Navigator (Python version – 3.8.3) on Windows Operating System. The following packages need to be installed before you continue with the tutorial –
- Pandas
- NumPy
- Scikit-learn
- Flask
- Joblib
You can install these packages in Conda’s virtual environment using conda install package-name. In case you are using Python directly via terminal/command prompt, pip install package-name will do the work.
Note that to access GridDB’s database through Python, the following packages will be required –
- GridDB C-client
- SWIG (Simplified Wrapper and Interface Generator)
- GridDB Python-client
Great! Our environment is all set up and ready to use. Let’s create a Machine Learning model.
Creating a Machine Learning Model
We will be using the Linear Regression model from one of our previous posts on Machine Learning using GridDB. The full source code is available on Github. We will modify the code as we move forward to inculcate the new changes. You can either download the source code to follow along or we will be attaching the python file at the end of this tutorial as well.
The Linear Regression Model for CalCOFI dataset looks like –
import numpy as np
import pandas as pd
from sklearn.model_selection import train_test_split
from sklearn.linear_model import LinearRegression
import joblib

dataset = pd.read_csv("bottle.csv")
dataset=dataset[["Salnty","T_degC"]]
dataset = dataset[:500]
dataset=dataset.dropna(axis=0)
dataset.reset_index(drop=True,inplace=True)

x_label=np.array(dataset['Salnty']).reshape(493,1)
y_label=np.array(dataset['T_degC']).reshape(493,1)
x_train, x_test, y_train, y_test = train_test_split(x_label, y_label, test_size = 0.2, random_state = 100)
regression_model=LinearRegression()
regression_model.fit(x_train,y_train)
Note that we have removed the last few lines where we’re making predictions on the test dataset as we don’t need them here. The model accuracy is 87% as we saw in the previous post. If you plot the resulting model, it will look like –
plt.figure(figsize=(12,10))
plt.scatter(x_label, y_label,  color='aqua')
plt.plot(x_train, regression_model.predict(x_train),linewidth="4")
plt.xlabel("Temperature",fontsize=22)
plt.ylabel("Salinity",fontsize=22)
plt.title("Linear Regression",fontsize=22)
Serialization and Deserialization of the Machine Learning Model
Our model is now ready to make predictions, but we will need to store the trained model so that we don’t have to execute the same steps every time we receive a request from the server. This process of storing a Python object into a byte stream so that it can be utilized later is called Serialization. Deserialization, as the name suggests, is the reverse of Serialization, i.e. converting a byte stream back into a Python object. Serialization and Deserialization in Python can be done via packages like joblib, pickle, etc.
Let’s go ahead and save our model.
joblib.dump(regression_model, 'regression_model.pkl')
print('Model dumped')
regression_model = joblib.load('regression_model.pkl')
regression_model_columns = list(x_train)
joblib.dump(regression_model_columns, 'regression_model_columns.pkl')
Our file after adding those code snippets will finally look like –
import numpy as np
import pandas as pd
from sklearn.model_selection import train_test_split
from sklearn.linear_model import LinearRegression
import joblib

dataset = pd.read_csv("bottle.csv")
dataset=dataset[["Salnty","T_degC"]]
dataset = dataset[:500]
dataset=dataset.dropna(axis=0)
dataset.reset_index(drop=True,inplace=True)

x_label=np.array(dataset['Salnty']).reshape(493,1)
y_label=np.array(dataset['T_degC']).reshape(493,1)
x_train, x_test, y_train, y_test = train_test_split(x_label, y_label, test_size = 0.2, random_state = 100)
regression_model=LinearRegression()
regression_model.fit(x_train,y_train)

joblib.dump(regression_model, 'regression_model.pkl')
print('Model dumped')
regression_model = joblib.load('regression_model.pkl')
regression_model_columns = list(x_train)
joblib.dump(regression_model_columns, 'regression_model_columns.pkl')
Let’s go ahead and save our regression_model.py in the same directory. To execute the code in the command line, type python regression_model.py. After execution, our directory structure will look like this –
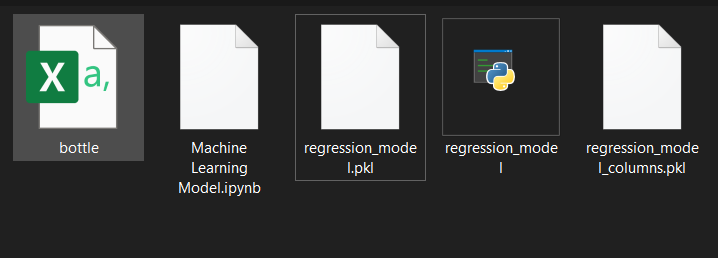
The ipynb file is optional if you are running your files in the terminal/command prompt.
Great! Now that our model is saved, we are all set to create an API for making real-time predictions.
Developing an API using Python’s Flask
We first need to import our model and convert it into a python object when our application starts. We can do that with the following lines of code –
lr = joblib.load("regression_model.pkl")
print ('Model loaded')
model_columns = joblib.load("regression_model_columns.pkl")
print ('Model columns loaded')
Now we need to create an API endpoint that actively listens to requests, processes them in a Python object and pass them to the model for making predictions. We also need to take care of runtime exceptions in case the input is not in the desired JSON format. The following script should do the work –
@app.route('/predict', methods=['POST'])
def predict():
    if lr:
        try:
            json_ = request.json
            query = pd.DataFrame(json_)
            print(query)

            prediction = list(lr.predict(query))

            return jsonify({'prediction': str(prediction)})

        except:

            return jsonify({'trace': traceback.format_exc()})
    else:
        print ('Train the model first')
        return ('No model here to use')
By default, a flask application runs on http://127.0.0.1:5000. Let’s customize this setting if the user wants to provide a specific port number during execution. The compiled file now looks like –
from flask import Flask, request, jsonify
import joblib
import traceback
import pandas as pd
import numpy as np
import sklearn

# Your API definition
app = Flask(__name__)

@app.route('/predict', methods=['POST'])
def predict():
    if lr:
        try:
            json_ = request.json
            query = pd.DataFrame(json_)
            print(query)

            prediction = list(lr.predict(query))

            return jsonify({'prediction': str(prediction)})

        except:

            return jsonify({'trace': traceback.format_exc()})
    else:
        print ('Train the model first')
        return ('No model here to use')

if __name__ == '__main__':
    try:
        port = int(sys.argv[1])
    except:
        port = 12345

    lr = joblib.load("regression_model.pkl")
    print ('Model loaded')
    model_columns = joblib.load("regression_model_columns.pkl")
    print ('Model columns loaded')

    app.run(port=port, debug=True)
Note that in the load() function, we have provided just the file name because we’re saving everything in the same directory. In case you encounter a FileNotFoundError during compilation, provide a full path instead.
Let’s go ahead and compile the file to see if everything’s working correctly. We get the following output –
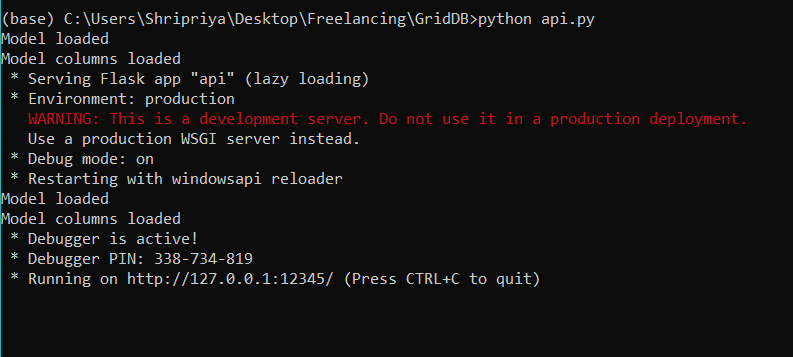
This means that our server is now active at http://127.0.0.1:12345. We now need a third-party application to send it a request and see what output are we getting.
Making real-time predictions
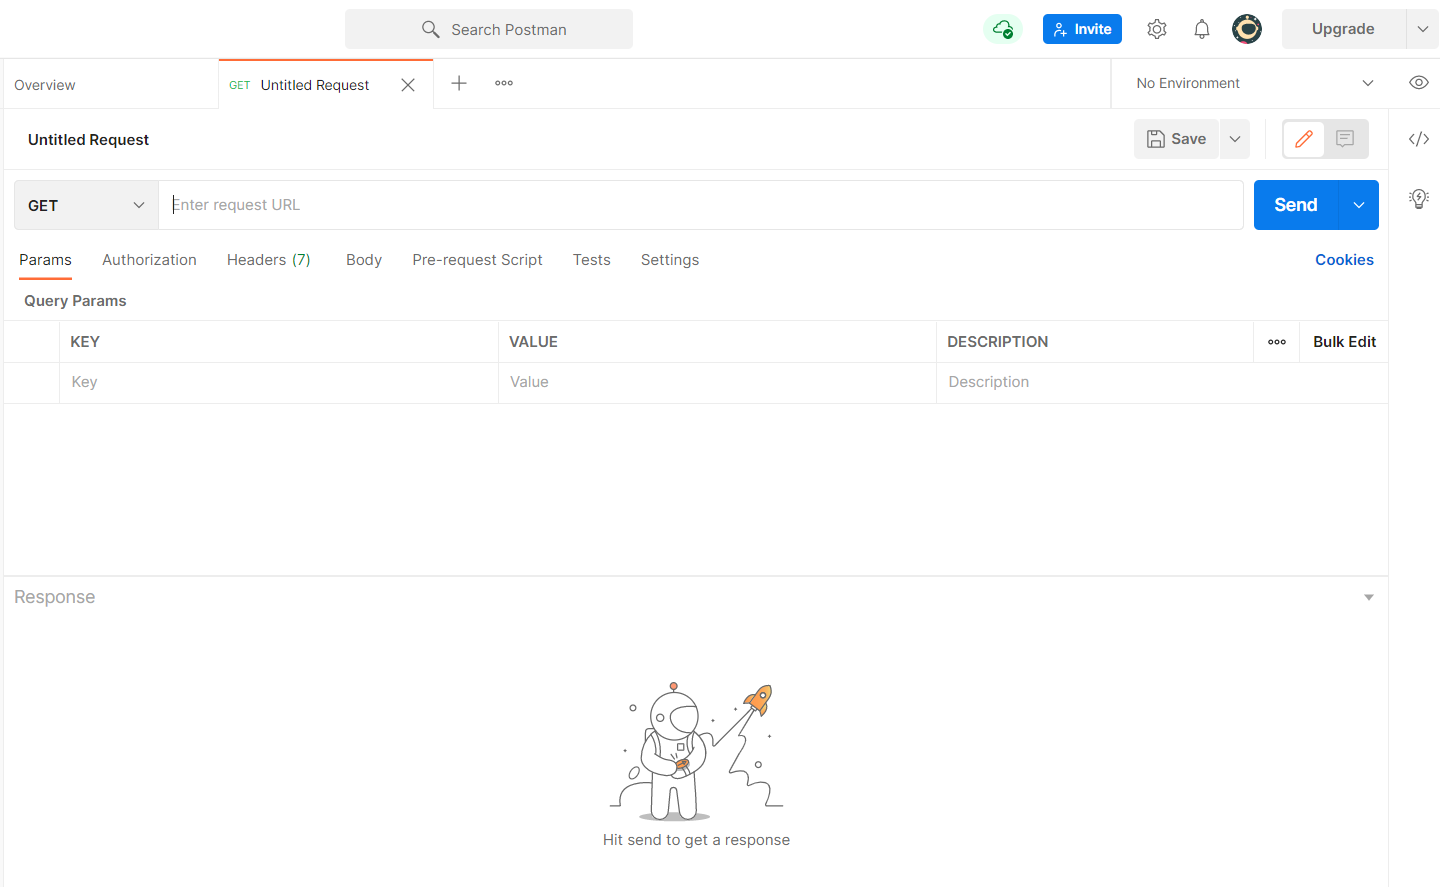
To send a request to our server, we will be using Postman’s Desktop application. There are several tools available for API testing, you can use whichever you prefer. The console will typically look like –
Let’s make the following changes –
- Change the method to
POST - Within the
Bodytab, selectrawandJSONas the Request format. - Pass input as a list such as
[{"Salnty":34}, {...}] - Hit
Send
Few things to note
- Your
api.pyneeds to run in the background, otherwise, the server will not be active and you’ll receive an error in the console. - The input we’re sending is in a JSON format which uses a combination of lists and dictionaries. Therefore, it is important to pass your input in a
{key: value}pair. In case of multiple attributes, your input will look like{"attribute1": value1, "attribute2": value2, ...}
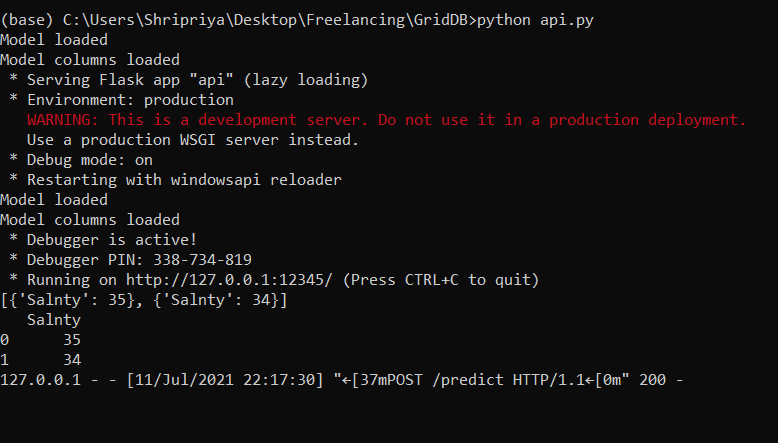
We get the following output in the console –

To double-check the input we got from the Postman console, check your terminal. It should have printed out the JSON query like –
Congratulations, You just deployed your Machine Learning Model to make predictions in real-time! Check out similar posts on our webpage.