Introduction
Today’s applications and IoT devices are generating a lot of big data. Most of this data is unstructured in nature. For a very long time, relational database management systems have been used to store structured data. These database management systems organize data into tables, which are rows and columns. However, unstructured data cannot be organized well in rows and columns, thus, relational databases are not the best option for storage of unstructured data. NoSQL databases were developed to fill the gaps created by relational databases. They are easy to use for the storage of unstructured data. GridDB is a good example of a NoSQL database. It is well optimized for IoT and Big Data. When using GridDB, you will need to stream data in and out. Apache Kafka is a data streaming platform that can help you to achieve this. In this article, we will be walking you through how to organize communication between different elements of the software system when using Kafka and GridDB database.
What is Apache Kafka?
Apache Kafka is a distributed event streaming platform used for data integration, data pipelines, and streaming analytics. It can help you to ingest and process streaming data in real-time. Streaming data refers to the data generated continuously by data sources, sending data records simultaneously. Kafka provides its users with the following functions:
- Publish and subscribe to record streams.
- Effective storage of record streams in the same order they were generated.
- Real-time processing of record streams.
Kafka combines storage, messaging, and stream processing to facilitate the analysis of real-time and historical data.
What is GridDB?
GridDB is a time series, NoSQL database optimized for the storage of IoT and Big Data. It uses a key-container model to handle time-series data and its corresponding metadata. GridDB also combines the Disk and In-Memory architecture for maximum performance. It uses parallel processing to distribute large datasets across multiple nodes, which is good for high performance. It also scales well on commodity hardware, both linearly and horizontally to offer excellent performance. Unlike other NoSQL databases, GridDB provides strong consistency in its containers and adheres to the ACID properties of transactions.
How to Organize Communication between a Java Application, GridDB and Kafka
In this section, we will demonstrate how to move data from a CSV file to GridDB and then to the consumer through Kafka. The process will take the following steps:
Step 1: A Java application reads data from a CSV file and write its into GridDB. Step 2: The source connector reads data from the GridDB database. Step 3: The source connector feeds the data into Kafka. Step 4: Kafka outputs data to the console.
Installation
Before getting started, let’s first install all the required tools. You have to set up Kafka, start ZooKeeper server, and finally start the Kafka server. You can download Kafka from the following page. Also, ensure that you have installed Java 1.8 on your computer. Once the download is complete, use the following command to untar it:
tar xzvf kafka_2.12-2.5.0.tgzChange directory to the extracted folder and set the path of the bin folder:
cd kafka_2.12-2.5.0
export PATH=$PATH:/path/to/kafka_2.12-2.5.0/bin
Next, start ZooKeeper and Kafka servers:
zookeeper-server-start.sh  --daemon config/zookeeper.properties
kafka-server-start.sh --daemon config/server.properties
You can then use the mvn package to build the Kafka-connect-GridDB JDBC connector from Git.
After building the .jar file, move it to the kafka/libs directory. Also, add the GridDB JDBC driver into the same directory.
Write CSV Data into GridDB
We have data from a Shopify store stored in a CSV file named orders.csv. The data shows the details of various orders for a particular product made on a Shopify store.
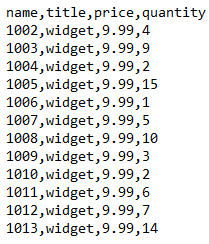
We will read the data from the CSV file using Java and then store it in GridDB. Let’s first import the Java packages that we will be using:
import java.io.IOException;
import java.util.Properties;
import java.util.Collection;
import java.util.Scanner;
import java.io.File;

import com.toshiba.mwcloud.gs.Collection;
import com.toshiba.mwcloud.gs.GridStore;
import com.toshiba.mwcloud.gs.GSException;
import com.toshiba.mwcloud.gs.GridStoreFactory;
import com.toshiba.mwcloud.gs.RowKey;
import com.toshiba.mwcloud.gs.Query;
import com.toshiba.mwcloud.gs.RowSet;
The data will be written into a GridDB container, so let’s create a static class that represents the container:
public static class KafkaGridDB{

         @RowKey String name;
         String title;
         String price;
         String quantity;
    }
See the above class as a GridDB container and the variables as the columns. Let’s now establish a connection to the GridDB instance. We will create a GridDB instance with the credentials of our GridDB installation:
Properties pp = new Properties();
pp.setProperty("notificationAddress", "239.0.0.1");
pp.setProperty("notificationPort", "31999");
pp.setProperty("clusterName", "defaultCluster");
pp.setProperty("user", "admin");
pp.setProperty("password", "mypassword");
GridStore store = GridStoreFactory.getInstance().getGridStore(pp);
Let us select the KafkaGridDB container:
Collection<String, KafkaGridDB> cl = store.putCollection("col01", KafkaGridDB.class);
We have selected the KafkaGridDB container and created its instance named cl. We can now use this instance to read data from the orders.csv file:
File myfile = new File("orders.csv");
                Scanner scn = new Scanner(myfile);
                String data = scn.next();

                while (scn.hasNext()){
                        String scData = scn.next();
                        String list[] = scData.split(",");
                        String name = list[0];
                        String title = list[1];
                        String price = list[2];
                        String quantity = list[3];


                        KafkaGridDB kafkagriddb = new KafkaGridDB();

                        kafkagriddb.name = name;
                        kafkagriddb.title = title;
                        kafkagriddb.price = price;
                        kafkagriddb.quantity = quantity;
                        cl.append(kafkagriddb);
                 }
We have created the kafkagriddb object which has been appended to the GridDB container.
Configure the GridDB Source Connector
It’s now time to configure the configuration file of GridDB sink connector. The configuration file will have the parameters that will facilitate communication between Kafka and GridDB. Add the following contents to your config/connect-jdbc.properties file:
bootstrap.servers=localhost:9092
name=griddb-sources
connector.class=io.confluent.connect.jdbc.JdbcSourceConnector
tasks.max=1
key.converter.schemas.enable=true
value.converter.schemas.enable=true
batch.size=1
mode=bulk
topic.prefix=gridstore-03-
table.whitelist="KafkaGridDB"
connection.url=jdbc:gs://239.0.0.1:41999/defaultCluster/public
connection.user=admin
connection.password=mypassword
auto.create=true
transforms=TimestampConverter
transforms.TimestampConverter.type=org.apache.kafka.connect.transforms.TimestampConverter$Value
transforms.TimestampConverter.format=yyyy-MM-dd hh:mm:ss
transforms.TimestampConverter.field=datetime
transforms.TimestampConverter.target.type=Timestamp
Next, we will be discussing how to read data from GridDB.
Reading GridDB Data
We will use the source connector to query for data from GridDB and feed it into Kafka. Let’s begin by running the source connector. Run the following command from the Kafka directory:
./bin/connect-standalone.sh config/connect-standalone.properties config/connect-jdbc.properties
The command will start up the connector and begin to look for any whitelisted table. If it doesn’t find one, it will return an error.
After the data has been populated, the connector will return the following output:
[2021-11-06 09:07:12,132] INFO WorkerSourceTask{id=griddb-sources-0} flushing 0 outstanding messages for offset commit (org.apache.kafka.connect.runtime.WorkerSourceTask:419)
[2021-11-06  09:07:12,148] INFO Started JDBC source task (io.confluent.connect.jdbc.source.JdbcSourceTask:237)
[2021-11-06  09:07:12,148] INFO WorkerSourceTask{id=griddb-sources-0} Source task finished initialization and start (org.apache.kafka.connect.runtime.WorkerSourceTask:215)
[2021-11-06 09:07:12,149] INFO Begin using SQL query: SELECT * FROM "KafkaGridDB" (io.confluent.connect.jdbc.source.TableQuerier:144)
The above message is a clear sign that the connection to the database was successful.
Next, we will be reading the data from Kafka.
Reading Data from Kafka
We want to display the contents of Kafka on the terminal. Simply run the following command:
bin/kafka-console-consumer.sh --topic gridstore-03-KafkaGridDB --from-beginning --bootstrap-server localhost:9092The command should return the contents of your GridDB container as a Kafka message.
Thus, we were able to write CSV data into GridDB, query the GridDB data, and feed it into Kafka.
Metadata:
This article walks you through the process of organizing communication when using a Java application, GridDB, and Kafka. It will help you learn how to write CSV data into GridDB data and feed it into Apache Kafka.